1. Welcome to 4Runners.com!

    You are currently viewing as a guest! To get full-access, you need to register for a FREE account.

    As a registered member, you’ll be able to:
    • Participate in all 4Runner discussion topics
    • Transfer over your build thread from a different forum to this one
    • Communicate privately with other 4Runner owners from around the world
    • Post your own photos in our Members Gallery
    • Access all special features of the site

What have you done to your 2nd Gen 4Runner today?

Discussion in '2nd Gen 4Runners (1990-1995)' started by Bob, Jul 24, 2016.

  1. Jul 14, 2020 at 5:23 PM
    #151
    bthp223

    bthp223 New Member

    Joined:
    Nov 14, 2016
    Member:
    #3009
    Messages:
    361
    Gender:
    Male
    Nevada
    Vehicle:
    1990 4X4
    I installed new tune up kit from LCE today. That was the last of the mechanical under the hood for me, she’s really purring like a kitten now. Just loving my 4runner :thumbsup:
     
  2. Jul 14, 2020 at 10:26 PM
    #152
    Jhayes1189

    Jhayes1189 New Member

    Joined:
    May 24, 2020
    Member:
    #14521
    Messages:
    11
    Gender:
    Male
    First Name:
    Joe
    Vehicle:
    1990 4x4 V6 4runner
    140AED17-53D8-48C2-9B98-D072FF7C1C09.jpg

    I promise this is my last decal lol. Love this vehicle.
     
    getaway88 and bthp223 like this.
  3. Jul 14, 2020 at 11:32 PM
    #153
    bthp223

    bthp223 New Member

    Joined:
    Nov 14, 2016
    Member:
    #3009
    Messages:
    361
    Gender:
    Male
    Nevada
    Vehicle:
    1990 4X4
    You did this Jhayes.......
    5CA84D69-C6EC-4C33-8BA5-5BCBCF3AAB99.jpg
    Those look good on the side :thumbsup:

    You need a gas cap cover bruh !
     
    thegillmachine and Jhayes1189 like this.
  4. Jul 15, 2020 at 5:14 PM
    #154
    Jhayes1189

    Jhayes1189 New Member

    Joined:
    May 24, 2020
    Member:
    #14521
    Messages:
    11
    Gender:
    Male
    First Name:
    Joe
    Vehicle:
    1990 4x4 V6 4runner
    Haha I love it. Decals are addicting. And yes I know but only seeing them for like $50 on ebay, lol. I’m good for a while
     
    This site contains affiliate links for which the site may be compensated.
    bthp223 and thegillmachine like this.
  5. Jul 17, 2020 at 8:14 AM
    #155
    thegillmachine

    thegillmachine New Member

    Joined:
    Feb 9, 2020
    Member:
    #13077
    Messages:
    11
    Gender:
    Male
    Vehicle:
    1995 4Runner 3.0L 4×4
    20200716_205601.jpg

    I like stickers, too :deadhorse:
     
    BigBootieJoodyisSlow and bthp223 like this.
  6. Jul 20, 2020 at 12:55 AM
    #156
    Dezman92

    Dezman92 New Member

    Joined:
    Mar 13, 2019
    Member:
    #9168
    Messages:
    96
    Gender:
    Male
    First Name:
    Doug
    Norcal
    Vehicle:
    1994 Green 4runner
    Scored some custom cover king seat covers for $50, weren’t even use, they were sitting in an old couples garage and they go for $250 on their website. Here’s a before and after. My driver’s was a little efed up

    C68BDB0B-B841-4380-9A7A-D12305852E8C.jpg
    A1441D58-2491-40F6-9EE4-CE7351C9533A.jpg
     
    Jflorecita likes this.
  7. Jul 20, 2020 at 5:27 AM
    #157
    Jflorecita

    Jflorecita New Member

    Joined:
    Jul 19, 2020
    Member:
    #15616
    Messages:
    3
    Gender:
    Female
    First Name:
    Janet
    California
    Vehicle:
    1994 Green 4runner
    Score! I had mine for about 8 years and they finally tore apart from so much use
     
  8. Jul 20, 2020 at 8:42 PM
    #158
    watermelonman122

    watermelonman122 New Member

    Joined:
    Jul 4, 2020
    Member:
    #15297
    Messages:
    84
    Utah
    Vehicle:
    1994 4Runner SR5 3.4 V6 4wd 5spd
    Broke down back during Mem. Day weekend. Eventually the problem was found to be a siezed fan pulley, but replacing that exposed a whole slew of work needs doing. So:
    -Took off the timing belt. Replaced the cam and oil pump seals before putting a new timing belt on. Also new water pump, thermostat, idler pulley, tensioner pulley, and tensioner.
    -New alternator, although it seems that the old one wasn't why it threw the belt. Oh well, worse problems to have than a new alternator.
    -Backflushed the oil pump coolant line. Nothing would come out and then a big wad of corroded goo shot out like a cannon. :crapstorm: Flows easy now.
    -New hoses all over the place.
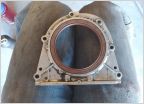
    -New clutch plate, pressure plate, flywheel, pilot bearing, and rear main seal. The pilot bearing we took off was in pieces.
    -The counter shaft bearing was toast and took the transmission case with it. :bananadead: So I found and bought a transmission with 90k fewer miles than the broken one I pulled off.
    -Broke open the transfer case to see if any bearings were also busted. Fortunately, it looks immaculate. Unfortunately, I now need to reseal the case and I might as well do seals while I'm here.
    Dad's going to come into town and help me put on the new transmission. Hopefully I can have the rest put together before then and we can take all the new stuff for a test drive. Next job is the valve cover gaskets and maybe take a look at some header tape on the crossover. Who knows! Thankfully the summer heat makes most places not worth going, so I can just keep plugging away in the garage.
     
    trlhiker likes this.
  9. Aug 16, 2020 at 3:07 PM
    #159
    atgparker

    atgparker Cal Poly, ETME 1988

    Joined:
    Jun 20, 2018
    Member:
    #6296
    Messages:
    335
    Gender:
    Male
    First Name:
    Andrew
    Mission Viejo, CA
    Vehicle:
    1991 White 4Runner 3.0 L
    Rebuilt Engine MLS and ARP on the heads, DT Header, 2-1/2" CARB compliant Flow-Master CAT with 2.0" Bosal CAT back Dayco 1-1/4" Spacers, SkyJacker M-Series Monotube Shocks, Ball Joint Spacers. 95-9006 K&N Air Cleaner, G-Plus Alum Radiator, ZIrgo 16" Fan, Derale Temp switch/relay
    Gas springs for the bonnet! 5/16" Ø pop rivets to the hood and screwed with M6 to the fender rails at the bottom. 80 N springs sporting about 10.5" of travel. The DS one misses the cruise control actuator just!
    20200814_210018.jpg
    Since the plastic latch disintegrated for the hood-prop-rod this seemed a good alternative and less hassle once the hood is raised and no rod in the way when I check the oil.
     
    bthp223 and trlhiker like this.
  10. Aug 20, 2020 at 12:39 PM
    #160
    Justthemechanic

    Justthemechanic New Member

    Joined:
    Dec 14, 2019
    Member:
    #12325
    Messages:
    186
    Gender:
    Male
    Nevada desert
    Vehicle:
    94 4Runner SR5, 5 speed, 3.0
    OME 2” lift, BudBuilt armor, RRO sliders, Spartan rear locker
    Power to the back. One 12v socket and two USB charge ports.

    44CF63BC-0E0A-4582-A253-1DF9181AA476.jpg
     
    trlhiker and bthp223 like this.
  11. Aug 20, 2020 at 2:18 PM
    #161
    bthp223

    bthp223 New Member

    Joined:
    Nov 14, 2016
    Member:
    #3009
    Messages:
    361
    Gender:
    Male
    Nevada
    Vehicle:
    1990 4X4
    Nice, I have 2 units to install, I’d be nice if someone would turn the oven off. 92 degrees at 0400 today.
     
  12. Sep 7, 2020 at 4:43 PM
    #162
    atgparker

    atgparker Cal Poly, ETME 1988

    Joined:
    Jun 20, 2018
    Member:
    #6296
    Messages:
    335
    Gender:
    Male
    First Name:
    Andrew
    Mission Viejo, CA
    Vehicle:
    1991 White 4Runner 3.0 L
    Rebuilt Engine MLS and ARP on the heads, DT Header, 2-1/2" CARB compliant Flow-Master CAT with 2.0" Bosal CAT back Dayco 1-1/4" Spacers, SkyJacker M-Series Monotube Shocks, Ball Joint Spacers. 95-9006 K&N Air Cleaner, G-Plus Alum Radiator, ZIrgo 16" Fan, Derale Temp switch/relay
    Today a Yukon Grizzly Locker went into the rear diff. I had to knock the ring gear off the carrier that has the Spartan in it and put the gear in the oven at 350°F until the preheat was done. The Grizzly went in the freezer while the ring gear was warming up. I used my Toyota bottle jack to set the new carrier bearings onto the the Grizzly. This was a piece of cake with my home made press-tool frame.
    20200907_133502.jpg 20200907_121324.jpg
    20200907_133510.jpg Initial drive in the 4Runner is much improved over the Spartan. So we took it up the street to the dead end and did a series of full lock 360°'s to the left and then the right. All my Son and I could hear were quiet clicks that are more rapid than the Spartan makes. Then I goosed the throttle to head straight back down the street and the inside wheel chirped and continued to do so as I have found the best locking carrier there is. This thing is awesome and doesn't exhibit any of the rather nasty bad manners that the Spartan does on pavement like axle wind up and banging when it unlatches. With the Grizzly the outside wheel in turns just unlatches and freewheels at a faster rate to catch up with the inside wheel in a corner. But you goose the throttle and the inside wheel will break loose and burn some rubber until the outside wheel re-latches and then your spooled and zooming along. The dream is becoming more of a reality!...
     
    Last edited: Sep 7, 2020
  13. Sep 21, 2020 at 10:53 AM
    #163
    Justthemechanic

    Justthemechanic New Member

    Joined:
    Dec 14, 2019
    Member:
    #12325
    Messages:
    186
    Gender:
    Male
    Nevada desert
    Vehicle:
    94 4Runner SR5, 5 speed, 3.0
    OME 2” lift, BudBuilt armor, RRO sliders, Spartan rear locker
    Installed a Rock Defense front bumper and Zesuper 9500lb winch.

    8DA61CF4-BE12-4752-BE38-90F25CFA4B6F.jpg

    Turned my park lights into park/turn signals. 1157A bulb, Pico 5441 light socket, 1 1/8 hole saw and some filler.

    03D7DE8A-16AA-435E-B039-BB147D03DBDC.jpg
     
    atgparker, bthp223 and 4scooter19 like this.
  14. Sep 22, 2020 at 12:46 PM
    #164
    trlhiker

    trlhiker Lazy Bum

    Joined:
    Nov 8, 2019
    Member:
    #11913
    Messages:
    2,330
    Gender:
    Male
    Vehicle:
    1992 4Runner SR5 V6 4X4
    I downloaded an app to check my speedo since I have gone from 225's to 31's and at 45 mph it is 3 mph off, says I am doing 48. At 55 mph it says I am doing 59.
     
  15. Sep 22, 2020 at 6:21 PM
    #165
    Jason

    Jason New Member

    Joined:
    Feb 7, 2016
    Member:
    #1509
    Messages:
    42
    Gender:
    Male
    First Name:
    Jason
    Vehicle:
    1992 black 4runner
    still stock
    Lets see i guess i forgot to wash it? No sadly i lost my poor 4runner in the bear fire in here in cali

    Resized_20200922_163942.jpg
     
  16. Sep 30, 2020 at 1:55 PM
    #166
    atgparker

    atgparker Cal Poly, ETME 1988

    Joined:
    Jun 20, 2018
    Member:
    #6296
    Messages:
    335
    Gender:
    Male
    First Name:
    Andrew
    Mission Viejo, CA
    Vehicle:
    1991 White 4Runner 3.0 L
    Rebuilt Engine MLS and ARP on the heads, DT Header, 2-1/2" CARB compliant Flow-Master CAT with 2.0" Bosal CAT back Dayco 1-1/4" Spacers, SkyJacker M-Series Monotube Shocks, Ball Joint Spacers. 95-9006 K&N Air Cleaner, G-Plus Alum Radiator, ZIrgo 16" Fan, Derale Temp switch/relay
    So on Monday the 28Sept2020 a set of bronze bushings for my idler arm arrived from 4Crawler Offroad Products. These bushings are intended for a ProForge idler arm that I got about a year ago. This arm has provision for a zerk fitting between the bushings in the side of its housing. The ProForge idler arms shaft is made of 4140 Chrome Moly steel and is 20mm in diameter and is the biggest shaft diameter you can get that is a close match for the OEM design geometry. The stock Toyota idler arm shaft is Ø18mm and the housing bore is Ø22mm. This is a well known weakness on the 2nd Gens. So, if your looking to replace your worn out idler arm there are three options.
    1. Total Chaos offers a double shear unit that is bullet proof. But it is very expensive at $300. Trail gear had a unit as did JD fabrication with similar design ques.
    2. OEM-Rebuild: McMaster-Carr offers a 6659K37 bronze bushing that fits the OEM Toyota idler and will quite nicely replace the disintegrated nylon bushings. I have rebuild two OEM units for spares using these bushings.
    3. ProForge with 4Crawler Bronze Bushings offers a nice alternative with increased shaft size and bronze bushings. The bearing shear strength is greatly increased over the plastic with this set up. The only additional modification I made is as follows:
      • The Toyota OEM idler has a washer under the nut which is kept from rotating by a set of splines which are formed at the base of the threaded end of the shaft.
      • The ProForge shaft does not have this feature. So 4Crawler supplies a regular nut and jam nut to replace the nyloc that ProForge uses to assemble their arm.
      • What I did was flatten the ProForge washer which was over tightened and had been distorted when the preload was set on the nylon bushings at the factory.
      • I then installed my new bronze bushings and positioned the ProForge washer and secured and preloaded it with the supplied nut and tac welded the pair together in three places.
      • Once it was cooled off I took it apart and lubricated the surfaces. I then re-installed washer-nut and set the preload with the jam nut stopping the new washer-nut from rotating which optimizes the surface area under the washer as the bearing surface were the bushing then rotates is underneath the washer. Otherwise the washer would rotate under the nut before it was welded together!
      • When a toe-out moment is supplied to the idler arm by the suspension the axial thrust load on the idler arm shaft is a downward pull so this modification puts the entire upper bushings flange surface area in compression and should make the performance better over the long haul as the surface is evenly loaded and uses all of the bushings surface area. What is more the new 4Crawler Bronze bushings are longer than the ProForge and OEM Toyota supplied Nylon bushings so the average shear stress is dissipated over a larger area and is therefore reduced. This provides for a more robust design which should bear up under heavy off road use or just last forever on a pavement pounder. Another option may be to use a washer faced nut with a bit of lapping and pitch the ProForge washer altogether then lock it with the jam nut!
     
  17. Oct 4, 2020 at 11:44 AM
    #167
    trlhiker

    trlhiker Lazy Bum

    Joined:
    Nov 8, 2019
    Member:
    #11913
    Messages:
    2,330
    Gender:
    Male
    Vehicle:
    1992 4Runner SR5 V6 4X4
    Changed my oil and rear diff fluid. Fluid in the diff looked good considering I haven't changed it in over 10 years. Was going to change the front but do not have enough fluid to do that today.
     
  18. Oct 5, 2020 at 8:42 AM
    #168
    bthp223

    bthp223 New Member

    Joined:
    Nov 14, 2016
    Member:
    #3009
    Messages:
    361
    Gender:
    Male
    Nevada
    Vehicle:
    1990 4X4
    Went to the pic a part for a few small things and this time I didn’t pass like a have a few times in the past. Finally since getting the 4Runner that missing rubber trim monkey is off my back. And I don’t even need to paint it. Exact match. Well the door card was different but the paint match is perfect.
    84D4EFCA-16B9-4023-ADAC-99320F26E524.jpg 477849FF-92DF-4344-8E6C-ECDD492548E6.jpg C23D2A67-E90E-4C21-9F42-CFF004C6AEE5.jpg
    It might be hard to see, in the first picture the rubber is missing in the lower corner then up. I’m really just excited this is finally done. I no longer have to look at that and say “SOMEDAY” :thumbsup:

    Next up I’m going to repaint the stripe and Amazon full synthetic 10-30 oil change.
     
  19. Oct 8, 2020 at 2:15 AM
    #169
    watermelonman122

    watermelonman122 New Member

    Joined:
    Jul 4, 2020
    Member:
    #15297
    Messages:
    84
    Utah
    Vehicle:
    1994 4Runner SR5 3.4 V6 4wd 5spd
    0929201241a.jpg Over the last three months, I replaced all of these things. Clutch kit, timing belt kit, transmission, aftermarket stereo, nonpowered antenna,a few hoses, seals, and o rings. I might do a full post later to go into more detail.
     
    bthp223 likes this.
  20. Oct 11, 2020 at 12:26 PM
    #170
    trlhiker

    trlhiker Lazy Bum

    Joined:
    Nov 8, 2019
    Member:
    #11913
    Messages:
    2,330
    Gender:
    Male
    Vehicle:
    1992 4Runner SR5 V6 4X4
    Changed out the front diff fluid. Did a drain and fill on the tranny and transfer case. Now just need to do a drain and fill on the radiator and all my maintenance will be up to date.
     
  21. Oct 12, 2020 at 6:51 AM
    #171
    bthp223

    bthp223 New Member

    Joined:
    Nov 14, 2016
    Member:
    #3009
    Messages:
    361
    Gender:
    Male
    Nevada
    Vehicle:
    1990 4X4
    Did full Synthetic oil change @ 191573 miles. Amazon full synthetic 10-30 oil with Purolator One PL10241 oil filter Sunday. My 4Runner has never leaked oil/fluid on the ground. So I’ll be watching and have a 1,700 mile road trip coming up. Las Vegas to Grants pass, Crater Lake, then the Oregon Coast down into California crossing over to Vacaville then into Apple Valley and home. All stops will be camping minus family visits. All I need to do is install the PVC deal with Schrader valve for showering and I’m GTG.
     
  22. Oct 12, 2020 at 11:05 PM
    #172
    Araucani_ronin

    Araucani_ronin New Member

    Joined:
    Oct 10, 2020
    Member:
    #17255
    Messages:
    1
    Gender:
    Male
    First Name:
    Nestor
    Vehicle:
    1991 4Runner SR5 3L V6 M/T 4x4
    Larger tires and rims. Reupholstered interior.
    Where’d you get your back bumper?
     
  23. Oct 13, 2020 at 3:47 AM
    #173
    bthp223

    bthp223 New Member

    Joined:
    Nov 14, 2016
    Member:
    #3009
    Messages:
    361
    Gender:
    Male
    Nevada
    Vehicle:
    1990 4X4
    You’ve been a busy man, you’re doing that solo ? Some serious work there, congrats on pushing through.
     
  24. Oct 13, 2020 at 11:53 PM
    #174
    watermelonman122

    watermelonman122 New Member

    Joined:
    Jul 4, 2020
    Member:
    #15297
    Messages:
    84
    Utah
    Vehicle:
    1994 4Runner SR5 3.4 V6 4wd 5spd
    Dad came and helped with anything to do with the trans coming in or out. The rest of it is solo when I got the time. I figure this is my penance for going a full year without doing a serious dive into its condition. We pulled the trans to replace the clutch bearings, found a leak on the front bearing retainer plate, pulled it, and found a fried bearing had torn up the transmission casing. Finding a replacement was one of the more frustrating experiences of my life. It's all driving again though. Wish I was done, but it's got a funky idle, a new coolant leak, and an old oil leak. Fortunately I never intended this to be my daily driver, but I do need it to be reliable for going offroad by ourselves.
     
  25. Oct 14, 2020 at 9:15 AM
    #175
    trlhiker

    trlhiker Lazy Bum

    Joined:
    Nov 8, 2019
    Member:
    #11913
    Messages:
    2,330
    Gender:
    Male
    Vehicle:
    1992 4Runner SR5 V6 4X4
    Just had the yearly vehicle inspection done and it passed with flying colors. Checked my fluid levels and oil is perfect, tranny is about 1/4" to high so I need to drain out a little.
     
  26. Oct 18, 2020 at 5:38 PM
    #176
    trlhiker

    trlhiker Lazy Bum

    Joined:
    Nov 8, 2019
    Member:
    #11913
    Messages:
    2,330
    Gender:
    Male
    Vehicle:
    1992 4Runner SR5 V6 4X4
    Sucked out some tranny fluid, looks good now. Also sucked out the power steering reservoir and it was nasty. Dark, dark red. Put new tranny fluid in and I will suck it out again in about a month so the new stuff can cycle in.
     
  27. Nov 8, 2020 at 9:34 AM
    #177
    trlhiker

    trlhiker Lazy Bum

    Joined:
    Nov 8, 2019
    Member:
    #11913
    Messages:
    2,330
    Gender:
    Male
    Vehicle:
    1992 4Runner SR5 V6 4X4
    Gave her a washing and a coat of wax. Need to clean the interior thoroughly now.
     
  28. Nov 22, 2020 at 9:24 AM
    #178
    trlhiker

    trlhiker Lazy Bum

    Joined:
    Nov 8, 2019
    Member:
    #11913
    Messages:
    2,330
    Gender:
    Male
    Vehicle:
    1992 4Runner SR5 V6 4X4
    Looks great. Did you blacken the pin stripe?
     
  29. Nov 22, 2020 at 1:31 PM
    #179
    bthp223

    bthp223 New Member

    Joined:
    Nov 14, 2016
    Member:
    #3009
    Messages:
    361
    Gender:
    Male
    Nevada
    Vehicle:
    1990 4X4
    I did trlhiker but I’m not at all happy with it, it’s satin black. I’m going to tape it off again and mildly try to use paint thinner and get it off, back down to the factory paint then I’m going to go back to a tan, desert color. After I installed the new door it leaks right at the upper pillar, so after I get the sway bar links installed and find the oil leak, I’m going to pull that door off and strip it down, try and transfer the window rubber to my original door and put it back on. Then do the re striping.
     
  30. Nov 22, 2020 at 9:51 PM
    #180
    atgparker

    atgparker Cal Poly, ETME 1988

    Joined:
    Jun 20, 2018
    Member:
    #6296
    Messages:
    335
    Gender:
    Male
    First Name:
    Andrew
    Mission Viejo, CA
    Vehicle:
    1991 White 4Runner 3.0 L
    Rebuilt Engine MLS and ARP on the heads, DT Header, 2-1/2" CARB compliant Flow-Master CAT with 2.0" Bosal CAT back Dayco 1-1/4" Spacers, SkyJacker M-Series Monotube Shocks, Ball Joint Spacers. 95-9006 K&N Air Cleaner, G-Plus Alum Radiator, ZIrgo 16" Fan, Derale Temp switch/relay
    Well back on the weekend (15Nov2020) for my B-day I got a garage pass and my BMI Go-Carts parts (Caliper/Bracket and Disk Rotor) had arrived.
    So I fabricated my parking-disk-brake that mounts to my chain-driven transfer-case.
    20201108_152637.jpg
    The speedometer cable carrier housing's bolt-circle makes for an ideal mounting solution!
    I used studs and some coupling nuts with spacers and more studs and them some washer faced nuts to secure the caliper plate to the t-case.
    Welded some 1.25 x 1/8 steel strip to the bottom edge, drilled a hole, welded in a nut, made a clevis rod, made a lever-arm, taped a hole in it for the cable and bamo you have a system.
    20201108_152736.jpg
    This was the first attempt at getting the leverage sorted out. So I had to move the pivot (shoulder screw) closer to the disk.
    But it works with less than 5 clicks to set the brake.
    20201122_212158.jpg
    Next step was to get the axles bearings and backing plates removed at YotaMasters so as to install an All-Pro Economy disk-brake kit on the rear axle.
    I have 2-1/2" Trial Gear hub centric wheel spacers on the axles flanges in anticipation for getting the track width to nearly match the Blazeland LA-travel A-arms that are on there way.
    20201122_212045.jpg
    Early 80's Toyota 4x4 front disk brake rotor and 4 piston caliper are used with this kit. Now I can replace the M95's with limit straps and put the SB bilsteins out board of the frame and on the front of the axle.
    The droop in the rear suspension would cause the drum brake cable to get tight. So that problem is now gone in going with these disk brakes.
    Pedal feel is great. The OEM Toyota anti-lock braking is still all in place as is the biasing valve for load compensation and all is working perfectly.
     
    bthp223 and Justthemechanic like this.

Products Discussed in

To Top