

-
Welcome to 4Runners.com!
You are currently viewing as a guest! To get full-access, you need to register for a FREE account.
As a registered member, you’ll be able to:- Participate in all 4Runner discussion topics
- Transfer over your build thread from a different forum to this one
- Communicate privately with other 4Runner owners from around the world
- Post your own photos in our Members Gallery
- Access all special features of the site
 What brand cleaners do you use
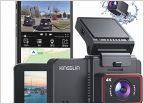 Security and Dash cam
 Aftermarket phone/key etc storage cubbie
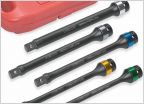 Need torque wrench, skid, recovery rope, etc...
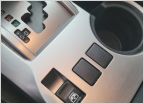 Console Buttons
 Common Knowledge?
Cheap 4runner mods, emphasis on cheap
Discussion in 'General 4Runner Talk' started by v_man, Mar 13, 2016.
Page 4 of 4
Page 4 of 4
Products Discussed in


