1. Welcome to 4Runners.com!

    You are currently viewing as a guest! To get full-access, you need to register for a FREE account.

    As a registered member, you’ll be able to:
    • Participate in all 4Runner discussion topics
    • Transfer over your build thread from a different forum to this one
    • Communicate privately with other 4Runner owners from around the world
    • Post your own photos in our Members Gallery
    • Access all special features of the site

Pinstripes? I'll Show You Pinstripes!!

Discussion in 'Detailing' started by Stoney Ranger, Sep 29, 2021.

  1. Sep 29, 2021 at 9:07 PM
    #1
    Stoney Ranger

    Stoney Ranger [OP] New Member

    Joined:
    Mar 19, 2021
    Member:
    #20419
    Messages:
    1,018
    Gender:
    Male
    Driftless Area
    Vehicle:
    '18 SR5 Nauti Blue
    4x Rockers/Skids-Dobi-275's-Fr/R Bpr-Winch-Stickers-ALF
    Video of how I pinstriped my 4R.

    https://photos.google.com/share/AF1...?key=cS1vRU5sSlU5Z3BlOEhKUDRZakw1Ym84Q2ZEZmx3


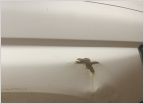
    We knew that it was going to get pinstriped, but not like this. Both sides got it. The right side was the worse. (Worst?)
    DSC_8322.jpg DSC_8326.jpg

    4 days and 20 hrs. of buffing and a case of beer later....
    DSC_8367.jpg DSC_8370.jpg

    The wife is stunned that I rubbed out the scratches (I kinda am, too) To say that she was pissed would be an understatement. Lucky she was riding shotgun when I did it!!
    I have zero experience doing any kind of buffing. I stopped at the body supply store for advice. They recommended Meguire's Solo Cut and Polish Cream applied with a wool pad on a polisher-not on an orbital buffer. Final polish with a foam pad.
    I didn't get them completely out. I was afraid that I might get through the clear coat and into the paint. The sun has to be at the correct angle to see the very few teeny-tiny scratches that remain.

    I am really proud of the results. Amazing!!
     
    Last edited: Sep 29, 2021
  2. Sep 29, 2021 at 9:59 PM
    #2
    Slopemaster

    Slopemaster Slope Survivalist

    Joined:
    Mar 20, 2021
    Member:
    #20442
    Messages:
    3,075
    Gender:
    Male
    Idaho
    Vehicle:
    2018 SR5
    265-70-17 Ridge Grapplers, TRD Pro rims, 3M precut bra, N-Fab nerf/steps
    Ouch!

    Nice save.
     
    mrmike7189 and Bob like this.
  3. Sep 29, 2021 at 10:26 PM
    #3
    YetiMtnBkr

    YetiMtnBkr New Member

    Joined:
    Jan 3, 2021
    Member:
    #18893
    Messages:
    945
    Gender:
    Male
    First Name:
    Jim
    Frederick, MD
    Vehicle:
    2021 LR Pro
    None
    Damn! That is a stunning recovery! But, if you are going to be a repeat offender - why bother!
     
    mrmike7189 and suaveflooder like this.
  4. Sep 30, 2021 at 4:30 AM
    #4
    Stoney Ranger

    Stoney Ranger [OP] New Member

    Joined:
    Mar 19, 2021
    Member:
    #20419
    Messages:
    1,018
    Gender:
    Male
    Driftless Area
    Vehicle:
    '18 SR5 Nauti Blue
    4x Rockers/Skids-Dobi-275's-Fr/R Bpr-Winch-Stickers-ALF
    I will do everything in my power to avoid the pinstripes in the future. That was my introduction to off-roading. I had a blast, but I will pass on the bushwacking. I also did ask a body shop about buffing. The owner told me Toyota skimps on the clear coat. I feel, right or wrong, that if I ever scratch it again that I cannot do any buffing as I will probably get through the clear coat and into the paint.
     
    mrmike7189 likes this.
  5. Sep 30, 2021 at 5:08 AM
    #5
    Matt83

    Matt83 New Member

    Joined:
    Jul 11, 2019
    Member:
    #10511
    Messages:
    776
    Northeast
    Those are some good ones. Nice job getting them out. Most of mine over the last two years are superficial and come out with a wash but I have a few deep ones. Gives it some character, if you are going off road unless you find wide tracks or maintained logging/forest service roads it is unavoidable in certain parts of the country .
     
  6. Sep 2, 2023 at 10:43 AM
    #6
    garoto

    garoto New Member

    Joined:
    Aug 13, 2023
    Member:
    #34878
    Messages:
    560
    There's one solution to completely avoid it ever touching the paint, and also to buff them out with extreme ease: XPEL PPF.
     
  7. Sep 2, 2023 at 4:10 PM
    #7
    SlvrSlug

    SlvrSlug Slightly bent.

    Joined:
    Jun 3, 2018
    Member:
    #6172
    Messages:
    7,841
    Gender:
    Male
    First Name:
    John
    Ramona Ca.
    Vehicle:
    2017 4-Runner SR-5 P. Kings, Built Right uca’s, Durabumps, RSG sliders
    Nice work, i think the beer made all the difference.
     
    Stoney Ranger[OP] likes this.
  8. Oct 27, 2024 at 6:33 PM
    #8
    SS396Solar

    SS396Solar New Member

    Joined:
    Oct 24, 2024
    Member:
    #43546
    Messages:
    11
    Gender:
    Male
    Stoney, impressive. Especially for an amateur and without all the tools. Great job. The smartest thing that you did was not being too aggressive on the clearcoat. Once you remove too much, there's no going back and you ruin your basecoat color. Basecoat color is for one thing. Color coverage. It has zero UV and Chemical resistance. The clearcoat is the work horse, it provides all the protection. Think of clearcoat like sunscreen on a hot sunny day. If you only have a little sunscreen, and dilute it to go further, you now have a thinned out, low film protection which will allow UV to penetrate and burn your skin. Same thing with clearcoat. At the factory they dip the vehicle in a phosphate wash, rinse it then apply a thin (.4 mil-a mil is a thousandth of on inch) wash prime (E-coat) then a .7 mil epoxy baked sealer. Then a highly pigmented basecoat 1-1.2 mils then a high solids clearcoat, 2.5-3.5 mils. Usually the top, horizontal surfaces are thicker because they can hold more without running and sagging. When you remove the clearcoat by sanding and buffing you remove part of the base coat protection. Shops have an array of tools and compounds. Heavy duty compounds remove a lot, fast, but it creates gouges in the clear, which then have to be removed with a gritty polish and then again with a less gritty polish then a finish polish/wax. Too many people go too aggressive too fast. They also make the mistake of overkilling panel borders. They polish a fender and also hit the edge of the door and hood. Then when they buff the door and hood, they re-hit the fender, removing more clear. I always recommend taping the gaps between panels and then hand polishing those areas. You can't tell the difference but keep your film build at safe levels. Might take a few more beers, and time, but since when has that been a bad thing???Good job.
     
    Last edited: Oct 27, 2024
    Stoney Ranger[OP] likes this.
  9. Oct 27, 2024 at 7:25 PM
    #9
    Stoney Ranger

    Stoney Ranger [OP] New Member

    Joined:
    Mar 19, 2021
    Member:
    #20419
    Messages:
    1,018
    Gender:
    Male
    Driftless Area
    Vehicle:
    '18 SR5 Nauti Blue
    4x Rockers/Skids-Dobi-275's-Fr/R Bpr-Winch-Stickers-ALF
    Thank you! I guess I'll be the guinea pig to see how many buffings before the paint is toast. I do a tight-and-scratchy off-road trip every spring.
     
  10. Oct 27, 2024 at 7:29 PM
    #10
    SS396Solar

    SS396Solar New Member

    Joined:
    Oct 24, 2024
    Member:
    #43546
    Messages:
    11
    Gender:
    Male
    Well, before you go, put on a few coats of wax, not glazes. Rub that off, not your clear.
     
    Stoney Ranger[OP] likes this.

Products Discussed in

To Top