1. Welcome to 4Runners.com!

    You are currently viewing as a guest! To get full-access, you need to register for a FREE account.

    As a registered member, you’ll be able to:
    • Participate in all 4Runner discussion topics
    • Transfer over your build thread from a different forum to this one
    • Communicate privately with other 4Runner owners from around the world
    • Post your own photos in our Members Gallery
    • Access all special features of the site

Looking for blueprints

Discussion in '2nd Gen 4Runners (1990-1995)' started by jukebox_runner, Apr 24, 2023.

  1. Apr 24, 2023 at 4:34 PM
    #1
    jukebox_runner

    jukebox_runner [OP] New Member

    Joined:
    Apr 24, 2023
    Member:
    #32552
    Messages:
    1
    Gender:
    Male
    First Name:
    Law
    Vehicle:
    94 4Runner 3.0
    Too many to list
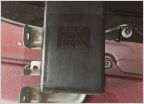
    *This is not my 4runner* I stole this picture from a Facebook group a year ago and was curious if anyone has tried making a box around the air filter housing like in this picture? If so do you have designs or blueprints? Thanks y’all

    28178B99-C781-4CA0-91B9-5E3C9DBDCBEA.jpg
     
  2. Apr 29, 2023 at 4:57 AM
    #2
    atgparker

    atgparker Cal Poly, ETME 1988

    Joined:
    Jun 20, 2018
    Member:
    #6296
    Messages:
    335
    Gender:
    Male
    First Name:
    Andrew
    Mission Viejo, CA
    Vehicle:
    1991 White 4Runner 3.0 L
    Rebuilt Engine MLS and ARP on the heads, DT Header, 2-1/2" CARB compliant Flow-Master CAT with 2.0" Bosal CAT back Dayco 1-1/4" Spacers, SkyJacker M-Series Monotube Shocks, Ball Joint Spacers. 95-9006 K&N Air Cleaner, G-Plus Alum Radiator, ZIrgo 16" Fan, Derale Temp switch/relay
    Honored that you took note of my handywork! Sorry, I do not have drawings on how I made this CAI shroud. But I can tell you that I kept the OEM plastic molded component that the OEM air intake is fitted to behind the head light. As for the aluminum used it is 5052-H32 which is ductile and great for bending. The inside of the top cover and both the inside and outside of the shroud are lined with PSA backed grey foam insulation that has aluminum film attached to it and is great for heat rejection. This stuff is a a Home-Depot item which comes on a roll and is for enhancing your air movement ducting in your homes heating/AC system. Seems to hold up quite well even for shrouding things if you do headers, etc. I used my work bench to which I had screwed a "T" cross section steel bar from my old garage door opener's track that the chain would pull the truck along when I had a tilt up garage door on the house. This worked really well as a break to bend the housing and a lot of card board template making to get the shape just right so it would conform to the inner fender. PSA foam backed draft reducing tape about the edges seal to the inner fender gaps. Other detail that is key with this CAI is leveraging the SUMMIT-Racing version of the K&N FIPK for the 3VZ-E. They sell it for slightly less money than K&N charges for theirs. The adapter that interfaces with the VAFM and the supplied K&N air filter in this kit makes for a solid way to fix the VFAM to the shroud. If you get it positioned like I managed to do there are some OEM threaded holes in the inner fender that can be used to fix it to keep alignment with the air pipe that goes to the TB. This modification really improved engine performance on warmer days as the air intake temp sensor inside the VAFM is completely isolated now from hot under-hood blow through from the radiator and radiant heat coming from the engine. This is akin to how the OEM air filter manages to get its cooler air from behind the drivers side head light but without all of the convoluted bends that the OEM air box and intake pipe have in getting the air to the TB. Having now amassed thousands of miles in my 4Runner with this in place the fuel mileage averages around 13 MPG but is mostly because the vehicle is so much fun to drive with the RPM above 3,500 because it breathes a lot better and makes more power than when it was in stock trim. However, the tunning that Toyota managed with the OEM design invariably has a sweet torque zone when cruising at sub 3,500 engine speeds, and that is likely part of the MPG not being as great. However, if I can keep the engine under 3,500 and around 65 MPH the mileage easily approaches 16 MPG. Buzzing along at 3,500 RPM in 5th gear is 80 MPH and at 4,500 RPM it is 102.8 MPH and with my other mods my 3.0L will easily get there and stay with little depression of the go pedal once the WOT roll-ons of the accelerator are completed. See my build page in this forum for additional modifications that I have done with this 91 4Runner. Best of luck in seeing your way to proper CAI solution.
     
    SlvrSlug likes this.

Products Discussed in

To Top