1. Welcome to 4Runners.com!

    You are currently viewing as a guest! To get full-access, you need to register for a FREE account.

    As a registered member, you’ll be able to:
    • Participate in all 4Runner discussion topics
    • Transfer over your build thread from a different forum to this one
    • Communicate privately with other 4Runner owners from around the world
    • Post your own photos in our Members Gallery
    • Access all special features of the site

2nd gen, 1994 T4R Starter Removal

Discussion in '2nd Gen 4Runners (1990-1995)' started by tpham18nm, Oct 9, 2016.

  1. Oct 9, 2016 at 5:40 PM
    #1
    tpham18nm

    tpham18nm [OP] New Member

    Joined:
    Aug 16, 2016
    Member:
    #2479
    Messages:
    7
    Gender:
    Male
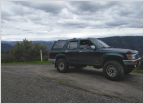
    So I just replaced the starter on my 94 4Runner last week. Here is a short and simple write up.

    Approx time: 4hours (novelist mechanic, low experience)

    Tools:
    10mm socket
    12mm socket
    14mm socket
    Ratchet wrench
    Extensions (about 1ft)
    Pilers that can cut a zip tie
    Flat head screw driver
    Universal joint

    Introduction: if you do research on how to take the starter motor out your going to get a lot of different opinions. Some people Tell you that it won't come out without removing misc. parts such as break lines and sway bars. I did not remove anything except for a heat shield, the starter, and brackets holding the wires in place. I left the tire on as well.

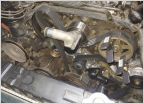
    Location: passenger side a little above the oil pan.

    Step 0: disconnect negative battery terminal.

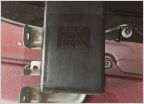
    Step 1: remove rubber shield to access the side panel. This shield is held on by 6 or so plastic push clips. I removed the first few starting from the rear clips first. Then I folded the rubber shield out of the way.

    Step 2: remove the metal access panel using the 10mm socket. My truck had 4 bolts holding on this panel.

    Step 3: using a screw driver or socket (10mm or 12mm, I forgot) remove the metal bracket that holds the starter wire in place. This wire was wrapped in red on my truck. Do not pull on it yet. Cut the zip tie squeezing the two wires together.

    Step 4: using a 14mm socket, remove a bracket holding a soft foam-like hose in place. This bolt will be facing towards you through the left hand side of the access panel.

    Step 5: remove the heat sheld in front of the starter using a 10mm socket. The first bolt could be taken out through the access panel. The second bolt I removed through the top using a extension and universal joint.

    Step 6: crawl under the truck. Remove the connections on the starter. One is a black plug that you squeeze and pull and the other is the hot wire held in place by a 14mm nut.

    Step 7: remove two of the starter 14mm bolts. One bolt is faced to the front of the truck. The other is facing the rear. Remove the front bolt first, then the rear bolt. The rear bolt is just above the bolt in step 4. They look like the color of brass. Move the starter around.

    Step 8: Get out from under the truck. Pull the hot wire out of the way by pulling it through the access panel and letting it rest against the metal. Pull the starter through the access panel. Mine came out easily.

    Step 9: reinstall in reverse order
     

Products Discussed in

To Top