1. Welcome to 4Runners.com!

    You are currently viewing as a guest! To get full-access, you need to register for a FREE account.

    As a registered member, you’ll be able to:
    • Participate in all 4Runner discussion topics
    • Transfer over your build thread from a different forum to this one
    • Communicate privately with other 4Runner owners from around the world
    • Post your own photos in our Members Gallery
    • Access all special features of the site

How to remove that big plastic piece around the front seats?

Discussion in '5th Gen 4Runners (2010-2024)' started by vthoky, Dec 16, 2024.

  1. Dec 16, 2024 at 9:40 AM
    #1
    vthoky

    vthoky [OP] New Member

    Joined:
    Aug 6, 2024
    Member:
    #42053
    Messages:
    306
    Gender:
    Male
    Virginia
    Vehicle:
    2024 TRD ORP
    Trailer connector relocate, tint, work lights, Pro wheels.
    I was thinking over the weekend that I could print or machine some mounts to bolt to the front of that piece (think, right below and behind your knees, when you're in the driver's seat) to secure my big@$$ flashlight or other items.

    I didn't take a lot of time looking yet, but so far I don't yet see how to remove that piece (so as to put a nut on the back of a fastener).

    Thanks, all!
     
  2. Dec 16, 2024 at 10:05 AM
    #2
    Photon_Chaser

    Photon_Chaser 48576 and counting…

    Joined:
    Sep 4, 2023
    Member:
    #35473
    Messages:
    584
    Gender:
    Male
    First Name:
    Roger
    Sierra Nevada Mountains
    Vehicle:
    21 TRD Pro - "Photon"
    In blind fastener locations just go with a Rivnut.
     
  3. Dec 16, 2024 at 10:07 AM
    #3
    icebear

    icebear Recovered Kia Owner

    Joined:
    Oct 10, 2023
    Member:
    #36091
    Messages:
    1,157
    Vehicle:
    2021 Toyota 4Runner SR5
    Not 1:1 what you're asking but some gizmos use the front seat mounting bolts as an anchor, maybe that could help? You just pry up this plastic cover on the floor to gain access.
     
  4. Dec 16, 2024 at 10:35 AM
    #4
    Captain Spalding

    Captain Spalding . . .

    Joined:
    Feb 4, 2022
    Member:
    #25492
    Messages:
    2,130
    scottiezilla likes this.
  5. Dec 16, 2024 at 10:55 AM
    #5
    vthoky

    vthoky [OP] New Member

    Joined:
    Aug 6, 2024
    Member:
    #42053
    Messages:
    306
    Gender:
    Male
    Virginia
    Vehicle:
    2024 TRD ORP
    Trailer connector relocate, tint, work lights, Pro wheels.
    Well, that's a nice layout!
     
  6. Dec 16, 2024 at 11:14 AM
    #6
    Captain Spalding

    Captain Spalding . . .

    Joined:
    Feb 4, 2022
    Member:
    #25492
    Messages:
    2,130
    The downside is that it mounts to the track and not the seat and it doesn’t move with the seat. So it might be inconvenient for taller folks who drive with the seat way back.

    IMG_9775.jpg
     
    icebear likes this.
  7. Dec 16, 2024 at 1:47 PM
    #7
    vthoky

    vthoky [OP] New Member

    Joined:
    Aug 6, 2024
    Member:
    #42053
    Messages:
    306
    Gender:
    Male
    Virginia
    Vehicle:
    2024 TRD ORP
    Trailer connector relocate, tint, work lights, Pro wheels.
    Good point, cap'n!

    And does that multimount panel require the seat jackers? Looks like it, based on the pics. Or maybe I just haven't looked closely enough at my own seat mounts.

    So... back to the original question for a moment: How does that big plastic piece come off?
     
  8. Dec 16, 2024 at 3:34 PM
    #8
    1SilverRunner

    1SilverRunner My boy, blue

    Joined:
    Jan 15, 2024
    Member:
    #37925
    Messages:
    1,273
    Gender:
    Male
    Tejas
    Vehicle:
    22 TRD Off Road Premium
    Front Bumper: C4 Fabrication Low-Profile Bumper Warn Evo10-S Winch w/ Warn wireless adapter Extreme LED dual color light bar w/ Cali raised LED OEM style switch Bumper Cover Trimmed For Clearance Rear Bumper: 80% Off Road Rear Bash Bar (Limited rear bumper version) Armor: RCI Skid plate package C4 Gas tank skid RCI Rear diff skid RCI Shock Skids RSG Angled/ Plated Sliders Total Chaos Cam Tab Gussets Total Chaos Spindle Gussets 41.22 Hitch Slider Suspension: Dobinsons IMS long travel shocks: (Front: IMS59-50574 w/ C59-352 Springs) (Rear: IMS59-50575 w/ C59-675v Springs) Apex Chassis Tie Rod Assemblies (KIT410) Apache Off Road UCAs Apache Off Road HD Rear Links (Upper and Lower) Apache Off Road Rear Sway Bar Links Dobinsons Track Bar Front Sway Bar Deleted DuroBumps Rear Bump stops PerryParts Front Bump stops DRKDSS Track Bar Correction kit Dobinsons Diff Drop Wheels/ Tires: RRW 17x8.5 -12 RR6-H Wheels 285/75/17 Falken A/T4W 1.25" SpiderTrax Spacers BMC, Pinch Weld Folded. C4 High Clearance Fender Liners Performance: OTT Tuned Scan Gauge II for Temp Monitoring Yota Shop Diff Breather Storage Solutions: Sherpa Crestone Sport roof rack Aiden James Customs Gear Plate w/ Slide Out Tables *Backordered. Rado Designs Molle storage panels and top shelf Glove Box organizer Center Console organizer Interior: Diode Dynamics LED Interior lighting (Warm white ftw) Meso Customs Hatch lights Meso Customs Door Handle Covers Ram ball mount for Garmin In-Touch Mini II FitCamX Dash Camera Scosche phone mount Weathertech floor matts Misc: Nano Ceramic Tint (Including windshield and sunroof) Midland MXT575 and Ghost Antenna Cali Raised LED 27W Ditch Lights w/ oem style switch OVS Nomadic 6.5' Awning AVS Low Profile Vent Visors AVS Bugflector II Diode Dynamics puddle lights LasFit Reverse lights LED license plate lights Ark Splash Guards Ark Mud Flap Deletes (cut for rear bumper/ bash bar) AJT Push-To-Start Button +Midland handheld GMRS radios, Baofeng UV-5R Ham radio, recovery gear, water purification system, lifeboat food rations, trauma kit, fire extinguisher and fire starting kit stay on board.
    If it's like any other interior trim piece in these rigs you just pry it until all the clips break off :crapstorm:
     
  9. Dec 16, 2024 at 3:54 PM
    #9
    Stoney Ranger

    Stoney Ranger Lockers? Pffft

    Joined:
    Mar 19, 2021
    Member:
    #20419
    Messages:
    1,071
    Gender:
    Male
    First Name:
    Dave
    Driftless Area
    Vehicle:
    '18 SR5 Nauti Blue
    4x Rockers/Skids-Dobi-275's-F/R Bpr-Winch-Stickers-ALF
    :headbang: :laugh: :laugh: :laugh: :laugh:
     
    1SilverRunner[QUOTED] likes this.
  10. Dec 16, 2024 at 4:44 PM
    #10
    Captain Spalding

    Captain Spalding . . .

    Joined:
    Feb 4, 2022
    Member:
    #25492
    Messages:
    2,130
    I just took a look at the front seat on my 4Runner. With a little planning I think it would be possible to attach something to the front of the seat without removing the plastic part. There is some webbing in the plastic that would need to be avoided, but there’s room enough behind to sneak some nylock nuts back there.

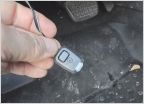
    Coincidentally, just yesterday I was looking for a place to attach a ResQme tool.
     
  11. Dec 16, 2024 at 4:45 PM
    #11
    RumHamRunner73

    RumHamRunner73 Dead on with a zero

    Joined:
    Nov 24, 2022
    Member:
    #29771
    Messages:
    2,892
    Gender:
    Male
    First Name:
    Philip
    Oakboro, N.C
    Vehicle:
    2022 4 Runner Limited. Blizzard Pearl
    Slide a trim tool or a wrapped small screwdriver on either the inner or outer edge and slightly pry outward to release the plastic tab. Will have one on the inner and outer side.
     

Products Discussed in

To Top