1. Welcome to 4Runners.com!

    You are currently viewing as a guest! To get full-access, you need to register for a FREE account.

    As a registered member, you’ll be able to:
    • Participate in all 4Runner discussion topics
    • Transfer over your build thread from a different forum to this one
    • Communicate privately with other 4Runner owners from around the world
    • Post your own photos in our Members Gallery
    • Access all special features of the site

Zack's 5th gen build blog

Discussion in '5th Gen Builds (2010-2024)' started by TheYeti17, Jul 7, 2024.

  1. Jul 7, 2024 at 3:26 PM
    #1
    TheYeti17

    TheYeti17 [OP] New Member

    Joined:
    Jul 6, 2024
    Member:
    #41461
    Messages:
    18
    Gender:
    Male
    First Name:
    Zack
    San Jose, California
    Vehicle:
    2024 Midnight Black 5th Gen 4Runner
    Hey everyone, picked up a new TRD Pro last month and since I got it I immediately started looking up mods and how others are upgrading theirs. This Blog is meant to document me upgrading from a brand new bone stock rig. I want to see how it evolves over time and how my hobbies with it change as time passes. Anyways, here's what she looked like the day I brought it home.
     
    Thacrow likes this.
  2. Jul 7, 2024 at 3:53 PM
    #2
    TheYeti17

    TheYeti17 [OP] New Member

    Joined:
    Jul 6, 2024
    Member:
    #41461
    Messages:
    18
    Gender:
    Male
    First Name:
    Zack
    San Jose, California
    Vehicle:
    2024 Midnight Black 5th Gen 4Runner
    Since then I've done a skid plate upgrade, I chose the CTH because it has a cutout and cover for the drain plug. Its stamped aluminum and looks basically the same as the stock TRD skid, price was $250 and I was able sell my stock one on craigslist for $200 so in my book its a win, I didn't have to paint it black myself and I got a cutout and cover for $50.
    https://cartrimhome.com/Bumper-Skid-Plate-Protector-Guard-For-TOYOTA-4RUNNER-2014-2021

    I also update all the interior Halogen bulbs with LEDs, only bulbs I haven't done yet are the ones under the mirror ones because I want to get sequential turn signals for the mirror and that way I've only got to take the side mirrors apart once. Didn't think to take a side by side pic to show the difference in brightness, but I was pretty surprised at how much brighter the LEDs are even in the daylight.
    https://www.amazon.com/dp/B07TFK2N8T?ref=ppx_yo2ov_dt_b_product_details

    Me cruisin'
     
    Thacrow likes this.
  3. Jul 7, 2024 at 4:04 PM
    #3
    Thacrow

    Thacrow New Member

    Joined:
    May 30, 2021
    Member:
    #21719
    Messages:
    1,568
    Gender:
    Male
    NorCal
    Vehicle:
    2021 ORP
    Speed holes
    Sweet truck dude!
     
  4. Jul 7, 2024 at 4:04 PM
    #4
    TheYeti17

    TheYeti17 [OP] New Member

    Joined:
    Jul 6, 2024
    Member:
    #41461
    Messages:
    18
    Gender:
    Male
    First Name:
    Zack
    San Jose, California
    Vehicle:
    2024 Midnight Black 5th Gen 4Runner
    Today I decided that I was going to put on the ditch light I ordered from CaliRaisedLED, I got their low pro Ditch Light Mounts along with the 27W Light Pods to go along with them. I went with them because they have the lowest profile mounts available, and I didn't want a pair of lights annoyingly blocking part of the windshield. Definitely happy with them so far, they are plenty bright at least shining on the garage I wired them to the battery to align and make sure they work. Then I cut them out of the harness they came with because I have an auxiliary switch similar to an AUXBeam on the way and I plan on using that for my switched power so I can operate left and right separately.
    https://www.amazon.com/dp/B088QSSZZF?ref=ppx_yo2ov_dt_b_product_details&th=1

    Anyways, here's how she sits today, will be receiving the AUX switch this week and already have an OEPanel designed specifically to house these switches, but that's for the next post. I'll try to document more of the builds rather than just the end product now that I have started this blog.

    -Yeti
     
    Thacrow likes this.
  5. Jul 7, 2024 at 4:06 PM
    #5
    TheYeti17

    TheYeti17 [OP] New Member

    Joined:
    Jul 6, 2024
    Member:
    #41461
    Messages:
    18
    Gender:
    Male
    First Name:
    Zack
    San Jose, California
    Vehicle:
    2024 Midnight Black 5th Gen 4Runner
    Thanks Man! Stoked to have another 4Runner, and now I've got a decent job so I can slowly turn it into a sweet overland rig!

    -Yeti
     
  6. Jul 10, 2024 at 6:53 PM
    #6
    TheYeti17

    TheYeti17 [OP] New Member

    Joined:
    Jul 6, 2024
    Member:
    #41461
    Messages:
    18
    Gender:
    Male
    First Name:
    Zack
    San Jose, California
    Vehicle:
    2024 Midnight Black 5th Gen 4Runner
    This week I received my new interior panel from OEPanels to house my 8 switch aux power kit from Yota Expedition and decided to wire in my ditch lights permanently. I chose to wire them up so I turn operate my left and right lights independently that way if I'm driving down a road I can turn the left light off to not blind any on coming traffic. I plan on adding more lighting in the grill and also want to add a roof rack with light bar and 360 cargo lighting in the future so this was the main reason for adding a relay panel in the first place.

    ** This post is meant to be an overview of what was done, and the issues I ran into and how I corrected or will correct them, not a How-To**

    However if anyone has any questions feel free to ask here or send me a message and I can take more pics or provide further info on how I did it, but I basically followed what I saw others do in YouTube vids.

    Anyways, here's the Panel I bought, they even have models available for all the newest models of Tundra, Tacoma, 4Runner and even Sequoias:
    https://oepanels.com/products/facto...-panel-for-2010-2024-toyota-4runner-oe-panels

    To put it in I first removed the original switch panel that houses the mirror adjustment and other switches.

    There is a small piece of plastic that needs to be removed so the AUX switch and new panel will fit in properly, you can see where I've begin removing material.

    I used a set of fret cutters which cut thru plastic extremely well and leave a nice flush cut when done, the finish was so smooth I opted not to sand it down any further.

    This is the AUX switch kit I decided to go with, I chose this kit because it gives you everything you need to install from the bracket for the relays being predrilled and tapped to pre cut wire lengths, and even a swivel bracket to mount you switch inside if you don't want to go through the headache of filling the corners of your switch, but more about that later.
    https://yotaxpedition.com/products/8-button-auxiliary-power-kit-bracket-4runner

    I installed either light into the 5amp connection, at 27w both lights could have used the same circuit and still be under the 60w limit for the fuse, but again, I wanted individual control of the ditch lights. Here is where the panel sits in the engine bay, right behind the battery, all I had to do to make it fit was move the small fuse box and bracket back next to the brake master cylinder. Only two wires need to go through the firewall, and I used an existing hole in the firewall under the brake master cylinder, and protected it with a supplied grommet with the kit. They are the wire to the AUX switch panel, and a power source to tell the unit when to turn on, I chose to use the included add a circuit kit and used the IGN 10A fuse on the small fuse box under the steering wheel, this way I can only turn on lights in accessory mode or when the car is on.

    And here's what she looks like all buttoned up, I know I need to wipe it off...

    Now onto the interior, where I encounter my only issue with this install. I guess the switch supplied from this kit has slightly sharper corners on the actual switch portion that goes in the hole in the panel, as it was designed around the AUXBEAM, but not a problem, we can make it work, and we will! You can sort of see it here, the corners stick out too far and don't let the switch sit in the panel like it should, so I decided that I would file the switch because it's aluminum and can be painted while the plastic housing I feared would lose structural integrity in the corners and split if it didn't have to file thru them to get the switch to fit in the first place. So I filed, and filed, and filed, then I broke out the Dremel because filing was taking forever, after 10 minutes with the Dremel I still had yet to get one corner filed down enough to fit. I am driving out to Idaho to see my parents and brother for a week and my brother has a nice belt sander, I plan on using that and grinding to fit out there. If you got the tools, USE THEM lol

    And here's how she sits as of now, I can leave the switch in place at an angle as half of it easily fits in the hole and stays there pretty well. I almost wish it would have been an angled mounted instead of flat, but I can't compare yet. Will update after I sand it down and get it to fit.
     
    Last edited: Jul 10, 2024
  7. Jul 11, 2024 at 6:31 AM
    #7
    jkirkpatrick

    jkirkpatrick New Member

    Joined:
    Jan 17, 2018
    Member:
    #5335
    Messages:
    70
    Gender:
    Male
    ......and following....
     
    TheYeti17[OP] likes this.
  8. Jul 11, 2024 at 6:32 PM
    #8
    reggiehere

    reggiehere New Member

    Joined:
    Jul 1, 2024
    Member:
    #41383
    Messages:
    5
    Gender:
    Male
    Vehicle:
    2024 4Runner SR5 Premium Underground
    Still to come...
    great stuff. looking forward to following along
     
    TheYeti17[OP] likes this.
  9. Jul 16, 2024 at 9:46 AM
    #9
    TheYeti17

    TheYeti17 [OP] New Member

    Joined:
    Jul 6, 2024
    Member:
    #41461
    Messages:
    18
    Gender:
    Male
    First Name:
    Zack
    San Jose, California
    Vehicle:
    2024 Midnight Black 5th Gen 4Runner
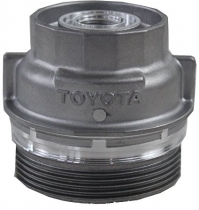
    Doing this post from my phone so I hope everything comes out ok. Drove the 4Runner out on its first big trip 650miles from the Bay Area, CA to Kuna, ID, she handled it like a champ. My brother knows a guy who has a good deal on Amsoil out here so I also did a break in oil change at about 1600 miles and changed out a few things as well. Didn’t get pictures of them but I swapped out the plastic oil filter housing for a metal one from Toyota, the dip tubes were different, so I swapped the factory one into the aluminum one just in case.
    https://www.amazon.com/dp/B008BHP68A?ref=ppx_pop_mob_ap_share

    Got an accompanying socket for the filter from Motiv Tools, it fits both the stock plastic housing and the aluminum housing perfectly.
    https://www.amazon.com/dp/B00XTAGHU0?ref=ppx_pop_mob_ap_share

    I also swapped the drain plug out for a ValvoMax Drain Plug Quickhttps://www.amazon.com/dp/B077ZGZ39V?ref=ppx_pop_mob_ap_share

    After swapping all that out I put a factory Toyota filter back in along with new o—rings and filled her up with 6.6 quarts of amsoil 0w20. $91 for 7 quarts of amsoil wasn’t bad imo.

    The main thing I was looking to get done while I was out visiting the family was getting my switch panel mounted correctly in the OEPanel I bought, so first thing I did was try to find a round object the same size as the corners in my panel. Tried PVC pipes, dowels, all kinds of stuff, what ended up working perfectly was the cap on an isopropyl alcohol bottle.

    Here’s how much material I had to remove, I was afraid I was going to need to sand the entire corner away, but this ended up being what fit in the end.

    The little workhorse that ended up getting it all done, they had bigger machines, but this was the one I ended up using and it worked out just fine.

    Here’s what she looks like installed, I also moved the blank switch cover up to this new panel from the one below it in anticipation of getting a GMRS Radio, so below is where I’m going to install an Ethernet extension jack as I plan on going with a Midland MXT so everything gets controlled from the hand radio portion rather than the unit itself, but again, that’s a project for another day.
     
    jkirkpatrick likes this.
To Top