1. Welcome to 4Runners.com!

    You are currently viewing as a guest! To get full-access, you need to register for a FREE account.

    As a registered member, you’ll be able to:
    • Participate in all 4Runner discussion topics
    • Transfer over your build thread from a different forum to this one
    • Communicate privately with other 4Runner owners from around the world
    • Post your own photos in our Members Gallery
    • Access all special features of the site

Post Mortem Timing Belt Replacement - Not for the Faint Hearted

Discussion in '2nd Gen 4Runners (1990-1995)' started by blueosprey90, Apr 16, 2024.

  1. Apr 16, 2024 at 7:43 PM
    #1
    blueosprey90

    blueosprey90 [OP] New Member

    Joined:
    Mar 16, 2021
    Member:
    #20372
    Messages:
    17
    Gender:
    Male
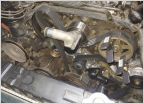
    I think I purchased the car in 2020 with about 136,000 miles. But with no known service history and now 160,070 miles, I decided that I needed to replace the timing belt. For the most part, I tried to follow the procedure described in the service manual at pages EG2-33 through EG2-49.

    The car had come with the AISIN Water Pump – Timing Belt Replacement Kit, Kit TKT-014 which included the following components: a new AISIN water pump with gasket and a gasket for the thermostat; the new timing belt by Mitsubishi; a new hydraulic tensioner; a new tensioner bearing; and a new idler bearing. Not included in the kit, but also installed were a new crankshaft bolt and three new belts for alternator, air conditioner and power steering. Also installed was new antifreeze coolant.

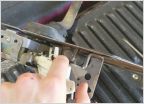
    I consider myself a reasonably competent shade tree mechanic with a reasonable compliment of hand tools and an impact gun, but the job was pretty tough and I needed to buy a few tools along the way at Harbor Freight. I needed one of those bent screwdriver prybars to remove the fan. I was going to make one from an old screwdriver, but for $7.00 I bought one at Harbor Freight instead. Once the fan was off, the removal of the belts and peripheral components was tedious, but fairly straight forward. But a very healthy variety of wrenches and sockets and the 3/4", 1/2", 3/8" and 1/4" ratchets with 3" and 6" extensions and a breaker bar was more or less mandatory. Some 16 inch reach wrenches would have come in very handy!

    I was never able to pull a single spark plug wire, so I worked against engine compression when rotating the engine.

    Do not go too far with disassembly until you have a real (i.e., feasible) plan on removing the crankshaft bolt. The crankshaft bolt is torqued to 180 foot pounds and unbeknownst to me, comes with green thread locker. My 350 ft lb impact gun was no match for the crank bolt! My breaker bar was no match for the crank bolt! A gorilla might be strong enough and available in some cases, but no circus was coming to my town for the foreseeable future!

    So, it you opt to use the starter to break the crankshaft bolt, do that to loosen the bolt as early as possible in the process. By the time I was forced to consider using the starter to break the crankshaft bolt loose, I had already removed the timing belt and feared the consequences.

    To remove the nuts holding the camshafts, I was able to fashion a tool to hold the camshaft sprockets steady while using the impact gun to loosen the nuts. Not too difficult, as those nuts are torqued to 70 ft lbs.

    But I was never able to fashion a tool sufficiently strong to hold the crankshaft steady while I tried to muscle it off. Ultimately, I came up with the following approach that might be used by other overly optimistic, hapless, wannabe mechanics finding themselves stymied mid job.

    The crankshaft pulley is held by the crankshaft bolt. But attached to the crankshaft pulley by four small bolts is the power steering pulley. I had removed the power steering pulley. After a lot of failure by trial and error by other means, I had a short piece of chain that I wrapped around the frame as tightly as I could and bolted it together to be held there. I then took the loose end and bolted that to the crankshaft pulley using a bolt hole for the power steering pulley with one longer bolt and some washers. When trying to loosen the crankshaft bolt, I attached on top. When tightening at the "end of the job" I attached on the bottom.

    All very well and good, but with about 20 degrees of play when force applied. But even with the crankshaft pulley chained to the frame, I was unable to remove the crank bolt. I feared that my 32" breaker bar was going to snap. I tried a big ratchet with a 3/4" drive, but that didn't work. Ultimately, I got a three foot piece of 1.5" pipe onto the big ratchet. I padded the car pretty heavily in case (a) the chain broke; (b) the bolt holding it to the crank pulley broke; or (c) the ratchet broke; but ultimately with an ungodly amount of strain on the chain - and my back! - the crank bolt broke loose.

    During reassembly, I had a bit of a problem in that my torque wrench only goes to 150 ft lbs. I torqued the bolt to the 150 ft lbs. Then, I swapped back to the 3/4" ratchet and turned the bolt another 15 or 20 degrees. In both cases, I used the pipe.

    Another time consuming conundrum involved setting up the timing belt on the crankshaft timing gear that sits within/under the crankshaft pulley. On page EG2-42 of the service manual, step 3(c) says "align the installation mark on the timing belt with the dot mark on the crankshaft timing pulley." That dot is so small that it is virtually impossible to see unless you know what it looks like and where to look. When the timing gear is installed on the shaft, the dot is at the very bottom (the 6:00 o'clock position) of the gear. The crankshaft mark on the belt is supposed to be aligned with this tiny dot. But once I figured that out and found that elusive dot, the rest of the timing belt installation was little trouble.

    The final puzzle had to do with the engine coolant. I had drained at least two gallons of coolant from the radiator and engine and it was pretty decrepit stuff. I flushed the radiator and I also removed and flushed the radiator overflow canister. When refilling the radiator, however, it only took about two quarts. I was very nervous about starting the car and running it without sufficient coolant in the block. I puzzled over this for quite some time, but could not come up with a solution for backfeeding coolant into the block or "burping" or bleeding the air out of the system. Ultimately, I started the car and monitored the radiator and hose temperatures with an infrared sensor as well as the gauge. Several times, when it seemed to get too hot, I shut it off. Eventually I discovered that air was bleeding off into the overflow canister, and then as the radiator cooled, fluid in the canister was drawn back into the radiator. So I filled the overflow canister maybe 4 times until I had refilled the system with the two gallons originally drained.

    Otherwise the job is done. The car runs. I think the job should take a Toyota mechanic 5 hours. It took me six days!
     
    Last edited: Apr 16, 2024
    Thatbassguy and Muggsy71 like this.
  2. Apr 17, 2024 at 3:42 PM
    #2
    trlhiker

    trlhiker Lazy Bum

    Joined:
    Nov 8, 2019
    Member:
    #11913
    Messages:
    2,330
    Gender:
    Male
    Vehicle:
    1992 4Runner SR5 V6 4X4
    Wow, glad you got it all sorted out. That is why I won't even attempt it. I am gonna have to pay to get mine done.
     
    blueosprey90[OP] likes this.
  3. Apr 17, 2024 at 3:48 PM
    #3
    steelevo

    steelevo Not so new anymore...

    Joined:
    Nov 29, 2022
    Member:
    #29845
    Messages:
    2,592
    Utah
    Vehicle:
    2023 4Runner TRD Pro Solar Octane
    Glad you got it done. It was a good read.
     
    blueosprey90[OP] likes this.
  4. May 13, 2024 at 6:48 AM
    #4
    Muggsy71

    Muggsy71 New Member

    Joined:
    May 4, 2024
    Member:
    #40244
    Messages:
    65
    First Name:
    Tom
    Vehicle:
    2003 4runner
    I was thinking about changing mine till I read your write up, haha. I have a 2003 with 434,000 miles on it that never had it done, as far as I know. I bought it with a little over 100,000 on it but the radiator recently blew a hole in it and the engine overheated, so I bought another 2003 with 221,000.
     
  5. May 13, 2024 at 7:07 AM
    #5
    backpacker

    backpacker New Member

    Joined:
    Apr 22, 2023
    Member:
    #32515
    Messages:
    2,187
    Gender:
    Male
    Vehicle:
    2023 TRD ORP
    RSG sliders, Falken Wildpeak 265/70R/17 E
    Yikes! I'm glad 5G has a timing chain instead, although a similar repair there will doubtless crop up when I'm 80 and no longer up for doing such a thing myself.
     
    McSpazatron likes this.
  6. May 13, 2024 at 7:12 AM
    #6
    Ironguy

    Ironguy New Member

    Joined:
    Dec 22, 2019
    Member:
    #12421
    Messages:
    7,207
    Gender:
    Male
    First Name:
    Ralph
    Bisbee AZ
    Vehicle:
    2020 Black 4Runner Venture 1967 FJ40 Land Cruiser
    New pine scent hanger, new sun shade
    Persistence pays. Good job.
     
  7. May 13, 2024 at 10:11 AM
    #7
    Airdam

    Airdam New Member

    Joined:
    May 4, 2024
    Member:
    #40249
    Messages:
    318
    First Name:
    airdam
    Vehicle:
    2008 Urban Runner 2012 Limited 2023 TRD Sport
    It takes all of about 45 seconds to pull the timing inspection cover on the drivers side of the engine. Would definitely make a good thread out of it with pictures if you posted them.
     
    Muggsy71[QUOTED] likes this.
  8. May 17, 2024 at 3:04 PM
    #8
    Justthemechanic

    Justthemechanic New Member

    Joined:
    Dec 14, 2019
    Member:
    #12325
    Messages:
    186
    Gender:
    Male
    Nevada desert
    Vehicle:
    94 4Runner SR5, 5 speed, 3.0
    OME 2” lift, BudBuilt armor, RRO sliders, Spartan rear locker
    I just finished installing the same Kit on my truck. Here are a few tips for those that may want to do this themselves.

    My 700 ft/lbs air impact wrench did not turn the crank bolt. A 1000 ft/lbs impact quickly removed it.

    A camshaft pulley holding tool, W89208, can be purchased from Amazon for under $20.

    I made a crankshaft holding tool out of a steel bar, .25 X 1.25 X 36”. Drilled 2 holes, cut 2 slots and bought 2 longer bolts. Bolt it on harmonic balancer and rest it on the ground.

    Most of the large automotive parts stores have 250 ft/lbs loaner torque wrenches.

    The coolant refills the block very slowly through the lower hose. I think because the thermostat is closed, it slowly fills the engine through the bleed hole in the thermostat. I filled the radiator to the top, waited 5 minutes then added another inch of antifreeze and repeated until I had put in over 1.5 gallons. I started the engine with the heat controls to full heat and left the radiator cap off. I was able to add more anti freeze slowly until the thermostat opened, then the level in the radiator dropped quickly and I added the rest of the coolant. Leave the cap off and heater controls open until the system is bled and the level stabilizes.
     
    Muggsy71 likes this.
  9. May 17, 2024 at 7:29 PM
    #9
    RumHamRunner73

    RumHamRunner73 Dead on with a zero

    Joined:
    Nov 24, 2022
    Member:
    #29771
    Messages:
    2,780
    Gender:
    Male
    First Name:
    Philip
    Oakboro, N.C
    Vehicle:
    2022 4 Runner Limited. Blizzard Pearl
    We used to use an aspirin to prop the thermostat open when refilling before staring up an burping the system. Would dissolve after filling and revert back to normal function.
     
  10. May 19, 2024 at 4:45 PM
    #10
    atgparker

    atgparker Cal Poly, ETME 1988

    Joined:
    Jun 20, 2018
    Member:
    #6296
    Messages:
    335
    Gender:
    Male
    First Name:
    Andrew
    Mission Viejo, CA
    Vehicle:
    1991 White 4Runner 3.0 L
    Rebuilt Engine MLS and ARP on the heads, DT Header, 2-1/2" CARB compliant Flow-Master CAT with 2.0" Bosal CAT back Dayco 1-1/4" Spacers, SkyJacker M-Series Monotube Shocks, Ball Joint Spacers. 95-9006 K&N Air Cleaner, G-Plus Alum Radiator, ZIrgo 16" Fan, Derale Temp switch/relay
    To loosen the bolt on the crank shaft put a socket and a long breaker bar on the thing and bungy cord it to the frame and use the starter motor to bust it loose. Works every time. Just kill the ignition before the thing unthreads completely.
     
  11. May 19, 2024 at 5:20 PM
    #11
    morfdq

    morfdq New Member

    Joined:
    May 25, 2022
    Member:
    #27196
    Messages:
    612
    Gender:
    Male
    First Name:
    Derek
    Vehicle:
    2022 SR5 Premium
    TRD Wheels, exhaust and skid plate
    Does a 2022 have a belt or a chain? I was told it was a chain that never needs to be replaced. What am I missing?
     
  12. May 19, 2024 at 6:00 PM
    #12
    backpacker

    backpacker New Member

    Joined:
    Apr 22, 2023
    Member:
    #32515
    Messages:
    2,187
    Gender:
    Male
    Vehicle:
    2023 TRD ORP
    RSG sliders, Falken Wildpeak 265/70R/17 E
    Chain. It doesn't have a scheduled replacement mileage.
     

Products Discussed in

To Top