1. Welcome to 4Runners.com!

    You are currently viewing as a guest! To get full-access, you need to register for a FREE account.

    As a registered member, you’ll be able to:
    • Participate in all 4Runner discussion topics
    • Transfer over your build thread from a different forum to this one
    • Communicate privately with other 4Runner owners from around the world
    • Post your own photos in our Members Gallery
    • Access all special features of the site

2011 4Runner Mod Log

Discussion in '5th Gen 4Runners (2010-2024)' started by Son_of_Yeti, Feb 22, 2024.

  1. Feb 22, 2024 at 12:32 PM
    #1
    Son_of_Yeti

    Son_of_Yeti [OP] New Member

    Joined:
    Feb 22, 2024
    Member:
    #38711
    Messages:
    6
    Gender:
    Male
    First Name:
    Andrew
    Vehicle:
    2011 Black 4Runner
    Just got a 2011 4Runner and wanted to log all the mods I’ve done to it so far. Hopefully it can help others doing similar mods but I’m also doing it as a log.
     
  2. Feb 22, 2024 at 12:53 PM
    #2
    Son_of_Yeti

    Son_of_Yeti [OP] New Member

    Joined:
    Feb 22, 2024
    Member:
    #38711
    Messages:
    6
    Gender:
    Male
    First Name:
    Andrew
    Vehicle:
    2011 Black 4Runner
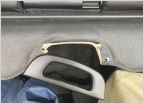
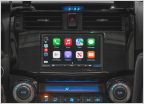
    This was my head unit and backup camera install. The head unit is a TS10 unit from Amazon. It was meant for a newer version of the 5th gen but it fit just fine. The wiring for the aftermarket backup camera was an absol bitch to setup though. First I had to feed the wire through the entire car. In the trunk there is no trim to pop and run it through so I had to feed the wire through the metal of the car along the main wiring harness. Next I ran it through the rubber boot that holds wires to the top of the ceiling liner. To run it down to the brake light next. There was no forum or video that tells you which reverse wire to tap into because this mod is so uncommon for the early 5th gens. I decided to tap the positive wire for the backup camera into the red and the negative into the white with black stripe. Which worked out!! It was the correct wire to tap into. The rest was easy compared to that I just ran it along the trim following the main harness up to the head unit. Next I had trouble with getting my backup camera to activate. I mentioned before that the unit was for newer 5th gens so it had a plug for a backup camera since newer 5th gens come with backup cams. The instructions for the head unit were wrong when it comes to the early 5th gens ‍♂️ I included pictures of this part but I found out that the backup wire that connects to the main plug of the head unit went to a different plug that lead to nothing! That was my problem. So I cut it and wired it to the trigger wire for my aftermarket backup camera. (Also included in the picture). After this headache, the vents wouldn’t insert fully into the head unit so I had to shave them down with a dremel tool. After that the head unit was plug and play. Finally it’s working and looks great! In the first picture you can also see the new TRD shifter I got because the old one was massive and clunky.

    image.jpg
    IMG_2792.jpg
    IMG_2774.jpg
    IMG_2776.jpg
    IMG_2777.jpg
     
  3. Feb 22, 2024 at 1:15 PM
    #3
    Son_of_Yeti

    Son_of_Yeti [OP] New Member

    Joined:
    Feb 22, 2024
    Member:
    #38711
    Messages:
    6
    Gender:
    Male
    First Name:
    Andrew
    Vehicle:
    2011 Black 4Runner
    Now, it’s time for my current mod I’m completing right now! I decided to switch the door handles because the cracked chrome just wasn’t doing it for me! image.jpgThat’s what it looked like. I’m almost done with the mod and didn’t take pictures.image.jpgLooks so much better now. I’ll show you how to do one of the doors now. It’s fairly similar on all the doors. image.jpgFirst remove the door panel. You can fully take off the inner panel by loosening the lil balls and popping the pieces out. And next you need to peel the top left corner of the plastic.image.jpgnext, pull this white tabimage.jpg take out these screws next and unplug the plug connected to the same mechanism.image.jpg unscrew this screw then you can pry out….image.jpgthis piece! The front doors are different.image.jpg pull this cap off to get to the screw for the small thing to come off.image.jpgnext pull this piece towards you the same way I’m standing in this picture and it will come off. The install is the reversal of these steps. You can make a crucial mistake when reinstalling so pay attention:image.jpgmake sure this blue mechanism is sitting on the peg or else your door handle won’t work!! It’s different on the front doors. The front doors have a vertical rod that sits in a hole but the function/concept is the same. I hope this helps anyone that wants to change their door handles!
     
    Lc200 likes this.
  4. Feb 22, 2024 at 7:03 PM
    #4
    Lc200

    Lc200 New Member

    Joined:
    Jun 16, 2023
    Member:
    #33430
    Messages:
    884
    Gender:
    Male
    Vehicle:
    Pre Facelift SR5P
    I need to add a back up camera in my 2011. I recently swapped for 2021 head unit with navigation. I have a camera input harness , just need to find the best way to route it through the door sill and then the boot.
    I also changed the door handles to OEM black from faded chipped chrome. They were expensive but they look very good.
    While there, I also added sound deadening and swapped all my speakers .
    I am going to be following your thread.
     
    Last edited: Feb 22, 2024
    Son_of_Yeti[OP] likes this.

Products Discussed in

To Top