1. Welcome to 4Runners.com!

    You are currently viewing as a guest! To get full-access, you need to register for a FREE account.

    As a registered member, you’ll be able to:
    • Participate in all 4Runner discussion topics
    • Transfer over your build thread from a different forum to this one
    • Communicate privately with other 4Runner owners from around the world
    • Post your own photos in our Members Gallery
    • Access all special features of the site

Parking Brake Replacement on 5th Gen Toyota 4Runner

Discussion in '5th Gen 4Runners (2010-2024)' started by strannik, Feb 4, 2024.

  1. Feb 4, 2024 at 7:52 PM
    #1
    strannik

    strannik [OP] New Member

    Joined:
    Jul 25, 2023
    Member:
    #34370
    Messages:
    115
    Parking brake on Toyota 4Runner is a fairly simple design, but installation process is quite difficult. I attempted to install it myself at first. After a few unsuccessful attempts, I decided that I would rather pay someone else to do the job, and devote the time I save to other things that need to be addressed.

    I visited a few shops in Los Angeles area and asked them if they could do this repair for me. Toyota dealership wanted to charge me an arm and a leg just for OEM parts, initial diagnosis, and repair. The other two shops simply refused to do the job after I told them that the car came from New York. The third shop agreed to take on the job for a reasonable price, but I felt a bit iffy about that place. So, in the end, I attempted to do the job on my own and after a few tries finally found a way it can be done. I hope this information will be useful all of you DIYers out there.

    Parts

    Parking Brake Hardware Kit: CARLSON 17395
    Parking Brake Shoe: POWER STOP B850

    [​IMG]

    Installation

    Repair Manual

    Manual Page: 585

    Repair manual doesn’t go into too much detail on how Toyota Certified Technician would reinstall all of these components.

    [​IMG]

    This YouTube video covers basics of the installation; however, it doesn’t give any details on the most challenging part of this job.

    https://youtu.be/YHuNLAff1ZY

    Installation of Parking Brake Shoe Hold Down Spring

    "Install the No. 2 parking brake shoe assembly to the backing plate with the parking brake shoe hold down spring cup and parking brake shoe hold down spring.
    2010 Toyota 4Runner Repair Manual, 59"

    It is fairly easy to put all of these parts together. Where it gets difficult is compressing the spring and aligning the hole of the hold down spring cup with the end of the hold down spring pin. You barely get any access to this assembly from the side. The only access point that I found useful is a tiny hole that aligns exactly with spring-cup assembly.

    [​IMG]

    This is the opening from the side.

    [​IMG]

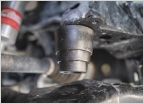
    The best way I found to deal with this problem is by creating a tiny tool that is able to fit through this hole. The tool resembles a fork with very sharp ends. These ends are able to bite into the spring cup and rotate it. All of this is happening as you are pressing down on the blunt end of the tool to compress the spring.

    [​IMG]

    The other part of the problem is the spring pin. You have to find a way to hold it steadily in place while you are doing all of these maneuvers. On the left side of the parking brake assembly the pin is straight, so it is a lot easier to make it work. On the opposite side, however, the pin is bent in a zigzag pattern, so it can fit around parking brake shoe lever.

    The easiest way I found to get the job done, is to tie a thin thread onto the end of the pin. The thread is wrapped around your fingers to create tension, which allows you to get more control of the pin as you are pushing it in. Imagine pushing a pin through a tiny hole, and maneuvering it with your index finger and a thumb. You loose control of it very easily.

    [​IMG]

    While I was working on this job, the lower shoe hold down spring cup would consistently get out of alignment. In the end I used a small piece of tape to secure it to the shoe.

    [​IMG]

    [​IMG]

    This is the end result.

    [​IMG]

    Installation of Return Tension Springs

    When you are installing return tension springs, keep in mind their order. The manual doesn’t give you specific order you should install them in. From my own experience, when I installed black first, and then green, one of the shoes didn’t make full contact with the back plate.

    [​IMG]
     
    BassAckwards, jgalt and Sin4R like this.

Products Discussed in

To Top