1. Welcome to 4Runners.com!

    You are currently viewing as a guest! To get full-access, you need to register for a FREE account.

    As a registered member, you’ll be able to:
    • Participate in all 4Runner discussion topics
    • Transfer over your build thread from a different forum to this one
    • Communicate privately with other 4Runner owners from around the world
    • Post your own photos in our Members Gallery
    • Access all special features of the site

Raptor Lights Trouble Shooting

Discussion in '5th Gen 4Runners (2010-2024)' started by boomboompaopao, Feb 22, 2023.

  1. Feb 22, 2023 at 5:14 PM
    #1
    boomboompaopao

    boomboompaopao [OP] New Member

    Joined:
    Jan 21, 2023
    Member:
    #30802
    Messages:
    31
    Gender:
    Male
    First Name:
    Pao
    Florida
    Vehicle:
    2023 ORP
    What's up guys! Newbie here.

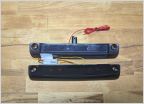
    I'm in the process of installing raptor lights onto my 2023 ORP. I was instructed to to insert the add-a-fuse into the side closest to the exterior, 8th slot from the hood side ("IGN NO.3" -10A), but there is a fuse there already. I was then instructed to remove the current fuse in IGN NO.3, and place on the add-a-fuse then place the add-a-fuse in the now open slot. However, the add-a-fuse has 2 fuses on it already.

    Do I just take out one the fuses on the add-a-fuse and place the original fuse on there? If so, which one do I replace? Or what do you recommend? Appreciate any help!

    PS
    I know I can also plug them into the fusebox in the engine bay, but i rather have them in the cabinIMG_6713.jpg IMG_6722.jpg IMG_6725 2.jpg
     
  2. Feb 22, 2023 at 7:49 PM
    #2
    Slopemaster

    Slopemaster Slope Survivalist

    Joined:
    Mar 20, 2021
    Member:
    #20442
    Messages:
    3,143
    Gender:
    Male
    Idaho
    Vehicle:
    2018 SR5
    265-70-17 Ridge Grapplers, TRD Pro rims, 3M precut bra, N-Fab nerf/steps
    Your about the fifth person in the last two months with Raptor light problems. There certainly seems to be a systemic problem with the manufacturers instructions. I would call them and ask what to do and say “by the way, your instructions suck” please update the installation instructions.
    Best wishes
     
    5six likes this.
  3. Feb 22, 2023 at 8:31 PM
    #3
    kmeeg

    kmeeg New Member

    Joined:
    Apr 18, 2018
    Member:
    #5853
    Messages:
    5,326
    Gender:
    Male
    I don't take risk with those fuses. I run them off a wire tap taken from the 12v outlet (cigarette lighter) switched and fused. To keep it safe I use just 2 raptor style lights to lower the current.

    You could even go to next level by using a relay just like wiring a light bar.

    Again, I run raptor style grill lights because I no more have my drls. Else I would avoid raptor style grill lights.
     
    Slopemaster likes this.
  4. Feb 23, 2023 at 7:47 AM
    #4
    jason5641

    jason5641 New Member

    Joined:
    Jan 23, 2023
    Member:
    #30828
    Messages:
    84
    Gender:
    Male
    First Name:
    Jason
    Quakertown, PA
    Vehicle:
    2023 ORP w/KDSS
    Takeout the 10A "Tail" fuse and insert the adda fuse with the provided 10 AND the 10 you took out (like your pic) It worked for me-its in one of the videos on 4runner lifestyle

    https://youtu.be/PEaR8lKoGno
     
  5. Feb 23, 2023 at 4:57 PM
    #5
    boomboompaopao

    boomboompaopao [OP] New Member

    Joined:
    Jan 21, 2023
    Member:
    #30802
    Messages:
    31
    Gender:
    Male
    First Name:
    Pao
    Florida
    Vehicle:
    2023 ORP

    Yes, this was the video I used. But My add-a-fuse already has 2 fuses on it, so do I take one out and replace it with the original? Or just place the add-a-fuse into the open slot and ditch the old fuse?
     
  6. Feb 23, 2023 at 5:01 PM
    #6
    boomboompaopao

    boomboompaopao [OP] New Member

    Joined:
    Jan 21, 2023
    Member:
    #30802
    Messages:
    31
    Gender:
    Male
    First Name:
    Pao
    Florida
    Vehicle:
    2023 ORP
    Yeah I've been finding out the struggle looking up vids/posts with the same issue....
     
    Slopemaster[QUOTED] likes this.
  7. Feb 23, 2023 at 5:50 PM
    #7
    jason5641

    jason5641 New Member

    Joined:
    Jan 23, 2023
    Member:
    #30828
    Messages:
    84
    Gender:
    Male
    First Name:
    Jason
    Quakertown, PA
    Vehicle:
    2023 ORP w/KDSS
    I simply removed the tail 10 and used the tail 10 fuse in my block. Good luck !!
     
  8. Feb 23, 2023 at 8:47 PM
    #8
    Slopemaster

    Slopemaster Slope Survivalist

    Joined:
    Mar 20, 2021
    Member:
    #20442
    Messages:
    3,143
    Gender:
    Male
    Idaho
    Vehicle:
    2018 SR5
    265-70-17 Ridge Grapplers, TRD Pro rims, 3M precut bra, N-Fab nerf/steps
    Even though I’m not a participant in aftermarket parts, it frustrates me to see new excited owners having electrical issues after an installation. IMO, the manufacturers are not providing their customers a full disclosure of the importance of proper interfacing to the vehicle electrical system. My guess is that some of them don’t understand it themselves. These new vehicles are intolerant of botched electrical installations.
     
    erfer1 and McSpazatron like this.
  9. Feb 23, 2023 at 9:28 PM
    #9
    steelevo

    steelevo Not so new anymore...

    Joined:
    Nov 29, 2022
    Member:
    #29845
    Messages:
    2,674
    Utah
    Vehicle:
    2023 4Runner TRD Pro Solar Octane

    This is what happens when we create a need and want for a cheap unnecessary electrical mod. It is made with one purpose, large profit margins for a fly-by-night China-based company. The manufacturer could care less if you fry your 4Runner. The instructions are usually written in a different language, then they use a translator to convert the text to English. I'm pretty sure that the person that wrote the instructions doesn't have any education beyond early elementary school. Rant over.
     
  10. Feb 23, 2023 at 9:38 PM
    #10
    Slopemaster

    Slopemaster Slope Survivalist

    Joined:
    Mar 20, 2021
    Member:
    #20442
    Messages:
    3,143
    Gender:
    Male
    Idaho
    Vehicle:
    2018 SR5
    265-70-17 Ridge Grapplers, TRD Pro rims, 3M precut bra, N-Fab nerf/steps
    Well said!
     
    steelevo[QUOTED] likes this.
  11. Feb 24, 2023 at 6:39 AM
    #11
    Lockdown

    Lockdown New Member

    Joined:
    Oct 8, 2022
    Member:
    #28991
    Messages:
    309
    Gender:
    Male
    Los Angeles
    Vehicle:
    2023 ORP Lunar Rock
    And I'm sure most people installing it have never taken an electrical engineering course or a basic physics course on how electricity works.

    The products and accessories are fine, if you understand how electricity works you'll be fine.

    Doesn't matter if the products are made in the u.s. or overseas, electricity and the components work the same.

    Source: degree in BioMedical engineering and currently working in AI Robotics.
     
    steelevo and Thepremier141 like this.
  12. Feb 24, 2023 at 5:41 PM
    #12
    achtung6

    achtung6 New Member

    Joined:
    Jan 10, 2020
    Member:
    #12655
    Messages:
    242
    I suggest ingnoring the instructions that came with the raptor lights and instead focus on learning how to use the add-a-fuse. One of the fuse positions protects the circuit designated on your fuse cover lid and the other position on the add a fuse protects the accessory you are installing. Beyond that, all you need to do is connect the + wire going to the raptor lights to the red wire coming out of the add a circuit and the black wire from the raptor lights can be connected to a chassis ground anywhere that is convenient.

    That's all there is to it. Hope this helps you.
     
    Too Stroked and 08TXRunner like this.
  13. Feb 25, 2023 at 1:05 PM
    #13
    boomboompaopao

    boomboompaopao [OP] New Member

    Joined:
    Jan 21, 2023
    Member:
    #30802
    Messages:
    31
    Gender:
    Male
    First Name:
    Pao
    Florida
    Vehicle:
    2023 ORP

    Appreciate everyone's input here, I was able to spend the time to educate myself on how the electrical system works along with the add-a-fuse. Got them up and running now. Thank you all
     
  14. Feb 25, 2023 at 1:32 PM
    #14
    Trail Runnah

    Trail Runnah New Member

    Joined:
    May 8, 2020
    Member:
    #14189
    Messages:
    3,037
    Gender:
    Male
    Vehicle:
    2013 T4R Trail Edition
    Stock
    Very easy fix.

    Step 1. remove them.
    Step 2. toss them in the trash.

    You're welcome:D
     
    Slopemaster, steelevo and KYFHO like this.
  15. Feb 27, 2023 at 10:07 PM
    #15
    Thacrow

    Thacrow New Member

    Joined:
    May 30, 2021
    Member:
    #21719
    Messages:
    1,567
    Gender:
    Male
    NorCal
    Vehicle:
    2021 ORP
    Speed holes
    First fuse closest to the fuse plug on the add a fuse = the fuse you replaced. 2nd one with the wire coming out is the additional for your accessory since it has that wire for the raptor lights.

    When I did mine I used a POSI-TAP
    https://www.amazon.com/Lockitt-POSI...gid=pla-582619162306&ref=&adgrpid=63081621116

    I didn't like the connection the add-a-fuse made and felt like it might come loose or fall out. And I don't remember if there was issues getting rhe fuse box cover on.
     
    Last edited: Feb 27, 2023
  16. Feb 28, 2023 at 7:02 PM
    #16
    boomboompaopao

    boomboompaopao [OP] New Member

    Joined:
    Jan 21, 2023
    Member:
    #30802
    Messages:
    31
    Gender:
    Male
    First Name:
    Pao
    Florida
    Vehicle:
    2023 ORP

    Thank you for your explanation! Fuse box cover is unable to go back on after.
     
  17. Feb 28, 2023 at 7:23 PM
    #17
    Thacrow

    Thacrow New Member

    Joined:
    May 30, 2021
    Member:
    #21719
    Messages:
    1,567
    Gender:
    Male
    NorCal
    Vehicle:
    2021 ORP
    Speed holes
    i noticed that too and bought the positap
     
    Saker likes this.
  18. Feb 28, 2023 at 7:38 PM
    #18
    Saker

    Saker New Member

    Joined:
    Apr 8, 2022
    Member:
    #26498
    Messages:
    417
    Gender:
    Male
    Vehicle:
    21 Black T4RORP

    Do you want them on every time you start the engine?
    If you want them on only when you turn your lights on, then connect them to the TAIL fuse location.
     
  19. Feb 28, 2023 at 8:19 PM
    #19
    Thacrow

    Thacrow New Member

    Joined:
    May 30, 2021
    Member:
    #21719
    Messages:
    1,567
    Gender:
    Male
    NorCal
    Vehicle:
    2021 ORP
    Speed holes
    I didn't know if I wanted raptor lights at all so I put mine, and my baja light bar blacklights on switches. On only when ya want em. Get sick of em, keep em off.
     
    Saker likes this.
  20. Apr 6, 2023 at 11:49 PM
    #20
    Kimo

    Kimo New Member

    Joined:
    Feb 13, 2022
    Member:
    #25648
    Messages:
    41
    Gender:
    Male
    Vehicle:
    2021 4runner nightshade
    which fuse did you end up using?
     
  21. Apr 8, 2023 at 9:39 PM
    #21
    Thacrow

    Thacrow New Member

    Joined:
    May 30, 2021
    Member:
    #21719
    Messages:
    1,567
    Gender:
    Male
    NorCal
    Vehicle:
    2021 ORP
    Speed holes
    this one

    20230408_213616.jpg
     
  22. Apr 8, 2023 at 10:52 PM
    #22
    2016Pro

    2016Pro Why all of the Pro hate?

    Joined:
    Nov 11, 2018
    Member:
    #7739
    Messages:
    1,832
    Only chrome bullbars and regular bullbars are worse than raptor lights....
     
  23. Apr 9, 2023 at 7:59 AM
    #23
    djwantke

    djwantke New Member

    Joined:
    Jan 31, 2021
    Member:
    #19487
    Messages:
    3,773
    Gender:
    Male
    Maple Ridge, British Columbia
    Vehicle:
    2016 4Runner Trail Premium
    Bought brand new 2016 After May 2021: -Approx 3" lift/level: Bilstein 5100's, OME 2884 590lb 3" front lift springs, SPC UCA's, ICON 158506 2" lift rear coils, diff drop -Mickey Thompson Baja ATZ LT285/70R17 Load E -Mickey Thompson Sidebiter ll 17x9, 0 offset, 5 backspace -Pro Comp black spline lugs ^installed by 4WheelParts^ -New brakes and rotors by brake shop -4-piece ARB skid kit -Smittybilt 2" nerf steps -MBRP black exhaust tip, chopped OEM -Drivers side OEM FJ oh shit handle -All blacked out emblems -Blacked out roof rails -4x WeatherTech window rain guards -OEM custom rear mud flap deletes -KICK BACK MUD FLAPS 12" WIDE - BLACK TOP AND BLACK WEIGHT -FRAM EXTRA GUARD CA10835 engine air filter -1797 LED tricolor fog bulbs Yellow 3000K White 6000K Blue 15000K 28W 4000LM -Armour paint lower rear bumper -Front bumper high stage high clearance cut -Fenders cut straight across, pink reservoir sprayed black -4Runner Lifestyle sequential fog fangs -4Runner Lifestyle smoked taillight decals -Pedal Commander -Rear passenger cargo mounted 120v truck tire pump -4x Spidertrax 1.25" black aluminum wheel spacers -Yota Twins Paracord Hatch Strap sand camo -Teton Workshop hard anodized matte black aluminum shift knob -Ditch flood lights 4 LED 20w 1400lm w/ OEM hood mounts on OEM style dash switch -Backup flood lights under bumper 6 LED 18w 1500lm on OEM style dash switch -Body Mount Chop; cut, weld, paint -Fender mount chop, re-weld, paint -Fender Liner cut behind wheel (I cut liner in front of wheel clean off at top of viper cut) -Wheel well firewall hammering, painting ^done by Arc One Industries^ -valance cap trim -Agency6 Black Shackle Block 2" US Certified 6061 T6 CNC machined aluminum -DRT fab universal hitch skid -ACDelco inner tie rods, outer tie rods, bellows -Full Dr. KDSS switch kit -March 31 Behind grille 13-1/4" 32 LED light bar + wide-angle, eagle-eye lens 6000lm on OEM style dash switch -RAA Powder coated steel roof rack cargo basket, 1" side rails, 64" x 39" x 6", 250lb limit -roof gas can, water can, shovel -PEAKTOW PTT0063 Hitch Mount Cargo Carrier 51-1/2 x 17-1/2 x 4 inches 500 lbs. Capacity (trips only) -July/2023: purchased first needed SPC balljoint replacement kit - newly released, upgraded non-zerk sealed joints 25002 -July 15/2023: The Original Universal EZ Flares, 1". All four corners -Dec. 2023: removed bumper cover and crash bar, drilled frame, installed Apex Overland KDSS Recovery Points -Jan. 2024: SPC balljoint replacement kit - upgraded non-zerk sealed joint design 25002 -Feb. 3/ 2024: 4x KC Wire Hiders, for roof rack lighting Feb. 13/2024: New ditch lights, on new Rago Fabrication Extension brackets. 3inch Quad Row Amber Pods from LED-Club. 32W 3200Lm 16-LED Spot Beam. Replacing 3inch EVERGEAR clear lens ditch light pods w/ yellow lamix-x In progress: 4th, 5th, and 6th set of off road lights Electrical components and wiring purchased, not started -roof rack scene lighting - EVERGEAR ea. 1,350 lumens, 30w, 3-¾" round floods. Custom, side mounted w/ galvanized flat bar And -roof rack upper ditch lights - 3inch Quad Row Amber Pods from LED-Club. 32W 3200Lm 16-LED Spot Beam. Bar clamp mounted to front corners And -roof rack reverse amber pods / secondary hazard lights. 20W 2000Lm 2-LED Spot Beam. Bar clamp mounted to rear side And -roof rack F1 smoked chase light w/ lighting effects. Custom bolted to rear side -POR15 rust proofing line-up, 3-step process PAUSED until 70⁰ weather Bought, in the garage queue: -BlueFire 6-Circuit Fuse Block with LED Indicator & Protection Cover -Blue Sea Systems 100A Circuit Breaker w/ reset lever -Rust prevention •New can POR15, 2x Black Fluid Film, long spray nozzle attachments, 2x PB Surface Shield, 1x Chainwax •partially used POR15 Degreaser, Metal Prep Wanted - PerryParts or Wheelers bump stops, self fabricated limb risers (seasonal, removable), 1" body lift, powder coated center winch bumper w/ large bar (got no tss), rear steel bumper w/ tire carrier for an LT285 Kumho on steely, sliders, bolt on cat shields
    Glad to hear you got it done! I've installed multiple add a fuse's into my interior fuse box. Ya half the time I experienced issues when following manufacturer instructions and had to adapt on the fly. Not sure what you mean about your add a fuse already having two fuses in it, did you buy new? Mine came without fuses plugged in, and you choose your amps accordingly.

    If ya'll don't like not running a fuse box cover after installing add a fuse's, Dr. KDSS sells a nice solution. Cheers

    https://drkdss.com/collections/kdss/products/fuse-box-cover
     
  24. Apr 12, 2023 at 9:51 PM
    #24
    Kimo

    Kimo New Member

    Joined:
    Feb 13, 2022
    Member:
    #25648
    Messages:
    41
    Gender:
    Male
    Vehicle:
    2021 4runner nightshade
    I also started using ign no 2 recently for my raptor lights. Any problems so far? Any safety concerns I should be aware of?
     
  25. Apr 12, 2023 at 10:22 PM
    #25
    Thacrow

    Thacrow New Member

    Joined:
    May 30, 2021
    Member:
    #21719
    Messages:
    1,567
    Gender:
    Male
    NorCal
    Vehicle:
    2021 ORP
    Speed holes
    I'm no electrical engineer but those led lights take just about no power so should be fine.
     
    Last edited: Apr 12, 2023
    slar50, achtung6 and Kimo[QUOTED] like this.
  26. Apr 14, 2023 at 3:25 PM
    #26
    poorman

    poorman New Member

    Joined:
    Jun 6, 2022
    Member:
    #27350
    Messages:
    6
    First Name:
    Pete
    Vehicle:
    2021 4Runner ORP
    Factory rock rails, Talons Garage cat cover plate
    When are the raptor lights on with the connection to IGN NO.2? When in accessory mode? When ignition is on but engine not running? Only when engine is running?

    I currently have a compressor control switch connected to the P/OUTLET fuse in a 2021 4Runner. It gets power in accessory mode and (of course) when the ignition is on. I'm hoping to find a fuse that gets power only when the engine is running or, failing that, only when the ignition is on.

    Thanks.
     
  27. Apr 14, 2023 at 4:04 PM
    #27
    Thacrow

    Thacrow New Member

    Joined:
    May 30, 2021
    Member:
    #21719
    Messages:
    1,567
    Gender:
    Male
    NorCal
    Vehicle:
    2021 ORP
    Speed holes
    since I posted that pic - I only use that fuse as an ignition on which turns a relay on which powers an auxiliary fuse panel directly from the battery, which IMO is how you should do it for most things but these raptor light take so little power an add-a-fuse is perfectly fine.

    Either way, it's only on when the car is on / ignition is on.
     
    Last edited: Apr 14, 2023
  28. Apr 15, 2023 at 5:55 AM
    #28
    poorman

    poorman New Member

    Joined:
    Jun 6, 2022
    Member:
    #27350
    Messages:
    6
    First Name:
    Pete
    Vehicle:
    2021 4Runner ORP
    Factory rock rails, Talons Garage cat cover plate
    Thanks, @Thacrow . The switches I've added (compressor, light bar) just control relays so the power draw from the fuse slot should be minimal. I'll give the IGN NO.2 fuse a try and report back.
     
  29. Apr 15, 2023 at 8:21 AM
    #29
    Kyblack76

    Kyblack76 New Member

    Joined:
    Jan 21, 2018
    Member:
    #5354
    Messages:
    1,166
    Gender:
    Male
    First Name:
    Kyle
    Layton, Utah
    Vehicle:
    18 TRD O.R
    What can be a bit funny, when a "relay" is needed, is that the relay will pull more amperage, than the thing your powering. Dont over think it all.
     
  30. Apr 15, 2023 at 12:28 PM
    #30
    poorman

    poorman New Member

    Joined:
    Jun 6, 2022
    Member:
    #27350
    Messages:
    6
    First Name:
    Pete
    Vehicle:
    2021 4Runner ORP
    Factory rock rails, Talons Garage cat cover plate
    That's a very good point. In my case the relays are embedded in the controlled devices (a Cali Raised LED lightbar and an ARB compressor). Other devices might well be best powered directly.

    I couldn't try IGN NO.2 because another add-a-fuse in the PANEL slot was too close. IGN NO.3, however, did the trick. My compressor switch now only receives power when the ignition is on.

    Thanks for the help, everyone. Now I'm off to research alternatives for wiring switch illumination power so that it dims with the rest of the dash lights.
     

Products Discussed in

To Top