1. Welcome to 4Runners.com!

    You are currently viewing as a guest! To get full-access, you need to register for a FREE account.

    As a registered member, you’ll be able to:
    • Participate in all 4Runner discussion topics
    • Transfer over your build thread from a different forum to this one
    • Communicate privately with other 4Runner owners from around the world
    • Post your own photos in our Members Gallery
    • Access all special features of the site

OEM Style Switch Disassembly (and AOB wiring diagram)

Discussion in '5th Gen 4Runners (2010-2024)' started by PJSnow, Dec 27, 2022.

  1. Dec 27, 2022 at 10:03 AM
    #1
    PJSnow

    PJSnow [OP] Always Learning

    Joined:
    Dec 11, 2019
    Member:
    #12291
    Messages:
    166
    First Name:
    PJ
    New York
    Vehicle:
    2018 Cavalry Blue TRD Pro
    I received a light blue Air On Board (AOB) fog light switch for Christmas to replace the OEM style switch that came with my Brite Box anytime fog light kit. The Brite Box switch appears to be a CH4x4 switch (from what I've read on the forums) and it has a harsh blue color. I like the light blue color of the AOB switch and it matches the other switches I have installed. For those wondering, the AOB switch is a direct replacement without changing the wiring of the Brite Box harness (see the wiring diagram below that came with my AOB switch).

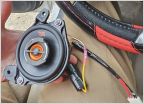
    Since I have no need for the Brite Box switch, I decided to disassemble it. The reason being, CH4x4 has the option for custom switch faces (endless possibilities compared to AOB), which would be great to combine with the OEM light blue LED switch color. I figure these can be frankensteined together or different color LEDs soldered in to your liking. The pictures below are a guide (of sorts) to disassemble OEM style switches (I assume the AOB switch is similar, just with different color LEDs). Hopefully this is helpful to someone and maybe we can see some creative ideas of custom switches with the factory light blue LED color.


    OEM style switch that came with the Brite Box Anytime fog light kit (assumed to be CH4x4 switch):
    IMG_5430.jpg

    Removable side panel:
    IMG_5431.jpg

    Side panel removed, exposing circuit board (there are 4 clips holding this in, I was able to use my finger nails to slowly work my way around to release each clip):
    IMG_5432.jpg

    Once the side panel is off, the internals can be removed. I started by lifting the back portion (where the harness plugs in) as seen at the right side of the picture.
    IMG_5434.jpg

    Lifting the rear section allowed me to squeeze a long tool (a letter opener in my case) between the switch case and the internal components.
    IMG_5435.jpg

    The next step is to pry the internals upwards (upwards in the photo but actually to the right side of the switch). This will release the blue tab that connects the internals to the switch face.
    IMG_5436.jpg

    Here you can see the internals removed from the switch casing (the switch face is still inside the casing. You can also see the blue tab at the left of the internals.
    IMG_5437.jpg

    Here are all of the parts spread out (switch face removed from the casing). The top piece is the casing, the left piece is the switch face, the right piece is the internals (circuit board etc), and the bottom is the side panel (that clips into the casing).
    IMG_5438.jpg

    Here is a better look at the back of the face and the blue tab that connects into it. IMG_5439.jpg

    Here you can see how the internals connect to the face (much easier to see when out of the switch casing).IMG_5440.jpg

    And just one more photo of the blue tab because this was the most difficult part of the disassembly. Hopefully these photos are helpful.
    IMG_5442.jpg

    This is the backside of the internals. You can see the two LEDs. I expect these can be desoldered and different color LEDs re-soldered to change the color of the switch.
    IMG_5443.jpg

    Here is a side profile picture showing the blue tab and the switch mechanism.
    IMG_5444.jpg

    And here is the other side profile. The switch mechanism is labeled "DC".
    IMG_5445.jpg

    IMG_5433.jpg
     
  2. Dec 27, 2022 at 10:07 AM
    #2
    PJSnow

    PJSnow [OP] Always Learning

    Joined:
    Dec 11, 2019
    Member:
    #12291
    Messages:
    166
    First Name:
    PJ
    New York
    Vehicle:
    2018 Cavalry Blue TRD Pro
    AOB wiring diagram did not upload with the first post.
     

    Attached Files:

Products Discussed in

To Top