1. Welcome to 4Runners.com!

    You are currently viewing as a guest! To get full-access, you need to register for a FREE account.

    As a registered member, you’ll be able to:
    • Participate in all 4Runner discussion topics
    • Transfer over your build thread from a different forum to this one
    • Communicate privately with other 4Runner owners from around the world
    • Post your own photos in our Members Gallery
    • Access all special features of the site
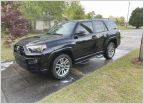
Photon (The Light Hunter) Build Thread

Discussion in '5th Gen Builds (2010-2024)' started by Photon_Chaser, Feb 11, 2024.

  1. Apr 4, 2025 at 11:15 AM
    #91
    Thacrow

    Thacrow New Member

    Joined:
    May 30, 2021
    Member:
    #21719
    Messages:
    1,780
    Gender:
    Male
    NorCal
    Vehicle:
    2021 ORP
    Speed holes
    Are you going straight axle? Are you serious about 42's?
     
    Photon_Chaser[OP] likes this.
  2. Apr 4, 2025 at 11:25 AM
    #92
    Photon_Chaser

    Photon_Chaser [OP] 53,001 and counting…

    Joined:
    Sep 4, 2023
    Member:
    #35473
    Messages:
    1,629
    Gender:
    Male
    Up, down and all around!
    Vehicle:
    21 TRD Pro - "Photon"
    4/3/25 Photon’s putting on more weight.

    I looked high and low for a rear bumper, seen many nice designs and features, the lightest to heaviest and in all that searching I was wondering if I’d ever find that perfect fit. There have been some trails that I’ve scrubbed Photon’s butt (thankfully more the trailer hitch) but a couple of times I scrubbed her plastic bumper pretty hard.

    At least I know just how much protection she needed so that helped to narrow the search. Didn’t need super high quarter panel protection but wanted a design that allowed for easier sliding off an obstruction or a sandy berm.

    Then I came across this design by Dissent Offroad. A local company that’s about a 2-hr drive away but also en-route to one of my mountain destinations. Their bumper design is rather unique in that it’s modular, two wing sections tied together at the tow hitch and a very robust doubler plate (more about that later) that also offers a (protected) rear camera mounting point and swing arm options. The thing about this company is that they build to order so the wait time for me was significant as they had a large waitlist…7 months it was but now that I have it I can understand why. When I got word that my order was ready I saved on shipping and went to pick it up in person. Besides, Photon can handle the 160 lbs or so of steel parts.

    IMG_3281.jpg
    At the dock picking up my kit.

    IMG_3328.jpg
    Two-piece guesseted bumper design

    IMG_3327.jpg
    Tire swing arm kit. I may eventually get the second swing arm for additional cargo…
     
    Last edited: Apr 4, 2025
    acet7, Thacrow and ChessGuy like this.
  3. Apr 4, 2025 at 11:27 AM
    #93
    Photon_Chaser

    Photon_Chaser [OP] 53,001 and counting…

    Joined:
    Sep 4, 2023
    Member:
    #35473
    Messages:
    1,629
    Gender:
    Male
    Up, down and all around!
    Vehicle:
    21 TRD Pro - "Photon"
    LOL No! (But I reserve the privilege if Photon ever gets turned into super beast)

    That image was of a customers on-going build I saw at Stellar Built in Sac last week.
     
    Thacrow[QUOTED] likes this.
  4. Apr 4, 2025 at 11:38 AM
    #94
    Photon_Chaser

    Photon_Chaser [OP] 53,001 and counting…

    Joined:
    Sep 4, 2023
    Member:
    #35473
    Messages:
    1,629
    Gender:
    Male
    Up, down and all around!
    Vehicle:
    21 TRD Pro - "Photon"
    4/3/25 Photon’s putting on more weight (Pt II)

    Every journey begins with that first step, I’ll skip the pre-study of the assembly video here but being an over planner at times I’ll just say that I watched that video at least a dozen times!

    So, the first step was to determine what bolt locations are to be used on the frame. Three on each frame member side for starters and I chased them all with a tap using CorrosionX to both act as a lubricant (not cutting fluid) as well at to pre-treat any existing corrosion in the threads, which I found plenty of.

    IMG_4098.jpg

    Next comes the fun part, not so for Photon cause it meant she was loosing part of her skirt…and she made me work for it!

    IMG_4260.jpg
    IMG_4262.jpg
    IMG_4267.jpg
    Pop clips, 10mm sheet metal/self tapping screws all over the place including a couple of partially hidden ones.
    IMG_4274.jpg

    IMG_4279.jpg
     
    acet7 and Thacrow like this.
  5. Apr 4, 2025 at 12:00 PM
    #95
    Photon_Chaser

    Photon_Chaser [OP] 53,001 and counting…

    Joined:
    Sep 4, 2023
    Member:
    #35473
    Messages:
    1,629
    Gender:
    Male
    Up, down and all around!
    Vehicle:
    21 TRD Pro - "Photon"
    4/3/25 Photon’s putting on more weight (Pt III - Rear Bumper)

    Next up, some clearance cuts. Not that bad actually more like get rid of this little bit on both sides using tin snips..
    IMG_4348.jpg
    until I lost my patience and broke out the cutting wheel!
    IMG_4349.jpg

    There, that’s better. Finished with some deburring and a shot of enamel paint over the raw edges.
    IMG_4294.jpg

    Next was to do a test fit of the Wing Stiffeners. Discovered that the frame welds needed to be ground down so out with the grinding wheel and about 10-15 minutes of smoothing out work.
    IMG_4285.jpg
    IMG_4344.jpg
    IMG_4298.jpg

    The Wing Stiffeners are designed mainly for support of the bumper sides as well as to add rigidity to handle the weight of the swingarms, nice touch. I used a liberal amount of Loctite 242 to help seal off the threads in addition to vibration protection.

    IMG_4302.jpg
     
    acet7 and Thacrow like this.
  6. Apr 4, 2025 at 12:23 PM
    #96
    Photon_Chaser

    Photon_Chaser [OP] 53,001 and counting…

    Joined:
    Sep 4, 2023
    Member:
    #35473
    Messages:
    1,629
    Gender:
    Male
    Up, down and all around!
    Vehicle:
    21 TRD Pro - "Photon"
    4/3/25 Photon’s putting on more weight (Pt IV - Rear Bumper)

    Now it’s time to ‘clear the decks’ so to speak. The entire underside of chassis frame and crossmember needs to be devoid of everything so out came the cutting wheel once again (and a socket wrench)

    Don’t need these plates…
    IMG_4289.jpg
    IMG_4287.jpg

    Nor these things
    IMG_4351.jpg

    Or even this thang
    IMG_4352.jpg

    oh yeah, don’t need these either (plastic bumper supports)
    IMG_4353.jpg
    IMG_4301.jpg

    and remove the fob sensor (set aside it’ll be reinstalled later) and trailer connector too
    IMG_4339.jpg
    IMG_4340.jpg
    Prep work done, now comes breaking torque on the factory hitch (four on the rear face and two underneath) then simply slide on the bumper shells.
    IMG_4356.jpg

    This part gets a bit tricky as it wasn’t clearly discussed in the assembly video, this center plate that has a built in rear camera housing needs to have all six of the factory hitch bolts completely removed. Now the plate can be fully slid into position, then the four rear facing bolts started and then the two bottom ones. I then added the four 1/2-13x1.25 bolts (the yellow zinc plated ones) washers and nuts finger tight.

    Now the two bottom hitch bolts were then snugged up then the four rear facing bolts were fully torqued followed by the two bottom bolts. Now comes an important step, the four 1/2-13 bolts are torqued to 90 ft-lbs. For those of you whom just see this as a rather hefty torque value please keep in mind that such high torques are meant to maximize clamping force and in the case of these bolt locations, it actually ties the bridge plate and two bumper shells into one cohesive assembly….essentially this is now a one-piece bumper. Don’t forget the Loctite!
    IMG_4370.jpg
    IMG_4371.jpg

    All torques dbl checked, I saw something that I should have addressed before I put the bumper shells on, it would have been a much easier process…
    IMG_4385.jpg IMG_4386.jpg
     
    Last edited: Apr 4, 2025
  7. Apr 4, 2025 at 1:03 PM
    #97
    Photon_Chaser

    Photon_Chaser [OP] 53,001 and counting…

    Joined:
    Sep 4, 2023
    Member:
    #35473
    Messages:
    1,629
    Gender:
    Male
    Up, down and all around!
    Vehicle:
    21 TRD Pro - "Photon"
    A quick addendum…

    Before I begin the final step of cutting up and re-installing the plastic bumper I’m getting proactive…as I spend a lot of time up in the mountains little critters are a concern. So…out with the tin snips and some galvanized chicken wire…
    IMG_4388.jpg

    Let’s see you bastards get passed this!
     
    acet7, fiddy5000, djwantke and 2 others like this.
  8. Apr 4, 2025 at 2:12 PM
    #98
    ChessGuy

    ChessGuy New Member

    Joined:
    Oct 22, 2021
    Member:
    #23918
    Messages:
    969
    Gender:
    Male
    First Name:
    LR
    Houston
    Vehicle:
    2020 TRD Pro / 2017 Tacoma TRD Pro
    Too many..... Performance: • Magnusum Supercharger • Gibson exhaust with dual black tip • Pedal Commander * PowerBrakes • Suspension – Old Man Emu BP-51 front and back with Medium load coils • Tires: AT3 Faulken Wildpeak – 285/70/17 • Wheels: Relations Race Wheels, RR7-H with -12 offset • Full roof rack and ladder by Westcott Design (removed the stock Yakima basket) • Molle storage panels by Rago fabrication • Front light brackets by Rago • Illuminator light bracket by Rago (roof rack location) Lights • Morimoto front and back with sequential signals • Morimoto fog lights and side mirrors with sequential signals • 40” Baja design light bar for roof rack • 20” S8 Baja design driving combo (winch location) • Squadron sport baja design ditch lights • S2 Chase lights by baja designs (mounted on roof) In the bay: • Odyssey 34-PC Battery • SDQH Aluminum billet battery terminals and bracket • Switch Pro 9100 with aluminum tray • Anytime front and back camera • ARB twin compressor Recovery & Protection: • Smittybilt X20 synthetic rope winch • Factor 55 fairlead and flatlink • Southern Style Off-road (SSO) low profile bumper • SSO stage 2 high clearance wings • Weekend warrior recovery kit by treaty oak • RCI – skid plates – entire vehicle + catalytic converter protection wings Interior: • Nano Ceramic IR – Avery Dennison Window tint – all windows • Several phone mounts • Upgraded Rear Hatch lift gate struts (ladder is heavy) • Boom blaster horn switch (featuring La cucaracha)
    Wow OP, what a build you got going on here. Congratulations sir! :hattip:
     
    Photon_Chaser[OP] and Thacrow like this.
  9. Apr 4, 2025 at 2:32 PM
    #99
    Photon_Chaser

    Photon_Chaser [OP] 53,001 and counting…

    Joined:
    Sep 4, 2023
    Member:
    #35473
    Messages:
    1,629
    Gender:
    Male
    Up, down and all around!
    Vehicle:
    21 TRD Pro - "Photon"
    Thank you! I have to admit that I was a bit apprehensive doing this but now that the bumper install is almost done I’m very happy about it!
     
    ChessGuy[QUOTED] and Thacrow like this.
  10. Apr 4, 2025 at 2:35 PM
    #100
    Photon_Chaser

    Photon_Chaser [OP] 53,001 and counting…

    Joined:
    Sep 4, 2023
    Member:
    #35473
    Messages:
    1,629
    Gender:
    Male
    Up, down and all around!
    Vehicle:
    21 TRD Pro - "Photon"
    4/3/25 Photon’s putting on more weight (Pt V - Rear Bumper)

    This is about as ‘live’ as it’ll get. Doing the plastic bumper trim thing. Whew! Glad I got the initial fit right!

    IMG_4390.jpg
    IMG_4391.jpg

    Just need to dial in the final clearance, add weatherstripping then I’m off to electrical.
     
    acet7, djwantke and Thacrow like this.
  11. Apr 4, 2025 at 2:39 PM
    #101
    Photon_Chaser

    Photon_Chaser [OP] 53,001 and counting…

    Joined:
    Sep 4, 2023
    Member:
    #35473
    Messages:
    1,629
    Gender:
    Male
    Up, down and all around!
    Vehicle:
    21 TRD Pro - "Photon"
    PSA: Anyone have a need for a rear bumper valance and foam spacer? Free for the taking but must be within an hours drive of Sacramento, CA or the Bay Area!

    image.jpg
     
    Thacrow likes this.
  12. Apr 4, 2025 at 2:50 PM
    #102
    Photon_Chaser

    Photon_Chaser [OP] 53,001 and counting…

    Joined:
    Sep 4, 2023
    Member:
    #35473
    Messages:
    1,629
    Gender:
    Male
    Up, down and all around!
    Vehicle:
    21 TRD Pro - "Photon"
    4/3/25 Photon’s putting on more weight (Pt V cont. - Rear Bumper)

    Final trim is done, all that’s left to do is to clean up the cut edges and install the weatherstripping…

    image.jpg

    Pro Tip: adding weatherstripping to parts like this bumper can be an aggravating experience. Simply use some (liberally) rubbing alcohol or equiv. And thoroughly wet the weatherstripping’s interior groove. It’ll make things slide on oh so nicely.
    IMG_4392.jpg

    Done! (For now)
    IMG_4394.jpg
    IMG_4393.jpg
     
    Last edited: Apr 4, 2025
  13. Apr 4, 2025 at 7:01 PM
    #103
    ChessGuy

    ChessGuy New Member

    Joined:
    Oct 22, 2021
    Member:
    #23918
    Messages:
    969
    Gender:
    Male
    First Name:
    LR
    Houston
    Vehicle:
    2020 TRD Pro / 2017 Tacoma TRD Pro
    Too many..... Performance: • Magnusum Supercharger • Gibson exhaust with dual black tip • Pedal Commander * PowerBrakes • Suspension – Old Man Emu BP-51 front and back with Medium load coils • Tires: AT3 Faulken Wildpeak – 285/70/17 • Wheels: Relations Race Wheels, RR7-H with -12 offset • Full roof rack and ladder by Westcott Design (removed the stock Yakima basket) • Molle storage panels by Rago fabrication • Front light brackets by Rago • Illuminator light bracket by Rago (roof rack location) Lights • Morimoto front and back with sequential signals • Morimoto fog lights and side mirrors with sequential signals • 40” Baja design light bar for roof rack • 20” S8 Baja design driving combo (winch location) • Squadron sport baja design ditch lights • S2 Chase lights by baja designs (mounted on roof) In the bay: • Odyssey 34-PC Battery • SDQH Aluminum billet battery terminals and bracket • Switch Pro 9100 with aluminum tray • Anytime front and back camera • ARB twin compressor Recovery & Protection: • Smittybilt X20 synthetic rope winch • Factor 55 fairlead and flatlink • Southern Style Off-road (SSO) low profile bumper • SSO stage 2 high clearance wings • Weekend warrior recovery kit by treaty oak • RCI – skid plates – entire vehicle + catalytic converter protection wings Interior: • Nano Ceramic IR – Avery Dennison Window tint – all windows • Several phone mounts • Upgraded Rear Hatch lift gate struts (ladder is heavy) • Boom blaster horn switch (featuring La cucaracha)
    Amazing how handy and masterfully you have done so much to your 4R. Keep the project going. Fun watching the transformation.
     
    Photon_Chaser[OP] and Thacrow like this.
  14. Apr 4, 2025 at 7:05 PM
    #104
    Thacrow

    Thacrow New Member

    Joined:
    May 30, 2021
    Member:
    #21719
    Messages:
    1,780
    Gender:
    Male
    NorCal
    Vehicle:
    2021 ORP
    Speed holes
    Yeah he doesnt mess around. Love watching builds like this. Unique. Custom. Well done.
     
    Photon_Chaser[OP] likes this.
  15. Apr 4, 2025 at 7:09 PM
    #105
    Photon_Chaser

    Photon_Chaser [OP] 53,001 and counting…

    Joined:
    Sep 4, 2023
    Member:
    #35473
    Messages:
    1,629
    Gender:
    Male
    Up, down and all around!
    Vehicle:
    21 TRD Pro - "Photon"
    Thank you! It’s amazing this old body keeps on going! As I was pushing the shells into place I kept thinking I’ll just take a nap while I’m laying here! :D
     
  16. Apr 4, 2025 at 7:10 PM
    #106
    Photon_Chaser

    Photon_Chaser [OP] 53,001 and counting…

    Joined:
    Sep 4, 2023
    Member:
    #35473
    Messages:
    1,629
    Gender:
    Male
    Up, down and all around!
    Vehicle:
    21 TRD Pro - "Photon"
    Glad I’m only showing you the ones I feel are worthy of posting, the screwups, are plenty! ;)
     
  17. Apr 4, 2025 at 7:11 PM
    #107
    Thacrow

    Thacrow New Member

    Joined:
    May 30, 2021
    Member:
    #21719
    Messages:
    1,780
    Gender:
    Male
    NorCal
    Vehicle:
    2021 ORP
    Speed holes
    Thats just #standard

    Plenty here on my build as well
     
  18. Apr 4, 2025 at 7:15 PM
    #108
    Photon_Chaser

    Photon_Chaser [OP] 53,001 and counting…

    Joined:
    Sep 4, 2023
    Member:
    #35473
    Messages:
    1,629
    Gender:
    Male
    Up, down and all around!
    Vehicle:
    21 TRD Pro - "Photon"
    Speaking of standards and builds, I’m super jealous of the work you’ve accomplished on your sound system!
     
    Thacrow[QUOTED] likes this.
  19. Apr 4, 2025 at 7:30 PM
    #109
    Thacrow

    Thacrow New Member

    Joined:
    May 30, 2021
    Member:
    #21719
    Messages:
    1,780
    Gender:
    Male
    NorCal
    Vehicle:
    2021 ORP
    Speed holes
    Thanks man! That was a fun project. Been trying to figure out what else to do without doing something just to do something.
     
  20. Apr 5, 2025 at 9:31 AM
    #110
    Photon_Chaser

    Photon_Chaser [OP] 53,001 and counting…

    Joined:
    Sep 4, 2023
    Member:
    #35473
    Messages:
    1,629
    Gender:
    Male
    Up, down and all around!
    Vehicle:
    21 TRD Pro - "Photon"
    Doing something is always better than doing something else!

    Really, the work you do is on point!
     
    Thacrow[QUOTED] likes this.
  21. Apr 5, 2025 at 5:01 PM
    #111
    Photon_Chaser

    Photon_Chaser [OP] 53,001 and counting…

    Joined:
    Sep 4, 2023
    Member:
    #35473
    Messages:
    1,629
    Gender:
    Male
    Up, down and all around!
    Vehicle:
    21 TRD Pro - "Photon"
    4/5/25 Photon’s putting on more weight (Pt VI - Rear Bumper, Crawling Back Under)

    Yesterday I stopped work on the rear bumper as I was plumb wore out! Today’s effort was a breeze (kinda) by comparison as it was time to now route and re-install the trailer hitch wiring.
    IMG_4427.jpg

    I think it was step IV that I removed the bracket and plug assembly from the frame. Tossed the bracket (unless someone PMs me before next garbage day) and began re-working the cable bundle to get as much extension out of it as possible. Turns out Toyota puts a ‘service loop’ inside the short section of snakeskin, nice.
    IMG_4428.jpg

    The real (and only) struggle of this work was getting new snakeskin on to the existing harness without writing down pin configurations, tearing each connector apart, thread on new snakeskin, etc. So stubborn me just went at it with the largest diameter snakeskin that I had on hand. Took me almost half an hour but I got it done, wished I had 1” not 5/8” snakeskin.
    IMG_4429.jpg
    IMG_4430.jpg

    Was starting to retape everything when I ran out of electrical tape so I called up a good buddy to see if he had any. I ran over when he said to just grab one and take it back with me, guess I know who to ask if I ever run out of tape again!
    IMG_4425.jpg

    I finished off taping, was even able to reuse the official blue Toyota tape to give the harness a factory finish!
    IMG_4431.jpg

    Threaded the harness through provisions in the bumper, reconnected the two plugs and main plug into the back of the factory socket housing and snapped it into place, another perfect fit by the Dissent company, tucked up and protected in its own little cubby.
    IMG_4432.jpg IMG_4433.jpg

    Maybe tomorrow I’ll decide how I’m going to hook up the new taillights…
     
    Thacrow and fiddy5000 like this.
  22. Apr 6, 2025 at 2:03 PM
    #112
    acet7

    acet7 New Member

    Joined:
    Feb 6, 2021
    Member:
    #19584
    Messages:
    91
    Gender:
    Male
    First Name:
    John
    Vehicle:
    2021 Dark Grey TRD Off-Road 4Runner
    You do excellent work man.
     
    Photon_Chaser[OP] likes this.
  23. Apr 6, 2025 at 3:19 PM
    #113
    Photon_Chaser

    Photon_Chaser [OP] 53,001 and counting…

    Joined:
    Sep 4, 2023
    Member:
    #35473
    Messages:
    1,629
    Gender:
    Male
    Up, down and all around!
    Vehicle:
    21 TRD Pro - "Photon"
    Much appreciate it! One thing’s for sure, projects are easier when you begin with quality parts!
     
    acet7[QUOTED] likes this.
  24. Apr 7, 2025 at 4:05 PM
    #114
    Photon_Chaser

    Photon_Chaser [OP] 53,001 and counting…

    Joined:
    Sep 4, 2023
    Member:
    #35473
    Messages:
    1,629
    Gender:
    Male
    Up, down and all around!
    Vehicle:
    21 TRD Pro - "Photon"
    Bumper Prolog:

    I should have added this short dialog in the initial bumper post...

    Of the key features that I came to appreciate about this particular bumper design this one certainly deserves its own merit. In the event that I were to somehow bash one side (hopefully my own doing on a trail somewhere vs someone else hitting me!) I could potentially contact Dissent and swap out the damaged half shell and not the entire bumper assembly.

    Ok, nuff said.
     
  25. Apr 7, 2025 at 4:39 PM
    #115
    Photon_Chaser

    Photon_Chaser [OP] 53,001 and counting…

    Joined:
    Sep 4, 2023
    Member:
    #35473
    Messages:
    1,629
    Gender:
    Male
    Up, down and all around!
    Vehicle:
    21 TRD Pro - "Photon"
    Performance Log Entry #1 - Post Rear Bumper Install

    So now that Photon has an additional 125 lbs sitting on her rear end I was determined to see what the MPG hit would be like. So for this short trip out to the coast I carefully logged the start and stop display readings and tried my best to be as conservative (but follow the flow of traffic) as I could manage.

    Start:
    • Elev. approx. 2000’ ASL, 70°F
    • Current permanent added weight = ~350 lbs (all of the build items to date sans the roof top cargo boxes)
    • Carrying an additional ~100 lbs of cargo/equipment.
    • Full tank, 87 octane
    • MT Baja Boss AT, 50% treadlife, 36 psi
    IMG_4473.jpg

    First 35 miles were slightly downhill (love the countryside in the springtime)
    IMG_4472.jpg

    The next 70 or so miles were across flat ag. land (and about a 20-25 mph headwind!), there are several hill climbs (1000’, a couple of 500’ and the biggest (~1800’) one out to the coast.

    I was actually able to average close to 20-21 MPG across the Central Valley region once that gnarly westerly subsided and slowly lost ground with each ‘hill’ along the way. I was actually surprised that the 65 MPH cruising speed was more efficient than several 55 MPH zones but maybe that was due to wind direction.

    Once over the last ‘hill’ I took this snapshot of the dash display.
    IMG_4480.jpg

    So 121 miles averaging 65 MPH and ending with an approximate 18 MPG. I know going Offroad the numbers will be a far cry worse but I’m hopeful they’ll be better than sub tens…
     
    yentup and acet7 like this.
  26. Apr 9, 2025 at 10:43 PM
    #116
    Photon_Chaser

    Photon_Chaser [OP] 53,001 and counting…

    Joined:
    Sep 4, 2023
    Member:
    #35473
    Messages:
    1,629
    Gender:
    Male
    Up, down and all around!
    Vehicle:
    21 TRD Pro - "Photon"
    It's been almost two years since I installed Molle panels in the back and have spent countless hours tinkering with placements of numerous gear using fairly inexpensive bags to hold first aid items to camping supplies like these compressed towelettes I bought off Amazon. Really handy to have and when done cleaning up I let them dry out, rub some candle wax on em and voila, handy campfire starters. They work so well and somewhat reusable, I haven't had to pack a roll of paper towels in almost two camping seasons.
    compressedtowels.jpg

    In all this time the panels have begun to accumulate very specific, permanent, items. One of which is a first aid kit. The initial sack that I've been using has become overloaded (and I'm still without certain necessities.) Since I have a few of these six compartment Rigid toolboxes laying around I figure I'd give this idea a try. I think it'll serve its purpose well, stays secured until needed and isn't a PITA to put back onto the Molle Panel afterwards (unlike the molle bags with their button snap straps that are a pain to put back on after use.)
    rigidaid.jpg
     
    acet7 and yentup like this.
  27. Apr 11, 2025 at 11:20 AM
    #117
    Photon_Chaser

    Photon_Chaser [OP] 53,001 and counting…

    Joined:
    Sep 4, 2023
    Member:
    #35473
    Messages:
    1,629
    Gender:
    Male
    Up, down and all around!
    Vehicle:
    21 TRD Pro - "Photon"
    Fired up the Computer…

    While going over my gear in preparations for this coming summer (at least I hope I’ll be able to get out for a trip or two!) I remembered something that is more a convenience than novelty. Sure, I can easily take some of the LED string lights that I have and make things all glampy or I can get to work and make things a bit more utilitarian.

    First, some 3D modeling to get a better perspective of what I’m dealing with…
    IMG_4526.jpg

    Then comes a few careful measurements, a little thinking of how things fit together and a cup of coffee, a little while later things are starting to take form…
    IMG_4524.jpg
    IMG_4530.jpg

    A little thinking about how to store them…
    IMG_4528.jpg

    And how they are installed onto the awning’s C-channel extrusions.
    IMG_4531.jpg

    For now the wiring will just be rough-in. I’ve already begun designing the mounts with integrated connectors next.


    All IP herein are protected under copyright law ©2025 PhotonChaser
    [​IMG][​IMG][​IMG]
     
    Last edited: Apr 11, 2025
    yentup and dgrenier15 like this.
  28. Apr 11, 2025 at 2:03 PM
    #118
    dgrenier15

    dgrenier15 New Member

    Joined:
    Feb 27, 2023
    Member:
    #31489
    Messages:
    314
    Gender:
    Male
    First Name:
    Dayne
    Oklahoma
    Vehicle:
    2022 AG TRD ORP


    ALL I HAVE TO SAY IS DAYYYYYYUMMMM! :101010:
     
To Top