1. Welcome to 4Runners.com!

    You are currently viewing as a guest! To get full-access, you need to register for a FREE account.

    As a registered member, you’ll be able to:
    • Participate in all 4Runner discussion topics
    • Transfer over your build thread from a different forum to this one
    • Communicate privately with other 4Runner owners from around the world
    • Post your own photos in our Members Gallery
    • Access all special features of the site

Parking Brake Holding Weight of Truck on Inclines?

Discussion in '5th Gen 4Runners (2010-2024)' started by Scarif_1, Jun 19, 2024.

  1. Jun 20, 2024 at 6:30 PM
    #31
    Borracho Loco

    Borracho Loco My 4Runner identifies as a Prius!

    Joined:
    Sep 23, 2023
    Member:
    #35824
    Messages:
    2,880
    Gender:
    Male
    Dallas/Ft Worth
    Vehicle:
    2023 40th Anniversary Special Edition
    Oooh look, another mod.....

    [​IMG]


    [​IMG]
     
    Manhattan and glwood54 like this.
  2. Jun 20, 2024 at 8:45 PM
    #32
    glwood54

    glwood54 Stop making me buy stuff!

    Joined:
    Aug 19, 2019
    Member:
    #10964
    Messages:
    6,797
    Gender:
    Male
    First Name:
    Gary
    Albuquerque, NM
    Vehicle:
    2019 OR, KDSS, RSG sliders, Eibach shocks, 265/70 Falken Wildpeak AT4
    Anyone who doesn't like rust, tornadoes, floods, hurricanes, or shoveling snow. :p
     
  3. Jun 20, 2024 at 8:49 PM
    #33
    glwood54

    glwood54 Stop making me buy stuff!

    Joined:
    Aug 19, 2019
    Member:
    #10964
    Messages:
    6,797
    Gender:
    Male
    First Name:
    Gary
    Albuquerque, NM
    Vehicle:
    2019 OR, KDSS, RSG sliders, Eibach shocks, 265/70 Falken Wildpeak AT4
    Complements. Right.
     
    Last edited: Jun 20, 2024
    Borracho Loco[QUOTED] likes this.
  4. Jun 20, 2024 at 8:57 PM
    #34
    glwood54

    glwood54 Stop making me buy stuff!

    Joined:
    Aug 19, 2019
    Member:
    #10964
    Messages:
    6,797
    Gender:
    Male
    First Name:
    Gary
    Albuquerque, NM
    Vehicle:
    2019 OR, KDSS, RSG sliders, Eibach shocks, 265/70 Falken Wildpeak AT4
    Same as the other guy - he shows where it is, but doesn't say which way to turn the adjustment nut. I guess you can fill that part in on Sunday.
     
  5. Jun 21, 2024 at 11:15 AM
    #35
    McSpazatron

    McSpazatron New Member

    Joined:
    Feb 16, 2021
    Member:
    #19810
    Messages:
    5,647
    Gender:
    Male
    Vehicle:
    2021 4runner OR
    Dobinson IMS Warn Bumper CaliRaised Sliders 285/70 K02s
    Hmm, I may need to see how much contorting is required. If it’s a one nut adjustment, might be worth contorting.
     
    5thToy likes this.
  6. Jun 21, 2024 at 11:46 AM
    #36
    glwood54

    glwood54 Stop making me buy stuff!

    Joined:
    Aug 19, 2019
    Member:
    #10964
    Messages:
    6,797
    Gender:
    Male
    First Name:
    Gary
    Albuquerque, NM
    Vehicle:
    2019 OR, KDSS, RSG sliders, Eibach shocks, 265/70 Falken Wildpeak AT4
    Seems like if you have one of those adjustable lawn chairs, and it was a similar height to the floor of the 4R, you could lay on that and work inside. My problem is trying to stand on the ground and bend over backwards to look up, and it never seems to work very well.
     
  7. Jun 21, 2024 at 12:35 PM
    #37
    McSpazatron

    McSpazatron New Member

    Joined:
    Feb 16, 2021
    Member:
    #19810
    Messages:
    5,647
    Gender:
    Male
    Vehicle:
    2021 4runner OR
    Dobinson IMS Warn Bumper CaliRaised Sliders 285/70 K02s
    That’s exactly what I’m talking about lol. Phone cameras really help with at least being able to see what you’re reaching for, but it’s still a pain in the ass.
     
  8. Jun 21, 2024 at 12:46 PM
    #38
    1SilverRunner

    1SilverRunner My boy, blue

    Joined:
    Jan 15, 2024
    Member:
    #37925
    Messages:
    1,361
    Gender:
    Male
    Tejas
    Vehicle:
    22 TRD Off Road Premium
    Front Bumper: C4 Fabrication Low-Profile Bumper Warn Evo10-S Winch w/ Warn wireless adapter Extreme LED dual color light bar w/ Cali raised LED OEM style switch Bumper Cover Trimmed For Clearance Rear Bumper: 80% Off Road Rear Bash Bar (Limited rear bumper version) Armor: RCI Skid plate package C4 Gas tank skid RCI Rear diff skid RCI Shock Skids RSG Angled/ Plated Sliders Total Chaos Cam Tab Gussets Total Chaos Spindle Gussets 41.22 Hitch Slider Suspension: Dobinsons IMS long travel shocks: (Front: IMS59-50574 w/ C59-352 Springs) (Rear: IMS59-50575 w/ C59-675v Springs) Apex Chassis Tie Rod Assemblies (KIT410) Apache Off Road UCAs Apache Off Road HD Rear Links (Upper and Lower) Apache Off Road Rear Sway Bar Links Dobinsons Track Bar Front Sway Bar Deleted DuroBumps Rear Bump stops PerryParts Front Bump stops DRKDSS Track Bar Correction kit Dobinsons Diff Drop Wheels/ Tires: RRW 17x8.5 -12 RR6-H Wheels 285/75/17 Falken A/T4W 1.25" SpiderTrax Spacers BMC, Pinch Weld Folded. C4 High Clearance Fender Liners Performance: OTT Tuned Scan Gauge II for Temp Monitoring Yota Shop Diff Breather Storage Solutions: Sherpa Crestone Sport roof rack Aiden James Customs Gear Plate w/ Slide Out Tables *Backordered. Rado Designs Molle storage panels and top shelf Glove Box organizer Center Console organizer Interior: Diode Dynamics LED Interior lighting (Warm white ftw) Meso Customs Hatch lights Meso Customs Door Handle Covers Ram ball mount for Garmin In-Touch Mini II FitCamX Dash Camera Scosche phone mount Weathertech floor matts Misc: Nano Ceramic Tint (Including windshield and sunroof) Midland MXT575 and Ghost Antenna Cali Raised LED 27W Ditch Lights w/ oem style switch OVS Nomadic 6.5' Awning AVS Low Profile Vent Visors AVS Bugflector II Diode Dynamics puddle lights LasFit Reverse lights LED license plate lights Ark Splash Guards Ark Mud Flap Deletes (cut for rear bumper/ bash bar) AJT Push-To-Start Button +Midland handheld GMRS radios, Baofeng UV-5R Ham radio, recovery gear, water purification system, lifeboat food rations, trauma kit, fire extinguisher and fire starting kit stay on board.
    Thank you so much. I didn't realize pulling the center console panel would be so easy.

    I've already tightened the star adjustments at both rear wheels. It was better after that. But still wouldn't hold the vehicle on a steep grade.
    The cable adjustment seems to be the missing piece of the puzzle.
     
  9. Jun 22, 2024 at 1:57 PM
    #39
    McSpazatron

    McSpazatron New Member

    Joined:
    Feb 16, 2021
    Member:
    #19810
    Messages:
    5,647
    Gender:
    Male
    Vehicle:
    2021 4runner OR
    Dobinson IMS Warn Bumper CaliRaised Sliders 285/70 K02s
    Alrighty, since I have more important things to do, I thought I would procrastinate a bit and explore the pedal cable adjustment.

    It’s just like the 4th gen in the video posted earlier.

    It looks absolutely dead simple to adjust, and it’s easily within reach. Unfortunately, there’s no practical way to actually execute the adjustment if you have only have two hands (you need three), if your hands come attached to arms, and if you have bones. Putting the 4runner on its side would help though, or removing the dash I suppose.

    The reason is because you have to hold an open wrench on the black nut (pictured below), while you tighten the silver nut.
    IMG_3966.png


    But I found a work around, if you try it, it’s at your risk since it might end up twisting the cable.

    With the parking brake off, grab the nut and move it around. There should be slack in it so that you can pull at the nut/cable and get a finger tip behind it. That slack is important because it ensures a released pedal is not pulling at the cable in any way whatsoever. If there was no slack when released, the shoes would not completely disengaged from the drum.

    The problem is, too much slack will mean the pedal isn’t able to put enough force onto the shoes until it’s nearly at the end of travel.

    I tried to get a wrench on the black nut, and a socket on the silver nut, but that was impossible for me. In the end, I applied the parking brake tightly, hoping the friction of the black nut on the housing was greater than the friction of the silver nut on the black one. I ended up using a 10mm ratchet wrench (fine tooth ratchet). IMG_3971.jpg
    I was only able to swing it a few clicks at a time, but the it seemed the black nut stayed still. The only way I could verify it was by comparing the exposed threads before and after.
    IMG_3969.png
    IMG_3970.png

    There is still some slack at the cable nut assembly with the pedal released. I’m guessing it’s enough. But the pedal feels a little tighter than before. I really didn’t need to do this because mine was holding well after my previous adjustments, but I prefer to have maximum potential on the brake pedal.

    Have not tested things out yet, so I’ll update once I do what I’m supposed to be doing now lol.
     
  10. Jun 22, 2024 at 2:08 PM
    #40
    glwood54

    glwood54 Stop making me buy stuff!

    Joined:
    Aug 19, 2019
    Member:
    #10964
    Messages:
    6,797
    Gender:
    Male
    First Name:
    Gary
    Albuquerque, NM
    Vehicle:
    2019 OR, KDSS, RSG sliders, Eibach shocks, 265/70 Falken Wildpeak AT4
    I'm not sure what you did with the silver nut. Are you saying that if you could get a wrench on the black nut and could hold it still, which you accomplished instead by pushing the pedal down, you could then turn the silver nut clockwise to tighten up the cable? Or did you remove the silver nut?

    The guy in the video said to remove the silver nut, then tighten the black nut, then replace the silver nut.
     
    Last edited: Jun 22, 2024
    McSpazatron likes this.
  11. Jun 22, 2024 at 3:13 PM
    #41
    nimby

    nimby in the drink

    Joined:
    Mar 27, 2017
    Member:
    #3777
    Messages:
    4,726
    First Name:
    Jake
    California
    Vehicle:
    2018 SR5P
    I just did an adjustment at the pedal.

    Tried to remove the silver nut, but the black nut just spun with it as I was trying to take it off.

    So I just used a 10mm socket wrench on the silver nut and started turning it clockwise to tighten. Again, the black nut spun with it.

    It took quite a few turns (maybe a total of 12 full rotations) but now instead of mashing by e-brake to the floor and still having the truck roll back, it now holds firm in neutral on a steep incline somewhere close to 8-10 clicks. Stoked!
     
  12. Jun 22, 2024 at 3:28 PM
    #42
    McSpazatron

    McSpazatron New Member

    Joined:
    Feb 16, 2021
    Member:
    #19810
    Messages:
    5,647
    Gender:
    Male
    Vehicle:
    2021 4runner OR
    Dobinson IMS Warn Bumper CaliRaised Sliders 285/70 K02s

    I only looked at a picture of the video, so how am I supposed to know how to do it better? :p

    I started on my other thing, but I’ll take a look at it again when I get a chance. My impression led to the assumption of how the cable adjustment operated. Go figure, assumption…that may have been incorrect.

    If the silver nut was simply a lock nut, then it would be easier. I thought the black nut was attached to a cable housing that would keep the cable from twisting as the silver one is tightened down. It appears I may have just cranked on the lock nut and managed to spin both? Now I really have to look at it more carefully.
     
  13. Jun 22, 2024 at 3:38 PM
    #43
    McSpazatron

    McSpazatron New Member

    Joined:
    Feb 16, 2021
    Member:
    #19810
    Messages:
    5,647
    Gender:
    Male
    Vehicle:
    2021 4runner OR
    Dobinson IMS Warn Bumper CaliRaised Sliders 285/70 K02s

    Did you have the parking brake fully applied when you tried this?

    I think I counted 4 threads when I started, and 6 when I stopped (two full rotations). 12 full rotations seems like a lot. Did you check to see if you still have slack in the nut with the brake released to make sure you didn’t overtighten?

    Based on @glwood54 observation, I am not sure if the black nut is threaded to the threaded cable end, or of it’s just a hole through which the screw cable end passes.

    I may be overthinking this, but it bears verification before anybody else tries this. There is potential to unwind/twist the cable, or strip the threaded end, depending on what the black nut does.
     
    Last edited: Jun 22, 2024
  14. Jun 22, 2024 at 3:48 PM
    #44
    nimby

    nimby in the drink

    Joined:
    Mar 27, 2017
    Member:
    #3777
    Messages:
    4,726
    First Name:
    Jake
    California
    Vehicle:
    2018 SR5P
    No, the parking brake was fully released while adjusting.

    My parking brake was pretty worthless prior to this adjustment (hence needing more rotations).

    My only ragret was not doing it 100k miles sooner.
     
    Last edited: Jun 23, 2024
    SlvrSlug likes this.
  15. Jun 22, 2024 at 4:53 PM
    #45
    glwood54

    glwood54 Stop making me buy stuff!

    Joined:
    Aug 19, 2019
    Member:
    #10964
    Messages:
    6,797
    Gender:
    Male
    First Name:
    Gary
    Albuquerque, NM
    Vehicle:
    2019 OR, KDSS, RSG sliders, Eibach shocks, 265/70 Falken Wildpeak AT4
    It makes sense that the silver nut is a lock nut, that gets backed off so the black nut can be tightened to adjust the tension on the cable. The silver nut then gets tightened once again. IF you have hands the size of a hamster.

    I did confirm there's a small bit of slack at the nut bracket with the pedal all the way up on my 4R.
     
    Last edited: Jun 22, 2024
  16. Jun 22, 2024 at 9:43 PM
    #46
    glwood54

    glwood54 Stop making me buy stuff!

    Joined:
    Aug 19, 2019
    Member:
    #10964
    Messages:
    6,797
    Gender:
    Male
    First Name:
    Gary
    Albuquerque, NM
    Vehicle:
    2019 OR, KDSS, RSG sliders, Eibach shocks, 265/70 Falken Wildpeak AT4
    It stands to reason the black nut is also threaded on to the cable end, because if not, when the guy in the 4th gen video loosened the silver nut, and actually removed it, the cable would have slipped out of the bracket with no threads holding it.
     
  17. Jun 23, 2024 at 10:55 AM
    #47
    McSpazatron

    McSpazatron New Member

    Joined:
    Feb 16, 2021
    Member:
    #19810
    Messages:
    5,647
    Gender:
    Male
    Vehicle:
    2021 4runner OR
    Dobinson IMS Warn Bumper CaliRaised Sliders 285/70 K02s
    I don’t think it’s a completely loose nut, but rather I suspect it might be a captured spinning nut that’s part of the bracket or part of the cable itself. Some cables are sheathed and terminated with something that you can hold on to, so the cable doesn’t spin when tightening in a situation like this mechanism. It’s just a suspicion though. Which is why it’s worth preceeding with more caution than I did lol.
     
  18. Jun 23, 2024 at 11:26 AM
    #48
    nimby

    nimby in the drink

    Joined:
    Mar 27, 2017
    Member:
    #3777
    Messages:
    4,726
    First Name:
    Jake
    California
    Vehicle:
    2018 SR5P
    I drove around a bit today and noticed my rear brakes were dragging slightly more than I care for.

    Backed the pedal adjustment off about 3 turns so now I'm at 9. It's better now.
     
    McSpazatron likes this.
  19. Jun 23, 2024 at 11:31 AM
    #49
    glwood54

    glwood54 Stop making me buy stuff!

    Joined:
    Aug 19, 2019
    Member:
    #10964
    Messages:
    6,797
    Gender:
    Male
    First Name:
    Gary
    Albuquerque, NM
    Vehicle:
    2019 OR, KDSS, RSG sliders, Eibach shocks, 265/70 Falken Wildpeak AT4
    In for @Scarif_1's findings...it seems no one but the guy in the 4th gen video has been able to successfully loosen the silver lock nut.
     
  20. Jun 23, 2024 at 6:37 PM
    #50
    Scarif_1

    Scarif_1 [OP] New Member

    Joined:
    Jan 7, 2020
    Member:
    #12611
    Messages:
    201
    Gender:
    Male
    Oakland
    Vehicle:
    2020 TRD ORP
    Bilstein 6112s @ 3” w/ 5160s & Dobinsons 1.5" rear springs. SPC UCAs & Perry Parts Bump Stops. SCS F5s & Toyo RT Trail 285/70R17. C4 Sliders.
    My parking brake has achieved Chuck Norris status and will now hold the weight of a mildly modified 4Runner downslope and upslope in neutral on steep inclines.

    My case of a weak brake was pretty mild compared to some others here but it’s worlds stronger now.

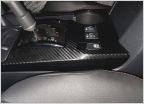
    I am not going to say it’s the “correct” way but I can confidently say the center console method is the easiest and yields some pretty good results for the effort. You don’t have to pull off the wheels and you don’t have to contort yourself under the pedal. Unscrew you shifter and transfer case knobs, squeeze each side of the console together and gently lift up. There are no locking clips to break so it will gradually come off. There are a couple of electrical connectors you can unclip to give yourself some room to work. The hardest thing is getting your chunky hands and tools in there to break free the locknut. Took me like 10m trying a variety of tools. Once undone and removed it’s super easy to increase the tension on the cable. You can feel the difference in the pedal with each turn. I have mine biting at 5 and in Chuck Norris mode at 7. I have to mash down to get 8 and reaching the floor isn’t possible. I ended by jacking up the rear from the diff. and without the brake engaged gave each wheel a spin to see if there was any drag. Pulled out of the driveway and tested upslope and downslope on the steep street I live on and that was it.

    My shoe star nuts still have their factory settings and original shoes so I didn’t have to worry if I was adjusting one side more than the other.

    I think this is such an easy thing to do there’s really no reason why it shouldn’t be done.

    IMG_4599.jpg
    IMG_4598.jpg
     
    McSpazatron, nimby and icebear like this.
  21. Jun 23, 2024 at 8:20 PM
    #51
    glwood54

    glwood54 Stop making me buy stuff!

    Joined:
    Aug 19, 2019
    Member:
    #10964
    Messages:
    6,797
    Gender:
    Male
    First Name:
    Gary
    Albuquerque, NM
    Vehicle:
    2019 OR, KDSS, RSG sliders, Eibach shocks, 265/70 Falken Wildpeak AT4
    Thanks for the followup. Do you think the pedal adjustment, if one could get in there, would accomplish the same end result as the center console adjustment? The adjustment method is the same on both ends.
     
    Last edited: Jun 23, 2024
  22. Jun 23, 2024 at 8:53 PM
    #52
    Scarif_1

    Scarif_1 [OP] New Member

    Joined:
    Jan 7, 2020
    Member:
    #12611
    Messages:
    201
    Gender:
    Male
    Oakland
    Vehicle:
    2020 TRD ORP
    Bilstein 6112s @ 3” w/ 5160s & Dobinsons 1.5" rear springs. SPC UCAs & Perry Parts Bump Stops. SCS F5s & Toyo RT Trail 285/70R17. C4 Sliders.
    People are seeing the same results so I think so. I just couldn’t understand what’s beyond that black adjusting nut at the pedal because it’s housed in metal so I tackled the console because there it was all out in the open to understand. Plus you can make a rotation on the tension adjusting bolt and check the pedal feel while sitting comfortably in the drivers seat.
     
    McSpazatron likes this.
  23. Jun 23, 2024 at 9:07 PM
    #53
    glwood54

    glwood54 Stop making me buy stuff!

    Joined:
    Aug 19, 2019
    Member:
    #10964
    Messages:
    6,797
    Gender:
    Male
    First Name:
    Gary
    Albuquerque, NM
    Vehicle:
    2019 OR, KDSS, RSG sliders, Eibach shocks, 265/70 Falken Wildpeak AT4
    Mine holds reasonably well on a small incline, but I want a bit more grab sooner in the pedal, so I will go the route of the center console. Thanks for trying it and reporting the results.
     
    McSpazatron likes this.
  24. Jun 24, 2024 at 9:22 AM
    #54
    nimby

    nimby in the drink

    Joined:
    Mar 27, 2017
    Member:
    #3777
    Messages:
    4,726
    First Name:
    Jake
    California
    Vehicle:
    2018 SR5P
    When you spun the wheel after the cable adjustment would you say there was zero drag? My shoes are still slightly touching. When I jack up the rear and spin the tire, it goes about 1.5 revolutions before stopping.

    My ebrake was at Chuck Norris mode when I cranked on the pedal adjustment but there was quite a bit of brake drag caused from that. Now that I have backed it off, it's no longer on Chuck Norris mode but it can hold the vehicle (still some slight drag though). If I back it off any further, I'll loose the brake hold I want.
     
    Last edited: Jun 24, 2024
  25. Jun 24, 2024 at 11:05 AM
    #55
    Scarif_1

    Scarif_1 [OP] New Member

    Joined:
    Jan 7, 2020
    Member:
    #12611
    Messages:
    201
    Gender:
    Male
    Oakland
    Vehicle:
    2020 TRD ORP
    Bilstein 6112s @ 3” w/ 5160s & Dobinsons 1.5" rear springs. SPC UCAs & Perry Parts Bump Stops. SCS F5s & Toyo RT Trail 285/70R17. C4 Sliders.
    I wouldn’t say zero drag like a bicycle wheel. More like an acceptable amount of drag that’s already wore-in and feeling better after some freeway driving. I think it’s all a matter of personal preference and needs. In a month I’ll be on some off camber shelf roads. I need 100% Chuck as backup. Maybe if you’re not preparing for a trip just dial-in 80% Chuck and just add “dial-in 100% Chuck parking brake” to your vehicle checklist for your next trip.
     
    icebear, glwood54 and nimby[QUOTED] like this.
  26. Jun 24, 2024 at 12:56 PM
    #56
    glwood54

    glwood54 Stop making me buy stuff!

    Joined:
    Aug 19, 2019
    Member:
    #10964
    Messages:
    6,797
    Gender:
    Male
    First Name:
    Gary
    Albuquerque, NM
    Vehicle:
    2019 OR, KDSS, RSG sliders, Eibach shocks, 265/70 Falken Wildpeak AT4
    New thread title: Where Is Your Parking Brake on the Chuck-O-Meter?
     
    icebear and Scarif_1[OP] like this.
  27. Jun 24, 2024 at 1:25 PM
    #57
    Scarif_1

    Scarif_1 [OP] New Member

    Joined:
    Jan 7, 2020
    Member:
    #12611
    Messages:
    201
    Gender:
    Male
    Oakland
    Vehicle:
    2020 TRD ORP
    Bilstein 6112s @ 3” w/ 5160s & Dobinsons 1.5" rear springs. SPC UCAs & Perry Parts Bump Stops. SCS F5s & Toyo RT Trail 285/70R17. C4 Sliders.
    Chuck approves of this survey.

    IMG_4626.png
     
    1SilverRunner likes this.
  28. Jun 25, 2024 at 2:41 PM
    #58
    McSpazatron

    McSpazatron New Member

    Joined:
    Feb 16, 2021
    Member:
    #19810
    Messages:
    5,647
    Gender:
    Male
    Vehicle:
    2021 4runner OR
    Dobinson IMS Warn Bumper CaliRaised Sliders 285/70 K02s
    My rear parking brakes are so Chuck Norris, the rear passenger side holds stronger than the driver side….AND vice versa!!!
     
    icebear and glwood54[QUOTED] like this.
  29. Jun 25, 2024 at 4:28 PM
    #59
    Manhattan

    Manhattan New Member

    Joined:
    Feb 18, 2024
    Member:
    #38590
    Messages:
    276
    Gender:
    Male
    My 2020 sticks to hills like a refrigerator magnet.
     
    Last edited: Jun 26, 2024
    glwood54 and icebear like this.
  30. Jun 25, 2024 at 4:40 PM
    #60
    Jedi5150

    Jedi5150 New Member

    Joined:
    Dec 3, 2022
    Member:
    #29906
    Messages:
    512
    Gender:
    Male
    PNW
    Vehicle:
    2022 4Runner ORP
    Hey now, the last time I drove through your fine city I got snowed on. Are you sure about the "no shoveling snow" part? :p My youngest daughter lives there, currently.

    As for the thread topic, I know that the "carcarenut" guy on youtube, who is the Toyota whisperer of mechanics, says that with any automatic vehicle, the correct method of parking is to park in neutral, put on the parking brake, then shift it into Park and turn the vehicle off. That way the transmission is not taking the strain, but it is more secure than using the brake and neutral. Once I heard him say that I've been doing it religiously ever since.
     

Products Discussed in

To Top