1. Welcome to 4Runners.com!

    You are currently viewing as a guest! To get full-access, you need to register for a FREE account.

    As a registered member, you’ll be able to:
    • Participate in all 4Runner discussion topics
    • Transfer over your build thread from a different forum to this one
    • Communicate privately with other 4Runner owners from around the world
    • Post your own photos in our Members Gallery
    • Access all special features of the site

Corrosion protection inside the frame?

Discussion in '5th Gen 4Runners (2010-2024)' started by 4R Florida, Apr 7, 2024.

  1. Apr 9, 2024 at 10:31 AM
    #31
    McSpazatron

    McSpazatron New Member

    Joined:
    Feb 16, 2021
    Member:
    #19810
    Messages:
    5,408
    Gender:
    Male
    Vehicle:
    2021 4runner OR
    Dobinson IMS Warn Bumper CaliRaised Sliders 285/70 K02s
    The paraffin based stuff I’ve used before (like the Maxima chain wax @djwantke mentioned before) is nice because it sets up a little harder. It’s a waxy finish, ironically unlike the woolwax (which is greasy). It also seems to be easier to clean mud off of.

    I bet the 3m stuff is similar. If it’s anything like maxima chain was, ths petroleum distillates used as a solvent makes it very thin, which really makes it wick up into sandwich weldments and seams via capillary action, as opposed to simply slow creeping like lanolin based stuff. If you use the 3m stuff please post your impressions!
     
    Last edited: Apr 9, 2024
    djwantke likes this.
  2. Apr 9, 2024 at 12:16 PM
    #32
    djwantke

    djwantke New Member

    Joined:
    Jan 31, 2021
    Member:
    #19487
    Messages:
    3,444
    Gender:
    Male
    Maple Ridge, British Columbia
    Vehicle:
    2016 4Runner Trail Premium
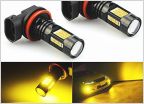
    Bought brand new 2016 After May 2021: -Approx 3" lift/level: Bilstein 5100's, OME 2884 590lb 3" front lift springs, SPC UCA's, ICON 158506 2" lift rear coils, diff drop -Mickey Thompson Baja ATZ LT285/70R17 Load E -Mickey Thompson Sidebiter ll 17x9, 0 offset, 5 backspace -Pro Comp black spline lugs ^installed by 4WheelParts^ -New brakes and rotors by brake shop -4-piece ARB skid kit -Smittybilt 2" nerf steps -MBRP black exhaust tip, chopped OEM -Drivers side OEM FJ oh shit handle -All blacked out emblems -Blacked out roof rails -4x WeatherTech window rain guards -OEM custom rear mud flap deletes -KICK BACK MUD FLAPS 12" WIDE - BLACK TOP AND BLACK WEIGHT -FRAM EXTRA GUARD CA10835 engine air filter -1797 LED tricolor fog bulbs Yellow 3000K White 6000K Blue 15000K 28W 4000LM -Armour paint lower rear bumper -Front bumper high stage high clearance cut -Fenders cut straight across, pink reservoir sprayed black -4Runner Lifestyle sequential fog fangs -4Runner Lifestyle smoked taillight decals -Pedal Commander -Rear passenger cargo mounted 120v truck tire pump -4x Spidertrax 1.25" black aluminum wheel spacers -Yota Twins Paracord Hatch Strap sand camo -Teton Workshop hard anodized matte black aluminum shift knob -Ditch flood lights 4 LED 20w 1400lm w/ OEM hood mounts on OEM style dash switch -Backup flood lights under bumper 6 LED 18w 1500lm on OEM style dash switch -Body Mount Chop; cut, weld, paint -Fender mount chop, re-weld, paint -Fender Liner cut behind wheel (I cut liner in front of wheel clean off at top of viper cut) -Wheel well firewall hammering, painting ^done by Arc One Industries^ -valance cap trim -Agency6 Black Shackle Block 2" US Certified 6061 T6 CNC machined aluminum -DRT fab universal hitch skid -ACDelco inner tie rods, outer tie rods, bellows -Full Dr. KDSS switch kit -March 31 Behind grille 13-1/4" 32 LED light bar + wide-angle, eagle-eye lens 6000lm on OEM style dash switch -RAA Powder coated steel roof rack cargo basket, 1" side rails, 64" x 39" x 6", 250lb limit -roof gas can, water can, shovel -PEAKTOW PTT0063 Hitch Mount Cargo Carrier 51-1/2 x 17-1/2 x 4 inches 500 lbs. Capacity (trips only) -July/2023: purchased first needed SPC balljoint replacement kit - newly released, upgraded non-zerk sealed joints 25002 -July 15/2023: The Original Universal EZ Flares, 1". All four corners -Dec. 2023: removed bumper cover and crash bar, drilled frame, installed Apex Overland KDSS Recovery Points -Jan. 2024: SPC balljoint replacement kit - upgraded non-zerk sealed joint design 25002 -Feb. 3/ 2024: 4x KC Wire Hiders, for roof rack lighting Feb. 13/2024: New ditch lights, on new Rago Fabrication Extension brackets. 3inch Quad Row Amber Pods from LED-Club. 32W 3200Lm 16-LED Spot Beam. Replacing 3inch EVERGEAR clear lens ditch light pods w/ yellow lamix-x In progress: 4th, 5th, and 6th set of off road lights Electrical components and wiring purchased, not started -roof rack scene lighting - EVERGEAR ea. 1,350 lumens, 30w, 3-¾" round floods. Custom, side mounted w/ galvanized flat bar And -roof rack upper ditch lights - 3inch Quad Row Amber Pods from LED-Club. 32W 3200Lm 16-LED Spot Beam. Bar clamp mounted to front corners And -roof rack reverse amber pods / secondary hazard lights. 20W 2000Lm 2-LED Spot Beam. Bar clamp mounted to rear side And -roof rack F1 smoked chase light w/ lighting effects. Custom bolted to rear side -POR15 rust proofing line-up, 3-step process PAUSED until 70⁰ weather Bought, in the garage queue: -BlueFire 6-Circuit Fuse Block with LED Indicator & Protection Cover -Blue Sea Systems 100A Circuit Breaker w/ reset lever -Rust prevention •New can POR15, 2x Black Fluid Film, long spray nozzle attachments, 2x PB Surface Shield, 1x Chainwax •partially used POR15 Degreaser, Metal Prep Wanted - PerryParts or Wheelers bump stops, self fabricated limb risers (seasonal, removable), 1" body lift, powder coated center winch bumper w/ large bar (got no tss), rear steel bumper w/ tire carrier for an LT285 Kumho on steely, sliders, bolt on cat shields
    Excellent stuff, much appreciated @McSpazatron

     
    McSpazatron likes this.
  3. Apr 10, 2024 at 10:27 AM
    #33
    Yotaholic

    Yotaholic New Member

    Joined:
    Mar 8, 2023
    Member:
    #31655
    Messages:
    3,325
    Olympia, WA
    Use Surface Shield, it is better than fluid film, stays longer.
     
    Spare Parts likes this.
  4. Apr 20, 2024 at 7:05 PM
    #34
    4R Florida

    4R Florida [OP] New Member

    Joined:
    Feb 6, 2024
    Member:
    #38369
    Messages:
    344
    Gender:
    Male
    Northeast Florida
    Vehicle:
    2024 4R Off Road
    Today I inserted my long magic wand into every orifice. :eek:

    I highly recommend the 3M Cavity Wax with the 3M applicator wands to anyone who wants a mess-free and easy application. It costs a little more than other options, but not a single drop leaked. I did not get it all over me. I only had a few drips out of holes that I wiped up with paper towels. It took exactly two cans to do the whole inside of the frame and cross members thoroughly, but I am glad I ordered three cans. Nobody wants to run out near the end and have to come back after ordering more.

    1) It comes out of the 34" wand as a 360-degree very fine mist/fog.
    2) If you are pulling the wand so slowly that it starts to drip out of holes, speed up a little. Watch the 3M videos.
    3) You can do it alone. I discovered that the skid plate under the oil pan has a hook on the rear of the driver side to facilitate one-person removal and reinstallation. The front skid plate has two hooks at the front for the same reason, but I already knew that b/c it's the same one that was on my FJ Cruiser.
    4) The wand is easily cleaned for future use. Invert an empty can and blast the remaining pressure through the wand to clean it out.
    5) Any cleanup is easy with mineral spirits. Soap and hot water took most of the waxy mist off of my forearms.
    6) Do it outside with air moving because the mineral spirits fog is flammable and stinky. Stay upwind. If no wind, just use a fan.
    7) Insert the 34" wand into every orifice and overlap your sections internally a little bit. There are plenty of orifices to use. You only need one every few feet because the wand is so long.
    8) Make sure that you get every cross member.
    9) Remove the nozzle and wand from the can as you work to reinsert the wand. I did break one of the nozzles near the end of the project. Fortunately, you get three nozzles.
    10) The cans only spray in the upright position, which is fine.
    11) Total time from start to finish: about 2 hours.
    12) It is very thin with a mineral spirits solvent, so it will creep itself into every microscopic nook and cranny and pore before the solvents dry, which I expect to take about 10 days. It will puddle internally in the same spots where water will puddle, leaving extra protection in those spots.
    13) 3M generally makes pretty good stuff, so I trust the product.

    I'll order another can to go with my spare can and wait 6 months to do another coat inside. The solvents should have dried by then, leaving only a tacky paraffin wax coating. 3M recommends 2-3 coats.

    This worked great. Highly recommended for those wanting a simple, clean DIY job. :thumbsup:

    https://www.amazon.com/dp/B07B4DFTXF?ref=ppx_yo2ov_dt_b_product_details

    https://www.amazon.com/dp/B0741FHDPF?ref=ppx_yo2ov_dt_b_product_details&th=1
     
    Last edited: Apr 20, 2024
    McSpazatron and Trail Runnah like this.
  5. Apr 21, 2024 at 1:17 AM
    #35
    wing2

    wing2 New Member

    Joined:
    Apr 12, 2024
    Member:
    #39774
    Messages:
    50
    Gender:
    Male
    First Name:
    Richard
    Vehicle:
    2024 SR5 Premium
  6. Apr 21, 2024 at 12:38 PM
    #36
    4R Florida

    4R Florida [OP] New Member

    Joined:
    Feb 6, 2024
    Member:
    #38369
    Messages:
    344
    Gender:
    Male
    Northeast Florida
    Vehicle:
    2024 4R Off Road
    I wanted something that would be semi-permanent inside the frame instead of something organic/biodegradable like so many, so I chose the 3M mixture of mineral spirits and paraffin wax. Last night after fixing dinner and cleaning up, after about 10 hand washes, I still had wax residue on my hands. That's a good sign. I'll use the wands to apply another layer in about 6 months and call it done for at least a few years. It ought to be pretty durable on the inside surfaces.

    I had the underbody sprayed with Tectyl 2012. It looks good, but only time will tell. It can only be applied to a brand new vehicle. They have another product for ones that have started to rust. I'm surprised at how thin it went on, like a heavy coat of paint. It's thinned with xylene and toluene so it smells like bubble gum (xylene) as it cures. I hope its tough when dry. Still soft after 4 days but no longer smells.

    https://www.youtube.com/watch?v=oyiLCUpGlas
     
  7. Apr 21, 2024 at 1:48 PM
    #37
    4R Florida

    4R Florida [OP] New Member

    Joined:
    Feb 6, 2024
    Member:
    #38369
    Messages:
    344
    Gender:
    Male
    Northeast Florida
    Vehicle:
    2024 4R Off Road
    Anybody know what the green dip at the factory is? My 2011 FJ Cruiser said the frame was treated with "electro deposited" something or other I think.

    Time stamped to start with the frame dip:

    https://youtu.be/ikKByP6H_58?t=285
     
  8. Apr 28, 2024 at 3:18 PM
    #38
    4R Florida

    4R Florida [OP] New Member

    Joined:
    Feb 6, 2024
    Member:
    #38369
    Messages:
    344
    Gender:
    Male
    Northeast Florida
    Vehicle:
    2024 4R Off Road
    Are the rocker panels also an issue? If so, do they have any openings that lead to the inside of the vehicle? I don't want to smell it inside.

    I did the insides of both of the step bars before I put them on. They are steel and the ones on my FJ Cruiser did rust through.

    Any other areas I should do with the remaining can of cavity wax?
     
  9. Apr 28, 2024 at 4:28 PM
    #39
    Chozen

    Chozen New Member

    Joined:
    Apr 27, 2024
    Member:
    #40088
    Messages:
    176
    Gender:
    Male
    Vehicle:
    2024 4Runner ORP
    Where are you gonna move? Well I’ll just say that I was researching this because I wouldn’t wanna buy a 4Runner without getting it protected professionally (I live around snow/salt), I could be wrong but the most promising place that I’ve seen is in Pittsburgh Pennsylvania. It really looks like they exceed the quality of the products that can be bought over the counter (they claim to have a higher quality patented product, and their most involved protection procedure involves taking a bunch of things apart to be more thorough, AND they do NOT drill any holes!!) Having said that I admit that I could be falling for their hype, IDK, however the reviews look pretty solid! Steel City Undercoating it’s called. If I get the 4Runner screw it, I’m gonna take a long road trip there and go with them. At least for the initial undercoating.
     
    Last edited: Apr 28, 2024
  10. Apr 28, 2024 at 4:51 PM
    #40
    4R Florida

    4R Florida [OP] New Member

    Joined:
    Feb 6, 2024
    Member:
    #38369
    Messages:
    344
    Gender:
    Male
    Northeast Florida
    Vehicle:
    2024 4R Off Road
    Undetermined. Depends on job market and just how cold I am willing to get in the winter. I may not go farther north than North Carolina, Kentucky, Virginia, Tennessee etc.

    It's now fully undercoated with Tectyl 2102, at about 100 miles on odometer before any rust had a chance to start. They dropped the skid plates including the one under the fuel tank (for a small fee) and did both sides of them. They did a good job. They got everything underneath. I sprayed 3M cavity wax inside entire the frame and the cross members. I wanted it all done for peace of mind and just in case I ever sell it for some reason. I want it in good shape under there.

    I have 1/2 of a can of 3M cavity wax left and can put it wherever else it is needed. I was thinking about the rocker panels as I was under there today bolting on the step bars.
     
  11. Apr 28, 2024 at 5:02 PM
    #41
    Chozen

    Chozen New Member

    Joined:
    Apr 27, 2024
    Member:
    #40088
    Messages:
    176
    Gender:
    Male
    Vehicle:
    2024 4Runner ORP
    That’s awesome. I’m still researching places, I’ll check out their website too. Yeah I understand what you’re saying about 100 miles, I would also like to IMMEDIATELY get it done. However I also realize that the most critical consideration by far is for me to do it before any snow/salt which I obviously have plenty of time for. So even if I can’t get it done ASAP I’ll still definitely beat the salt.

    Lol so my dilemma is rock sliders. Like you I’d love to get it done ASAP, but my dilemma is that I’m not positive if I’ll buy the 4Runner yet until it arrives and I’m in the dealership (because I need to see how I’m treated with my trade in value)…BUT I wanna get rock sliders, and I want them to be included with the rust protection procedure. However rock sliders could be like a 2 month wait!! Ugh, these damn 1st world problems!! Lol. Jeez, you’re moving AWAY from Florida??? I dream of moving TO Florida lol.
     
  12. Apr 28, 2024 at 5:17 PM
    #42
    4R Florida

    4R Florida [OP] New Member

    Joined:
    Feb 6, 2024
    Member:
    #38369
    Messages:
    344
    Gender:
    Male
    Northeast Florida
    Vehicle:
    2024 4R Off Road
    I waited to install my step bars until after the undercoating was done. I wanted it done behind the brackets and I didn't want the step bars to get in the shop's way. I also didn't want them in my way as I did the cavity wax. They have been sitting in my living room since I bought the 4R last month. It's amazing how large truck parts are when brought inside. I also had the rear bumper inside for 2 days as I changed the silver garnish to black. It's pretty big indoors!

    I have been in Florida my entire life except fo 4 years spent mostly in Virginia. Fished all parts of Florida all my life both inshore and offshore. Had a small boat and sold it. Enjoyed trips the the Keys a few times. Enjoyed the beach and water my whole life. Enjoyed mild winters my whole life. I want to be closer to mountains now, somewhere on the east coast. My beach and salt and heat days are over. The new 4R is perfect for camping trips. I hated to trade in my beloved FJ Cruiser, but I can't afford both.

    Even if I go where they don't use salt, I still have the peace of mind that it's all protected underneath as best it can be. The Tectyl 2102 is a very tough but thin black coating that is thinned with xylene and other nasty stuff that makes it stick very hard. It still smells a little like bubble gum as the xylene dries out. The cavity wax is a mineral spirits base, and it stinks to high heaven, but it's not too bad because it's all inside the frame and the truck is sitting outside while the solvents evaporate.
     
    Chozen likes this.
  13. Apr 28, 2024 at 5:50 PM
    #43
    Chozen

    Chozen New Member

    Joined:
    Apr 27, 2024
    Member:
    #40088
    Messages:
    176
    Gender:
    Male
    Vehicle:
    2024 4Runner ORP
    I agree that both are awesome, hot weather beach scenery, and nice snowy mountain scenery. What sucks is dealing with the freezing cold, but without the cool mountain scenery. So you have the right idea!!

    Well I’m a novice at all of this, so maybe you’re right and I’m overthinking the need to include the rock sliders in with the undercoating procedure. Yeah maybe I’ll just decide to get the undercoating done ASAP, and then just put the sliders on whenever they arrive!!
     
  14. Apr 28, 2024 at 5:55 PM
    #44
    4R Florida

    4R Florida [OP] New Member

    Joined:
    Feb 6, 2024
    Member:
    #38369
    Messages:
    344
    Gender:
    Male
    Northeast Florida
    Vehicle:
    2024 4R Off Road
    I'm interested in anyone's thoughts on this.

    Also, I find the large rubber plugs in the sheet metal floor pans in the center of the vehicle on both sides bizarre. I popped them out and the back of the carpet is right there on the other side! I guess if you drive your 4R into the ocean or a retention pond and need to drain the water from the floor pans those big holes might work. :eek: I'll be sealing over them with Kilmat sound deadening anyway. The road noise coming from the floor pans is unacceptable. I need to figure out how to pull the carpet back from the front without removing the front seats. The rear wheel wells and cargo area look like a PITA but it must be done. I was hoping the Tectyl 2102 would kill the noise, but it's not that type of coating. It's thin. Just good for corrosion protection and a clean appearance, not killing noise.
     
    Last edited: Apr 28, 2024

Products Discussed in

To Top