1. Welcome to 4Runners.com!

    You are currently viewing as a guest! To get full-access, you need to register for a FREE account.

    As a registered member, you’ll be able to:
    • Participate in all 4Runner discussion topics
    • Transfer over your build thread from a different forum to this one
    • Communicate privately with other 4Runner owners from around the world
    • Post your own photos in our Members Gallery
    • Access all special features of the site

Professional vs at home lift install

Discussion in '5th Gen 4Runners (2010-2024)' started by typark, Feb 12, 2020.

  1. Mar 30, 2021 at 5:17 AM
    #31
    zw470

    zw470 New Member

    Joined:
    Apr 24, 2019
    Member:
    #9651
    Messages:
    24
    Gender:
    Male
    First Name:
    Marty
    Vehicle:
    2015 Trail
    Buy a set of ratcheting combination wrenches. I probably wasted an hour using a normal combination wrench on the top shock bolts.
     
  2. Mar 30, 2021 at 5:22 AM
    #32
    PJSnow

    PJSnow New Member

    Joined:
    Dec 11, 2019
    Member:
    #12291
    Messages:
    164
    First Name:
    PJ
    New York
    Vehicle:
    2018 Cavalry Blue TRD Pro
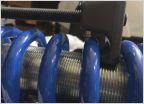
    It is a Bilstein TRD Pro strut assembly and I am trying to install the Toytec lower spring seat/perch and the extended top studs (https://www.youtube.com/watch?v=Ztjp5hbcMEE&ab_channel=ToyTecLifts). I am trying to save both the strut and spring (both are in good shape).

    The three top strut nuts (attaching strut to frame) are not the issue. I can remove the strut just fine but I can no longer remove the middle strut nut at the top of the stem. The small "nub" that is used to stop the stem from spinning is now sheared off (see photo from my previous post).
     
  3. Mar 30, 2021 at 5:47 AM
    #33
    Charlievee

    Charlievee New Member

    Joined:
    Dec 20, 2018
    Member:
    #8149
    Messages:
    1,353
    https://youtu.be/5E6u7dC7EHg

    Vid shows how to disassemble the coil overs without a spring compressor. If the shock turns you can do what shop suggested and "clamp the rod" use vise grips and a cut section of hose to prevent damage to the finish. Not sure how much thread is exposed, maybe you can find or make thin wall nuts to "double nut" and prevent it from turning.
     
    mve likes this.
  4. Mar 30, 2021 at 6:37 AM
    #34
    zw470

    zw470 New Member

    Joined:
    Apr 24, 2019
    Member:
    #9651
    Messages:
    24
    Gender:
    Male
    First Name:
    Marty
    Vehicle:
    2015 Trail
    My post was a suggestion for the OP.
     
  5. Mar 30, 2021 at 7:34 AM
    #35
    PJSnow

    PJSnow New Member

    Joined:
    Dec 11, 2019
    Member:
    #12291
    Messages:
    164
    First Name:
    PJ
    New York
    Vehicle:
    2018 Cavalry Blue TRD Pro
    Thanks for the feedback!
    I am not too worried about compressing the spring; I plan to rent a different style of spring compressors that don't require clamping around the back of the coil. I figured an "experienced" shop would be able to properly disassemble the strut but that is not the case.
    I was worried about damaging the smooth shaft but if rubber is an adequate buffer, then that seems to be the only way. Post 29 shows a photo of how many threads are left. No room for the double nut method.
     
  6. Mar 30, 2021 at 2:16 PM
    #36
    PCRIDE4RUNNER

    PCRIDE4RUNNER New Member

    Joined:
    Mar 25, 2018
    Member:
    #5722
    Messages:
    449
    SUPER DUPER
    Vehicle:
    2018 TRD OR
    I just used the harbor freight spring compressor. I was only doing 2" lift so didn't need to compress all that much.
     
  7. Mar 30, 2021 at 3:43 PM
    #37
    dustinb14

    dustinb14 New Member

    Joined:
    Feb 24, 2021
    Member:
    #19964
    Messages:
    27
    Gender:
    Male
    Vehicle:
    2021 Magnetic Gray TRD Offroad Premium
    Every time I try to work on my own stuff underneath I end up running into something that leaves me scratching my head and frustrated haha. Took my lift guy 2 hours to do front strut top mount spacer, diff drop, and rear coil spring spacers. So don’t be paying for 9 hours labor for something like what you got.
     
  8. Mar 30, 2021 at 4:18 PM
    #38
    fajitas21

    fajitas21 New Member

    Joined:
    Aug 2, 2016
    Member:
    #2395
    Messages:
    1,344
    Gender:
    Male
    First Name:
    Lee
    Collierville, TN
    Vehicle:
    2020 ORP
    Custom scratches
    @PJSnow to answer your question, you won't need the nub with an impact, it will pull it off.

    As always, that spring compressors are somewhat sketchy so always consider the stored energy you're building up and be safe.

    Personally, Bilstein 5100's are pretty cheap so if you botch the strut too badly, it's a nice plan B.
     
  9. Mar 31, 2021 at 5:53 AM
    #39
    PJSnow

    PJSnow New Member

    Joined:
    Dec 11, 2019
    Member:
    #12291
    Messages:
    164
    First Name:
    PJ
    New York
    Vehicle:
    2018 Cavalry Blue TRD Pro

    Thank you for confirming the impact method! I will give it a try (hopefully) this weekend.

    Bilstein 5100's are a good plan B but if it comes to that, I may just want to jump for 6112's. I feel the 5100's are a step down from the TRD Pro suspension. Let's hope it doesn't lead to that but I will cross that bridge when/if it comes.
     
  10. Mar 31, 2021 at 6:09 AM
    #40
    fajitas21

    fajitas21 New Member

    Joined:
    Aug 2, 2016
    Member:
    #2395
    Messages:
    1,344
    Gender:
    Male
    First Name:
    Lee
    Collierville, TN
    Vehicle:
    2020 ORP
    Custom scratches
    Understood. The TRD Pro Bilsteins aren't much of an upgrade over 5100's but I do think they might be better.

    Either way, and this sounds somewhat apathetic but I don't mean it that way:
    If you break it, it's just money, and learning. In the end the education is probably worth more than the money lost. In the short term, doh!
     
    PJSnow[QUOTED] likes this.
  11. Feb 13, 2023 at 7:07 PM
    #41
    smithkanye

    smithkanye New Member

    Joined:
    Feb 13, 2023
    Member:
    #31244
    Messages:
    8
    Gender:
    Male
    Installing your own lift kit is a great way to save money and get your hands dirty. Just make sure to take it slow and be extra careful when handling delicate areas.
    From what I've seen on YouTube, there are a few areas you want to be mindful of, like the brake lines and smooth shaft. But if you have a rubber buffer in place, you should be good to go. Just remember to double-check everything before you start driving around on your new lift.
    As for tips and tricks, check out hinchong.com. They've got a ton of helpful posts and forums where you can connect with other lift enthusiasts.
     
    Last edited: Feb 14, 2023

Products Discussed in

To Top