1. Welcome to 4Runners.com!

    You are currently viewing as a guest! To get full-access, you need to register for a FREE account.

    As a registered member, you’ll be able to:
    • Participate in all 4Runner discussion topics
    • Transfer over your build thread from a different forum to this one
    • Communicate privately with other 4Runner owners from around the world
    • Post your own photos in our Members Gallery
    • Access all special features of the site

Dear Diary

Discussion in '5th Gen 4Runners (2010-2024)' started by -dustin, Nov 12, 2015.

  1. Nov 12, 2015 at 7:10 AM
    #1
    -dustin

    -dustin [OP] New Member

    Joined:
    Oct 25, 2015
    Member:
    #1104
    Messages:
    63
    Gender:
    Male
    11/12/2015

    Dear Diary,

    Today I'm catching up with stuff I posted on T4R.org...

    Day 1:

    [​IMG]

    Won't be doing much outside of small, or cosmetic till I get some miles under it and know that it's going to be sticking around. First things first...I don't like red + silver or red + chrome. Not very visually appealing to me. Plastic-y silver in general just looks cheap. So....that's a cheap, easy, quick fix.

    Started with derping the the front valance and emblem:

    [​IMG]

    While that was going on and curing, went ahead and swapped for some more appropriate shoes:

    [​IMG]

    And also starting to mock up a bike rack for the inside...:

    [[​IMG]

    Front valance turned out alright:

    [​IMG]

    Now the rear. I've never removed a bumper before...or any part of a vehicle other than a radio.

    [​IMG]
     
    T-Rex266, Bob, mbbmnlb and 1 other person like this.
  2. Nov 12, 2015 at 6:13 PM
    #2
    ramonortiz55

    ramonortiz55 New Member

    Joined:
    May 3, 2015
    Member:
    #590
    Messages:
    1,665
    Gender:
    Male
    First Name:
    Ramon
    Vehicle:
    2001 4runner limited silver millenium
    What are you doing in here :spy:
     
  3. Nov 12, 2015 at 6:25 PM
    #3
    -dustin

    -dustin [OP] New Member

    Joined:
    Oct 25, 2015
    Member:
    #1104
    Messages:
    63
    Gender:
    Male
    I like this forum more than T4R.org. Especially the software. T4R.org seems to have a high rate of "assholes".

    Rear valance done!

    And somehow managed to shear a bolt. Zip tie to the rescue.

    image.jpg
    image.jpg
     
    T-Rex266 likes this.
  4. Nov 12, 2015 at 6:49 PM
    #4
    ramonortiz55

    ramonortiz55 New Member

    Joined:
    May 3, 2015
    Member:
    #590
    Messages:
    1,665
    Gender:
    Male
    First Name:
    Ramon
    Vehicle:
    2001 4runner limited silver millenium
    I like the software and layout here. T4R.org is slow and outdated
     
    drunner likes this.
  5. Nov 13, 2015 at 5:03 AM
    #5
    mbbmnlb

    mbbmnlb New Member

    Joined:
    Sep 27, 2015
    Member:
    #1008
    Messages:
    41
    Gender:
    Male
    First Name:
    Brigham
    Northern Virginia
    Vehicle:
    2016 Trail Premium Stock
    Dustin,

    Sorry, total newb here. "Derping"...I take it you painted the emblem and valances. May I ask what you used and if "derping" refers to materials or the changes you made?

    Thanks for being patient,

    B
     
  6. Nov 13, 2015 at 6:57 AM
    #6
    -dustin

    -dustin [OP] New Member

    Joined:
    Oct 25, 2015
    Member:
    #1104
    Messages:
    63
    Gender:
    Male
    Good ol' Plasti Dip. $6 at Lowe's...or Amazon, Home Depot, etc. Doesn't require prep, is easily removed (that's what I hear, at least), and has a nice matte finish that I prefer.
     
    mbbmnlb[QUOTED] likes this.
  7. Nov 14, 2015 at 3:29 PM
    #7
    -dustin

    -dustin [OP] New Member

    Joined:
    Oct 25, 2015
    Member:
    #1104
    Messages:
    63
    Gender:
    Male
    Last of the dippin. Roof rack and rear logos.

    Strangely enough, the rack rails are left and right specific, with the only noticeable difference being the location of the bolts, which differs by no more than a few millimeters.

    image.jpg
     
  8. Nov 14, 2015 at 7:53 PM
    #8
    -dustin

    -dustin [OP] New Member

    Joined:
    Oct 25, 2015
    Member:
    #1104
    Messages:
    63
    Gender:
    Male
    Not stoked with the results, but good enough for now. The racks look good, however. Pic tomorrow.

    image.jpg
     
  9. Nov 15, 2015 at 2:32 AM
    #9
    mbbmnlb

    mbbmnlb New Member

    Joined:
    Sep 27, 2015
    Member:
    #1008
    Messages:
    41
    Gender:
    Male
    First Name:
    Brigham
    Northern Virginia
    Vehicle:
    2016 Trail Premium Stock
    Looks good to me. Would be interested to learn how you take off things like the logo and letters. I'm sure it's not hard, but I don't believe I would have a clue how to do it without scratching the hell out of the finish. I like what you're doing here.
     
  10. Nov 15, 2015 at 3:06 AM
    #10
    samsung

    samsung New Member

    Joined:
    Oct 17, 2015
    Member:
    #1071
    Messages:
    109
    Gender:
    Male
    First Name:
    George
    Vehicle:
    2015 4Runner Trail Edition
    you don't take off the letters and logo. just mask off the letters and logo and plasti dip over them. search plasti dip and youtube.
     
  11. Nov 15, 2015 at 12:26 PM
    #11
    -dustin

    -dustin [OP] New Member

    Joined:
    Oct 25, 2015
    Member:
    #1104
    Messages:
    63
    Gender:
    Male
    Done with the Plastidip for a while.

    Next purchase will be either 5100s or a roof rack.

    image.jpg
     
  12. Nov 17, 2015 at 11:50 AM
    #12
    mbbmnlb

    mbbmnlb New Member

    Joined:
    Sep 27, 2015
    Member:
    #1008
    Messages:
    41
    Gender:
    Male
    First Name:
    Brigham
    Northern Virginia
    Vehicle:
    2016 Trail Premium Stock
    So in the photo above, where everything is laid out on the cardboard, what are those letters and logo? Not sure what you mean "just mask off"...will do the youtube thing. Thanks for being patient with me.
     
  13. Nov 17, 2015 at 2:00 PM
    #13
    -dustin

    -dustin [OP] New Member

    Joined:
    Oct 25, 2015
    Member:
    #1104
    Messages:
    63
    Gender:
    Male
    i pulled everything off. next time I'm just gonna mask it. I hate the process of cutting tape and trying to reapply letters square. They might be square, but I'll forever now swear that one is off.
     
  14. Nov 17, 2015 at 7:59 PM
    #14
    -dustin

    -dustin [OP] New Member

    Joined:
    Oct 25, 2015
    Member:
    #1104
    Messages:
    63
    Gender:
    Male
    [​IMG]

    See those 2 smudges. Been bugging the crap out of me since day one. I know I said I was done dipping, but two chickens in a bucket...

    End result - I can now look down and not cringe. Finish kinda matches the Softex.

    image.jpg
    image.jpg
     
  15. Jan 4, 2016 at 7:46 AM
    #15
    -dustin

    -dustin [OP] New Member

    Joined:
    Oct 25, 2015
    Member:
    #1104
    Messages:
    63
    Gender:
    Male
    I'm behind...

    Finished up the homemade/ rigged up interior rack and the wife's bike fits pretty well.

    [​IMG]

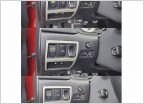
    Moved USB port from center console over to the glovebox this weekend. Now I'm wanting to figure out how to run a longer iPod cable from that port up to the center console. Figure it's easy enough to route one, but hiding it and keep it clean might be a little more difficult. In my head, the Lightning connector will pop out by the rear window switch. And thinking about it now, I could probably drill the console right there, and use a grommet for a Di2 wire.

    [​IMG]

    [​IMG]

    [​IMG]

    [​IMG]
     
  16. Jan 4, 2016 at 10:44 AM
    #16
    -dustin

    -dustin [OP] New Member

    Joined:
    Oct 25, 2015
    Member:
    #1104
    Messages:
    63
    Gender:
    Male
    new wheels mounted up

    [​IMG]
     
    runxchubchubxrun likes this.
  17. Jan 21, 2016 at 6:22 AM
    #17
    -dustin

    -dustin [OP] New Member

    Joined:
    Oct 25, 2015
    Member:
    #1104
    Messages:
    63
    Gender:
    Male
    Installed the Eibach 620lb springs as well as 5100s up front set at 0. Wanted to try and get rid of the soft, boat-like handling on highways. Pretty happy with the results so far.

    Looks nose up with my bike on there, so I think I'll likely add 2 of the 10mm OME trim spacers. The numbers are pretty close to level at the wheel well with my bike rack on, but no bike. Measured using a plumb bob and straightedge:

    FD - 36.375 (3/8)
    FP - 36.75 (6/8)
    RD - 36.5 (4/8)
    RP - 36.875 (7/8)

    Removing the rack brings up the rear 1/8 to 3/16".

    So 55lbs over the back is good for about 3mm of sag.

    Really wish there was a 1" coil for the rear that had a slightly higher spring rate.

    Before:

    [​IMG]

    After:

    [​IMG]
     
  18. Jan 27, 2016 at 7:14 AM
    #18
    -dustin

    -dustin [OP] New Member

    Joined:
    Oct 25, 2015
    Member:
    #1104
    Messages:
    63
    Gender:
    Male
    Well, it's not an electricians wet dream, but after moving the USB port from the center console to the glovebox, I still didn't have a setup like I wanted. So, a 6' Lightning cable, a drill, a few zip ties, and a few grommets later, I've got an iPhone hook up that charges and allows access to the music on my phone. No more relying on Bluetooth. Best of all, it tucks away nicely.

    [​IMG]
     
  19. Apr 14, 2016 at 1:44 PM
    #19
    -dustin

    -dustin [OP] New Member

    Joined:
    Oct 25, 2015
    Member:
    #1104
    Messages:
    63
    Gender:
    Male
    I'm slacking!

    Sealed the deal on the BajaRack and got it installed. Need to do some tweaking with centering, and getting some sort of bumper under the front so it doesn't kill the paint. Other than that, though...all is dandy.

    [​IMG]

    Canvasback from a fellow on T4R.org. This thing is a little nicer than I was expecting. The fit is pretty precise. I approve.

    [​IMG]
     

Products Discussed in

To Top