1. Welcome to 4Runners.com!

    You are currently viewing as a guest! To get full-access, you need to register for a FREE account.

    As a registered member, you’ll be able to:
    • Participate in all 4Runner discussion topics
    • Transfer over your build thread from a different forum to this one
    • Communicate privately with other 4Runner owners from around the world
    • Post your own photos in our Members Gallery
    • Access all special features of the site

Professional vs at home lift install

Discussion in '5th Gen 4Runners (2010-2024)' started by typark, Feb 12, 2020.

  1. Feb 12, 2020 at 7:16 AM
    #1
    typark

    typark [OP] New Member

    Joined:
    Aug 27, 2019
    Member:
    #11039
    Messages:
    26
    Gender:
    Male
    Vehicle:
    2016 grey 4Runner SR5 4WD
    So my 3" Dobinson lift will arrive within a week but Ive been on the fence about installing it myself since I bought it on Black Friday. It's nothing fancy, just replacing the front coilovers, rear shocks/springs, UCAs, and a diff drop. That being said, I've watched about 3 thorough lift installs on youtube and I looks like I could do it myself with a friend. Ive been quoted around $600-1000 for the lift install but it would be nice to save money.

    If any of y'all have any experience lifting yourselves, is there anything I should be wary of? Any delicate areas I should use extra care when handling? Thankfully I don't have kdss but I did see some videos mess with the brake line but none noted any parts I should be extra careful with. Also on that note, any helpful tips or tricks would be greatly appreciated. Thanks for help!
     
    Toffees likes this.
  2. Feb 12, 2020 at 7:29 AM
    #2
    Charlievee

    Charlievee New Member

    Joined:
    Dec 20, 2018
    Member:
    #8149
    Messages:
    1,356
    Just make sure you disconnect the abs wires before pulling the front struts. May want to take a bit more time and lube up those alignment cams while your there and need alignment anyway.
     
    typark[OP] likes this.
  3. Feb 12, 2020 at 7:36 AM
    #3
    Charlievee

    Charlievee New Member

    Joined:
    Dec 20, 2018
    Member:
    #8149
    Messages:
    1,356
    *** Basic concept, do work at own risk and skill level. I am not a certified tech, nor did I stay at a Holiday inn express last night***

    Get the truck up on stands
    Pull tire
    Loosen the ABS wire from UCA link (to gain extra slack)
    Remove sway bar link
    Loosen upper shock nut (center one)
    Place Jack stand under wheel hub and Jack under lower ball joint
    Remove the two bolts holding hub assembly to the lower control arm
    Mark alignment sleeves and loosen the control arm bolts.
    Lower jack/ lower control arm.
    Once the spring is fully decompressed, remove lower shock bolt
    Remove strut
    Install new strut, torque lower strut mount
    Lift the LCA back into position using the Jack to compress the spring
    Torque the two lower ball joint bolts and LCA bolts (making sure alignment marks are in place)
    Torque top shock nut
    Install sway bar link and ABS line
    Remove Jack and stand from under the hub/ lower ball joint
    Mount wheel
    Second side is the same.
    Put rear up on stands and remove wheels (I kept the Jack under the diff)
    Remove sway bar links
    Remove upper shock nut
    Place Jack under other side shock and lift until coil spring is free
    Remove lower shock mount and spring
    Install new spring
    Install new shock, torque lower mount to spec
    Lower jack ( hope spring staid in place)
    Tighten top shock nut
    Repeat on other side
    Install sway bar links
    Mount wheels.

    Get truck alignment

    I used 3 stands and two jacks

    Plenty of tube vids for reference
     
    Last edited: Feb 12, 2020
    Toy4X4, brownersd, mve and 3 others like this.
  4. Feb 12, 2020 at 8:36 AM
    #4
    SnowroxKT

    SnowroxKT New Member

    Joined:
    Dec 11, 2017
    Member:
    #5149
    Messages:
    143
    Gender:
    Male
    First Name:
    Kyle
    Alaska
    Vehicle:
    2018 T4R TRD Offroad
    2018 T4R Offroad SAS 1995 Tacoma
    I always offer to help install lift kits in my garage. It typically is pretty easy on the newer rigs with less rust. Once you get over 20 years old I plan on an extra day or so to deal with stubborn bolts, seized parts or the like. Make sure you have good jack stands and use them properly, and be careful working around the springs and coil overs. Other than that, go for it!
     
    Toy4X4, typark[OP] and SlvrSlug like this.
  5. Feb 12, 2020 at 8:44 AM
    #5
    snowruner

    snowruner New Member

    Joined:
    Oct 24, 2019
    Member:
    #11770
    Messages:
    26
    Gender:
    Male
    First Name:
    AMEET
    Vehicle:
    2016 4RUNNER TRAIL PREMIUM
    TOYTEC ALUMA SERIES SCS SR8 BFG 285 70 17 KO2 T9 HEAD UNIT ROUGH COUNTRY LIGHT BAR
    do it yourself. I did mine with two buddies you'll need spring compressors for the rear. first corner took me few hours, the rest of the truck was done in 3 hours. don't waste your money. you'll need simple hand tools. if you don't have kdss it will be even easier
     
    typark[OP] likes this.
  6. Feb 12, 2020 at 9:05 AM
    #6
    typark

    typark [OP] New Member

    Joined:
    Aug 27, 2019
    Member:
    #11039
    Messages:
    26
    Gender:
    Male
    Vehicle:
    2016 grey 4Runner SR5 4WD
    Thanks for that info, and I got some never seez and some grease for preventative measures.
    Since you typed all that out, now I don't need to hit rewind a million times on a youtube video while I install my lift. I have my own set of instructions to read courtesy of you ;). Thanks for that, I think I already see a couple of things the video might have missed
     
    jgcaps likes this.
  7. Feb 12, 2020 at 9:09 AM
    #7
    typark

    typark [OP] New Member

    Joined:
    Aug 27, 2019
    Member:
    #11039
    Messages:
    26
    Gender:
    Male
    Vehicle:
    2016 grey 4Runner SR5 4WD
    If only you weren't in Alaska, thats quite a drive away from SC haha. I will make sure to buy quality jack stands, can't be having the car fall on top of me

    The spring compressors do worry me because I've heard horror stories. Is any particular reason why the first corner took you so long? Was it just because of unfamiliarity? And then once you did one the rest was easy?
     
    SnowroxKT[QUOTED] likes this.
  8. Feb 12, 2020 at 9:13 AM
    #8
    Charlievee

    Charlievee New Member

    Joined:
    Dec 20, 2018
    Member:
    #8149
    Messages:
    1,356
    No need to deal with a spring compressor.

    Look on tubeyou for "toyota strut removal with out spring compressor " theres a two part taco vid on how to do it, step by step and its the same for the runner.

    I found it less sketchy and safer then using the compressor.
     
    Last edited: Feb 12, 2020
    Toy4X4 and typark[OP] like this.
  9. Feb 12, 2020 at 9:17 AM
    #9
    Charlievee

    Charlievee New Member

    Joined:
    Dec 20, 2018
    Member:
    #8149
    Messages:
    1,356
    Make sure you get the torque specs.
     
    Toy4X4 and typark[OP] like this.
  10. Feb 12, 2020 at 9:41 AM
    #10
    typark

    typark [OP] New Member

    Joined:
    Aug 27, 2019
    Member:
    #11039
    Messages:
    26
    Gender:
    Male
    Vehicle:
    2016 grey 4Runner SR5 4WD
    Thanks for that, I will definitely look into that!
     
  11. Feb 12, 2020 at 9:42 AM
    #11
    snowruner

    snowruner New Member

    Joined:
    Oct 24, 2019
    Member:
    #11770
    Messages:
    26
    Gender:
    Male
    First Name:
    AMEET
    Vehicle:
    2016 4RUNNER TRAIL PREMIUM
    TOYTEC ALUMA SERIES SCS SR8 BFG 285 70 17 KO2 T9 HEAD UNIT ROUGH COUNTRY LIGHT BAR
    watch the video from wonderlost overland the guys did a step by step video. that's what I used when I did mine and it was spot on.
     
    jgcaps and typark[OP] like this.
  12. Feb 12, 2020 at 10:52 AM
    #12
    Agent3056

    Agent3056 New Member

    Joined:
    Oct 26, 2018
    Member:
    #7587
    Messages:
    14
    Gender:
    Male
    Vehicle:
    2019 TRD ORP Nautical Blue
    Stock for now
    Should be a piece of cake without having to mess KDSS. Even with KDSS it's not rocket science. I did my KDSS rig with my daughter in a day. I did have new top hats installed on my 6112s prior to taking off the stockers. Most of my wrenching experience has been on dirt bikes. I'm not much of a mechanic. Save the money and do it yourself. Once you do it you'll wonder why they charge so much.
     
    typark[OP] likes this.
  13. Feb 12, 2020 at 5:12 PM
    #13
    xyzzy

    xyzzy New Member

    Joined:
    Apr 22, 2019
    Member:
    #9619
    Messages:
    193
    At the lake
    Vehicle:
    2019 Barc. Red TRD ORP
    I'd agree with the do it yourself sentiment.

    Way back, 20-30 years ago, I was apprehensive about doing any serious work on my vehicles because I just didn't know much and we didn't have YouTube back then. I just bit the bullet and gave myself an open ended time frame if I ran into issues that needed special tools, or what not.

    I ended up doing suspension lifts, clutch replacements, mid-80's multi-selonoid carburetor debugging and fixing, axle rebuilding, water pump replacements, etc... all without knowing what to do before attempting the repair/replacement.

    If you have an open ended or flexible time window to work with, anything is possible regardless of what you encounter - it only becomes a "real project" if you have to make 3 or more trips to get additional parts or tools to complete the job.
     
    typark[OP] likes this.
  14. Feb 12, 2020 at 6:35 PM
    #14
    fajitas21

    fajitas21 New Member

    Joined:
    Aug 2, 2016
    Member:
    #2395
    Messages:
    1,344
    Gender:
    Male
    First Name:
    Lee
    Collierville, TN
    Vehicle:
    2020 ORP
    Custom scratches
    So I do them myself, because if you're going to really go out there...it's in your best interest to learn. Use a ratchet, skip the impact unless you need to. Torque to spec.

    Then, when you need a trail repair, you know how to do it! If you pay a shop, I guess you should invite them with you on your trips?

    I joke, but I can think of not one time we went wheeling on any trip and didn't need to cinch something, check something, tighten something, put a tire back on a bead, etc.
     
    Tuco S. and typark[OP] like this.
  15. Feb 12, 2020 at 7:27 PM
    #15
    White runner

    White runner New Member

    Joined:
    Mar 29, 2019
    Member:
    #9335
    Messages:
    61
    Gender:
    Male
    First Name:
    Andy
    South Dakota
    Vehicle:
    2017 SR5 Premium
    I just installed my Dobinsons 2.5” front and 1.75” rear lift this weekend. I was quoted 9 hours to have a shop install it. Did it with my stepsons help. I would say we were novice level and it took us about 5 hours. Wasn’t to bad of a job.
     
    Toy4X4 and typark[OP] like this.
  16. Feb 13, 2020 at 5:39 AM
    #16
    typark

    typark [OP] New Member

    Joined:
    Aug 27, 2019
    Member:
    #11039
    Messages:
    26
    Gender:
    Male
    Vehicle:
    2016 grey 4Runner SR5 4WD
    Thats definitely one ill be checking on often, they did such a great job explaining

    I was nervous about doing it at first but after seeing all the overwhelming support for the DIY, definitely feel more confident doing it with a buddy now. I definitely want to tackle some trails after I lift it so I would be very beneficial for me to actually know little about my rig before I even start with the trails.
     
  17. Feb 13, 2020 at 5:42 AM
    #17
    typark

    typark [OP] New Member

    Joined:
    Aug 27, 2019
    Member:
    #11039
    Messages:
    26
    Gender:
    Male
    Vehicle:
    2016 grey 4Runner SR5 4WD

    seeing a common theme from the forum members to torque to spec so I will definitely double check all my nuts and bolts
     
    fajitas21[QUOTED] likes this.
  18. Feb 13, 2020 at 6:31 AM
    #18
    fajitas21

    fajitas21 New Member

    Joined:
    Aug 2, 2016
    Member:
    #2395
    Messages:
    1,344
    Gender:
    Male
    First Name:
    Lee
    Collierville, TN
    Vehicle:
    2020 ORP
    Custom scratches
    I only say that because a "professional" shop will likely just beat on a nut with a impact gun until it stops. For you it's done professionally in your mind, but it's likely not. Want to ensure it's torqued to spec? Do it yourself :)
     
  19. Feb 13, 2020 at 6:53 AM
    #19
    Charlievee

    Charlievee New Member

    Joined:
    Dec 20, 2018
    Member:
    #8149
    Messages:
    1,356
    mve likes this.
  20. Feb 13, 2020 at 8:09 AM
    #20
    LimitedTrd

    LimitedTrd New Member

    Joined:
    Aug 14, 2018
    Member:
    #6750
    Messages:
    56
    Gender:
    Male
    I would rather pay someone who knows what he is doing to do the job,preferably an off road shop that specializes in Toyota.
    The 4Runner is an expensive asset and I want it to last,so I will be extra cautious about changing anything. I am also paying for a peace of mind but that's just me.
     
    Toyofan87 likes this.
  21. Feb 13, 2020 at 8:15 AM
    #21
    Charlievee

    Charlievee New Member

    Joined:
    Dec 20, 2018
    Member:
    #8149
    Messages:
    1,356
    Peace of mind is exactly why i did it myself. I know what was done and what was not. I know the UCA is torqued to spec, the cam bolts are lubricated, everything has lock tight and or anti seize. Nothing was broken or stripped. Understand how things work and get a good look at anything else that needs attention. No one is going to take better care of your rig then the person that relies on it most.
     
    JT4RN, Doglover2003, mve and 5 others like this.
  22. Feb 13, 2020 at 8:19 AM
    #22
    LimitedTrd

    LimitedTrd New Member

    Joined:
    Aug 14, 2018
    Member:
    #6750
    Messages:
    56
    Gender:
    Male
    "No one is going to take bettet care of your rig then the petson that relies on it most" if you know what you are doing and are mechanically inclined.
     
    typark[OP] likes this.
  23. Feb 13, 2020 at 8:21 AM
    #23
    Charlievee

    Charlievee New Member

    Joined:
    Dec 20, 2018
    Member:
    #8149
    Messages:
    1,356
    If your going off road into the wilds, i hope you are.
     
    Doglover2003 and typark[OP] like this.
  24. Feb 13, 2020 at 12:02 PM
    #24
    snowruner

    snowruner New Member

    Joined:
    Oct 24, 2019
    Member:
    #11770
    Messages:
    26
    Gender:
    Male
    First Name:
    AMEET
    Vehicle:
    2016 4RUNNER TRAIL PREMIUM
    TOYTEC ALUMA SERIES SCS SR8 BFG 285 70 17 KO2 T9 HEAD UNIT ROUGH COUNTRY LIGHT BAR
    here's one more thing about doing it yourself. when something fails or breaks you'll know how to fix it or replace and wont need to rely on a shop to fix it. you'll be the guy on the trials helping other out guys. not saying it will break because you did it. just in case something does happen you'll have the now how cause you already done it once. plus the accomplishment of doing something on your own is the best feeling ever!
     
    taco_runner and typark[OP] like this.
  25. Feb 13, 2020 at 12:02 PM
    #25
    snowruner

    snowruner New Member

    Joined:
    Oct 24, 2019
    Member:
    #11770
    Messages:
    26
    Gender:
    Male
    First Name:
    AMEET
    Vehicle:
    2016 4RUNNER TRAIL PREMIUM
    TOYTEC ALUMA SERIES SCS SR8 BFG 285 70 17 KO2 T9 HEAD UNIT ROUGH COUNTRY LIGHT BAR
    do you have kdss?
     
  26. Feb 13, 2020 at 9:47 PM
    #26
    Hans Moleman

    Hans Moleman New Member

    Joined:
    Apr 9, 2019
    Member:
    #9481
    Messages:
    134
    SF Bay
    Vehicle:
    2018 SR5P
    Removal (2015 4Runner From 08/2014)


    NOTE
    Be sure to read the precaution before performing this procedure 2015 MY 4Runner [08/2014 - ]; SUSPENSION CONTROL: SUSPENSION CONTROL SYSTEM (w/ REAS): PRECAUTION.


    NOTE
    HINT:

    • Use the same procedure for the RH and LH sides.

    • The procedure listed below is for the LH side.


    1. REMOVE FRONT WHEEL

    2. REMOVE LOWER FRONT BUMPER COVER 2015 MY 4Runner [08/2014 - ]; 1GR-FE ENGINE MECHANICAL: ENGINE ASSEMBLY: REMOVAL+

    3. REMOVE NO. 1 ENGINE UNDER COVER SUB-ASSEMBLY 2015 MY 4Runner [08/2014 - ]; 1GR-FE ENGINE MECHANICAL: ENGINE ASSEMBLY: REMOVAL+

    4. REMOVE FRONT SUSPENSION MEMBER BRACE SUB-ASSEMBLY 2015 MY 4Runner [08/2014 - ]; FRONT SUSPENSION: FRONT STABILIZER BAR (w/ KDSS): REMOVAL+

    5. REMOVE FRONT STABILIZER END BRACKET (w/ KDSS) 2015 MY 4Runner [08/2014 - ]; FRONT SUSPENSION: FRONT STABILIZER BAR (w/ KDSS): REMOVAL+

    6. REMOVE FRONT STABILIZER BAR (w/ KDSS) 2015 MY 4Runner [08/2014 - ]; FRONT SUSPENSION: FRONT STABILIZER BAR (w/ KDSS): REMOVAL+

    7. DISCONNECT FRONT STABILIZER LINK ASSEMBLY LH (w/o KDSS)

    • Remove the nut and disconnect the stabilizer link from the steering knuckle.

      [​IMG]


      2015 MY 4Runner [08/2014 - ]; FRONT SUSPENSION: FRONT STABILIZER BAR (w/o KDSS): REMOVAL+

      10. REMOVE FRONT NO. 1 STABILIZER BRACKET RH (w/o KDSS) 2015 MY 4Runner [08/2014 - ]; FRONT SUSPENSION: FRONT STABILIZER BAR (w/o KDSS): REMOVAL+

      11. REMOVE FRONT STABILIZER BAR (w/o KDSS)

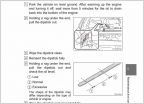
      12. REMOVE FRONT SHOCK ABSORBER WITH COIL SPRING (w/ REAS)


      NOTE
      Perform this procedure with the vehicle jacked up so that all the shock absorbers are extended.

      • As shown in the illustration, loosen the nut and disconnect the tube.

        Text in Illustration


        *a


        Hold


        *b


        Turn


        [​IMG]


        Click to Enlarge


        NOTE
        Never loosen the absorber hoses or the flare nuts at the joint parts.


      • Remove the bolt and bracket.

        [​IMG]


        Click to Enlarge
      • Remove the bolt, nut and washer.

        [​IMG]


        Click to Enlarge
      • Remove the 3 nuts on the top of the front shock absorber with coil spring.

        [​IMG]


        Click to Enlarge
      13. REMOVE FRONT SHOCK ABSORBER WITH COIL SPRING (w/o REAS)
      • Remove the bolt, nut and washer.

        [​IMG]


        Click to Enlarge
      • Remove the 3 nuts on the top of the front shock absorber with coil spring.

        [​IMG]


        Click to Enlarge
      • Remove the front shock absorber with coil spring.
     
    typark[OP] likes this.
  27. Feb 14, 2020 at 4:51 AM
    #27
    Charlievee

    Charlievee New Member

    Joined:
    Dec 20, 2018
    Member:
    #8149
    Messages:
    1,356
    Keep in mind the above information shows removing the spring and strut as one assembly. This will require use of a strut compressor if the new ones are not preassembled.
     
    typark[OP] likes this.
  28. Feb 28, 2020 at 5:45 PM
    #28
    Georgia Native

    Georgia Native New Member

    Joined:
    Aug 12, 2019
    Member:
    #10874
    Messages:
    77
    Gender:
    Male
    Vehicle:
    2019 OR Prem and 2017 Tacoma SR5 4x4
    You can always do it yourself and pay a mechanic 100 bucks to check your work.
     
  29. Mar 29, 2021 at 3:11 PM
    #29
    PJSnow

    PJSnow New Member

    Joined:
    Dec 11, 2019
    Member:
    #12291
    Messages:
    164
    First Name:
    PJ
    New York
    Vehicle:
    2018 Cavalry Blue TRD Pro
    This is the best place I can think of to ask my question (without starting a new thread) because it gave me the confidence to try a lift install on my own.
    Everything went well until I had to disassemble the strut. The spring compressors I borrowed have a U-bolts that clamp the coil (see example here: https://www.amazon.com/Powerbuilt-647089-Strut-Spring-Compressor/dp/B0015UWXIQ). Unfortunately, the U-bolt does not fit between the coil and the strut/"shock" body, thus, I was forced to bring the assembly to a local shop for disassembly. That is where it all turned wrong. If you want a job done right, do it yourself!!! The shop managed to shear the top "nub" (see photo below) and then wanted to clamp the polished shaft portion of the strut to remove the nut. They blamed the rust and an old shock... but it is only a 3 year old truck. At that point I said NO and took it back. I reinstalled the strut onto the 4Runner and it works just fine but I am still stuck without a lift. The nub is quite thin and I expect someone has gone through this before. Does anyone have any advice? I thought about welding a new nub but I am a bit concerned about impacting the threads. I also thought about scrapping the project for a future date when these shocks wear out but I already purchased new tires (sitting in the basement). A quick internet search seems to indicate an impact gun will remove the nut but I am concerned about re-assembling the strut after.
    Does anyone have any ideas or advice?


    63855396981__A457616E-CD33-4ED1-87CA-A5F8215F1B8F.jpg
     
  30. Mar 29, 2021 at 9:20 PM
    #30
    Charlievee

    Charlievee New Member

    Joined:
    Dec 20, 2018
    Member:
    #8149
    Messages:
    1,356
    What exactly are you trying to do? Replace the springs? Trying to save the shock?
     

Products Discussed in

To Top